

Mouse acceleration is the reason your cursor sometimes flies across the screen when you move fast and crawls when you move slow. The same physical distance on your desk maps to a different on-screen distance depending on speed, and that breaks muscle memory. If you’ve ever missed a flick shot in a shooter or overshot a tiny UI button, acceleration is often the hidden culprit. Turning it off gives you a 1:1 relationship: move the mouse two inches, the cursor moves the same amount every single time. That consistency is what pros and precision workers want, and it’s a five-minute fix on any modern PC.
This walkthrough covers Windows 10 and 11, macOS, and the in-game or driver-level settings that trip people up after they think they’re done. The setting is on by default almost everywhere, so most people have never turned it off. Whether your goal is cleaner aim on a gaming mouse or steadier cursor control for design work on a mouse built for work, the steps are the same. Let’s kill the acceleration and lock in predictable movement.
What you’ll need
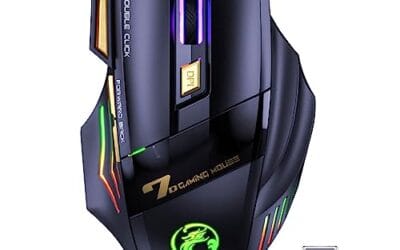
Not much. You need admin access to your PC, about five minutes, and the mouse you actually plan to use daily. That last part matters more than it sounds. Acceleration settings are system-wide, but the DPI and polling behavior of your specific mouse shape how the change feels afterward. A sensor with adjustable DPI lets you dial in raw sensitivity once acceleration is gone, so you’re not stuck compensating with a jittery Windows slider. If you’re shopping for a fresh pointer to pair with a clean, acceleration-free setup, a budget option like the VEGCOO C26 gives you room to experiment with DPI steps without spending much.

Pros
- Silent primary switches noticeably reduce click noise for shared spaces and streaming setups.
- 4800 DPI adjustable range is generous for a mouse at this budget tier.
- Rechargeable 400mAh cell with usable wired mode during charging avoids downtime.
- Broad compatibility across Windows, macOS, Linux, and Chromebook via included USB receiver.
Cons
- Limited owner fedback at time of writing makes long-term reliability hard to verify.
- Sensor model, polling rate, and weight are not specified, unusual for a gaming-labeled mouse.
- Random-cycling RGB with no software profile limits customization typical at this price tier.
The VEGCO C26 is a budget wireless gaming mouse aimed at casual players and work-from-home users who want quiet clicks without paying flagship money. Core specs include a 4800 DPI adjustable sensor, seven buttons plus a dedicated double-click key, RGB lighting, and a 400mAh rechargeable cell. Target buyer is a light gamer or office user, not a competitive FPS player.
The defining feature here is the silent switch implementation on both primary buttons, which meaningfully cuts audible click noise during late sessions or shared rooms. The 4800 DPI ceiling is workable for 1080p and 1440p tracking in slower-paced titles. Sensor model and polling rate are not specified, so expectations for esports-tier tracking should stay modest.
Trade-offs are typical at this tier. RGB cycles randomly with no listed software suite, weight is not specified, and there is no confirmed high poling rate or PTFE fet spec. Wireless latency figures are absent from source data, so competitive shooter use is a gamble. Owner feedback volume is limited at time of writing, which weakens confidence in long-term switch and battery durability.
Buy this if you want a quiet wireless mouse for browsing, office work, and casual gaming with occasional shooter sessions. Skip this if you playranked FPS titles, need a documented sensor like PixArt PMW395, or require a lightweight sub-70g shell for claw-grip flick shots.
Sensor and DPI: Source data lists a 4800 DPI adjustable ceiling with no named sensor model. Budget wireless mice in this tier typically ship with entry-level optical sensors adequate for 1080p desktop use, but not competitive-grade tracking. Confirm step increments in the manual before maping DPI to in-game sensitivity.
Buttons and layout: Seven standard buttons plus a dedicated double-click key on the upper left, useful for repeat inputs in file management, browsers, and semi-auto weapons. Silent switches on both left and right primaries are the headline mechanical feature, appropriate for shared offices, streaming mics, or households sensitive to click noise.
Wireless and battery: A 400mAh lithium cell is rated for roughly 31 days per full charge under unspecified usage. Wired pass-through operation during charging avoids downtime. Poling rate and wireless latency figures are not specified, so treat competitive FPS suitability with caution and expect standard 2.4GHz receiver behavior.
Shape and compatibility: Weight, length, and grip style (palm, claw, or fingertip) are not specified in source data, which limits fit guidance for hand sizes above roughly 19cm. Compatibility is broad, covering Windows 7 through 10, macOS, Linux, and Chromebook, with RGB that cycles automatically rather than through named software.
The VEGCOO C26 runs $16.99, carries a 4.3 rating, and offers 4800 DPI adjustable sensitivity across its steps, which is plenty of headroom for tuning raw sensitivity once the OS is out of the way. It’s a rechargeable silent wireless mouse with a thumb rest and RGB lighting, so it works as a cheap daily driver while you figure out what sensitivity feels right. Nothing fancy. It just does the one thing you need here: consistent raw input you can adjust in hardware rather than leaning on software curves.
Step 1: Open Windows mouse settings
Press the Windows key, type “mouse settings,” and hit Enter. That opens the modern Settings panel. Scroll to the bottom and click “Additional mouse settings” (Windows 10) or “Additional mouse options” under the Bluetooth & devices section (Windows 11). You want the old-school Mouse Properties control panel window that pops up, not the new Settings surface. The checkbox you’re hunting for only lives in that classic dialog. Microsoft has moved it around across builds, so if you can’t find the link, press Windows + R, type main.cpl, and hit Enter to jump straight to Mouse Properties.
Step 2: Turn off Enhance pointer precision
In the Mouse Properties window, click the “Pointer Options” tab. At the top you’ll see a checkbox labeled “Enhance pointer precision.” That friendly name is Microsoft’s marketing for mouse acceleration. Uncheck it. Below that checkbox sits a speed slider; leave it at the sixth notch from the left, which is the default 1:1 position where Windows applies no scaling multiplier. Any other notch either skips or duplicates pixels, which reintroduces inconsistency even with acceleration off. Click Apply, then OK. Move your mouse around and you’ll immediately notice the cursor tracks your hand at a steady rate no matter how fast you swing it.
Step 3: Verify the registry value (optional but worth it)
Some Windows updates and third-party utilities have been known to re-enable the checkbox silently. If you want a guarantee, check the registry. Press Windows + R, type regedit, and open HKEY_CURRENT_USER\Control Panel\Mouse. Look at three values: MouseSpeed, MouseThreshold1, and MouseThreshold2. With acceleration disabled, all three should read 0. If any show a nonzero number, double-click and set it to 0, then sign out and back in. This is the same fix long recommended in the community MarkC mouse-acceleration guide, and it’s the surest way to confirm the setting actually stuck.
Step 4: Disable it on macOS if you dual-boot
Mac users get no checkbox in System Settings, which frustrates a lot of switchers. Apple bakes acceleration into the pointer scaling and hides the off switch behind Terminal. Open Terminal and run defaults write .GlobalPreferences com.apple.mouse.scaling -1. The value -1 disables acceleration entirely. Log out and back in for it to apply. To restore the default later, run the same command with a positive value like 3. Third-party apps such as LinearMouse offer a friendlier interface if you’d rather not touch Terminal, and they let you set raw tracking per device, which helps when you swap between a trackpad and an external pointer.
Step 5: Check your mouse driver and in-game settings
Here’s where most people slip up. You disabled OS acceleration, but your mouse’s own software or a game engine can add its own layer on top. Open your manufacturer’s utility, whether that’s Logitech G Hub, Razer Synapse, or a similar suite, and look for a sensitivity or acceleration toggle. Set acceleration to off and enable raw input if the option exists. Then check each game individually. Most competitive shooters bury a “raw input” or “mouse acceleration” setting in their control menus, and enabling raw input bypasses OS-level scaling entirely. A quality sensor on a wireless gaming mouse already tracks 1:1 in hardware, so once you’ve cleared the software curves, your aim finally reflects your hand.
Troubleshooting common issues
Cleared every checkbox and the cursor still feels off? A few things commonly go wrong, and they’re all quick to sort out.
The setting keeps turning itself back on
This is almost always a driver utility or a Windows feature update reapplying the default. Confirm the registry values from Step 3 read 0, then check whether your mouse software has a “sync with Windows” option that overwrites system settings on launch. Disable that sync. If a monthly update flips the checkbox again, a small startup script that reasserts the registry values will hold the line without any manual effort.
My cursor now feels too slow
That’s expected, and it’s the fix working, not a bug. Acceleration was quietly boosting your fast movements, so removing it makes big sweeps feel heavier. Don’t crank the Windows slider off its 1:1 notch to compensate. Instead, raise the DPI in your mouse’s hardware settings. Higher DPI increases raw sensitivity cleanly, without the pixel-skipping that the OS slider causes. Give your hand a day or two to adjust; muscle memory recalibrates fast.
One game still accelerates
Older titles and some console-port games ignore raw input and apply their own curve you can’t fully disable. Look for a config file in the game’s install folder, often an .ini or .cfg, and search for a line containing “accel” or “smoothing.” Setting that value to 0 usually kills it where the menu can’t. If the game offers no such option, a mouse with an onboard profile can lock DPI at the hardware level so at least the base sensitivity stays fixed.
Wireless lag feels like acceleration
Sometimes what reads as acceleration is actually inconsistent polling from a weak wireless link or a low battery. Swap to a fresh charge or a wired connection and check it again. Cable drag can muddy the feel too, which is why a lot of players route their cord through a mouse bungee to keep tension steady and eliminate that phantom resistance. A dying battery in particular can produce erratic cursor jumps that look identical to acceleration, so rule out the power situation before you assume a software curve is still active.
Before and after: what to expect
Before, your cursor speed depended on how fast you moved. Two identical desk movements landed the cursor in two different places. After, every movement is proportional and repeatable, which is exactly what precision aiming and detailed editing demand. The change feels subtle for the first hour and then indispensable. Once your hand learns that a given physical distance always equals a fixed on-screen distance, you stop overcorrecting, and both your aim and your general cursor control tighten up noticeably. Detailed work benefits just as much as gaming. Photo editors, CAD users, and anyone dragging precise selections will find that clicks land where they intend on the first try, which cuts down on tiny corrective movements that add up over a long day.
Variations and advanced setups
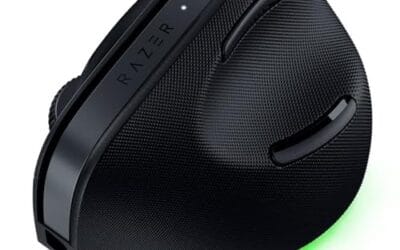
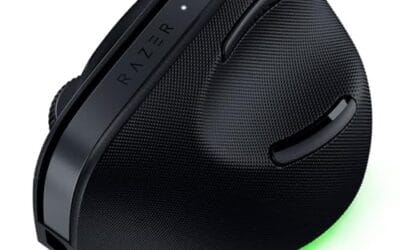
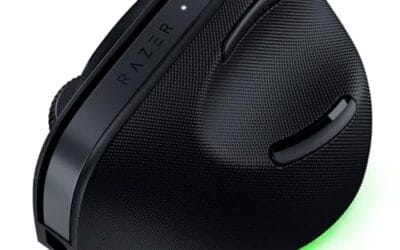
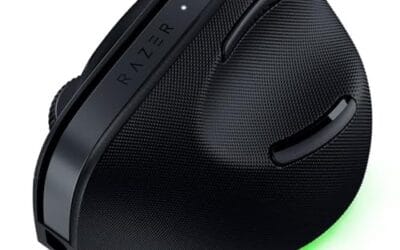
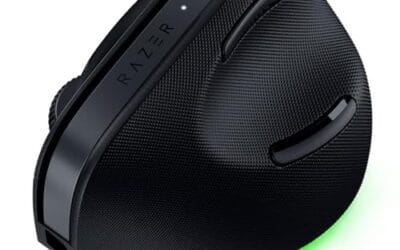
Ergonomics feed directly into how well this fix pays off. If your grip is cramped, no amount of clean tracking will steady your hand. Plenty of precision users pair a disabled-acceleration setup with an ergonomic mouse to reduce fatigue during long sessions, and vertical designs take that further by rotating the wrist into a handshake position. A vertical mouse keeps raw tracking intact while easing strain, and the newest ergonomic vertical picks combine both benefits. For multi-monitor rigs, consider a higher DPI so one clean sweep crosses all your screens without you rolling your arm off the pad.
Common questions
Does disabling mouse acceleration improve aim in games?
For most players, yes. A 1:1 relationship between hand and cursor lets your muscle memory build reliably, so repeated flicks land the same way each time. Acceleration adds a variable that changes with speed, which is hard to internalize. That said, a small number of veterans grew up on acceleration and prefer it, so the honest answer is to disable it, adjust for a week, and judge for yourself.
Is Enhance pointer precision the same as acceleration?
Yes. “Enhance pointer precision” is simply Microsoft’s name for mouse acceleration in Windows. Unchecking that box in the Pointer Options tab is what disables it. The friendly wording fools a lot of people into leaving it on because it sounds helpful, but for consistent tracking you want it off.
Will this affect my trackpad or touchpad?
On Windows, the Enhance pointer precision setting applies to pointing devices broadly, though laptop touchpads often have separate acceleration curves in their own driver panel. If your touchpad still feels accelerated after the fix, look for a precision-touchpad section in Settings or the manufacturer’s utility and adjust it there separately.
Do I need a special mouse for this to work?
No. The setting is software, so any mouse benefits from turning it off. That said, a sensor with adjustable DPI makes life easier afterward, since you tune raw sensitivity in hardware instead of fighting the OS slider. A budget adjustable mouse like the VEGCOO C26 at $16.99 works fine for this, and so does a premium high-end sensor. The mouse itself doesn’t create the acceleration; the operating system does, so the fix stays the same across every price tier.


























Write Your Review
No reviews yet. Be the first to share your experience!