

A dirty optical sensor is the quiet reason your cursor stutters, skips across the screen, or freezes for a half-second mid-swipe. If you’ve been fighting jittery tracking and blaming your mousepad or your drivers, the real culprit is often a speck of dust, a strand of hair, or a smear of skin oil sitting right over the tiny lens on the underside of your mouse. The good news is that cleaning a mouse sensor takes about ten minutes, costs almost nothing, and doesn’t require you to open the shell or void a warranty. This walkthrough covers the exact order I’d follow on any modern optical or laser mouse, from a budget office clicker to a high-end model you might have picked from our best gaming mouse or best wireless gaming mouse guides.
Sensor gunk builds up faster than most people expect. Every time your hand sweats, every time you snack at your desk, tiny residues migrate down to the bottom shell and collect around the lens opening. Owner reports across enthusiast forums point to the same pattern: tracking problems that “come and go” almost always trace back to a partially blocked sensor rather than a dead one. So before you shop for a replacement, clean the one you own. It’s the cheapest fix in the whole peripheral world.
What you’ll need
Gather a short list of supplies before you start, because stopping halfway to hunt for a cotton swab is how dust settles back onto a clean lens. You’ll want 99% isopropyl alcohol (the 70% bottle works but leaves more moisture behind), a few dry cotton swabs, a clean microfiber cloth, and a can of compressed air or a small hand blower. A wooden toothpick or a plastic dental pick helps for lifting debris out of the sensor recess without scratching anything. That’s the entire kit. Don’t reach for household glass cleaner, paper towels, or your shirt sleeve, since ammonia-based sprays can haze the lens coating and paper fibers shed right back into the opening.
If your mouse is wireless, have a fresh battery or your charging cable nearby too. You’ll want to confirm tracking after the cleaning, and a dying battery can mimic the exact stutter you’re trying to eliminate. Good lighting matters more than people think. A desk lamp angled across the underside makes the lens dust visible in a way that overhead room light never will.
Step 1: Power down and disconnect the mouse
Always kill power first. For a wired mouse, unplug the USB cable from the PC. For a wireless model, flip the power switch on the bottom to off, and pull the receiver dongle if it’s the 2.4GHz type. This does two things. It stops the sensor LED from firing into your eyes while you work up close, and it prevents the mouse from registering a chaotic storm of phantom movements while you wipe the lens. Laser sensors in particular emit invisible light, so switching off is a small safety habit worth keeping.
Flip the mouse over and rest it on the microfiber cloth, sensor side up. Give yourself a stable surface. A wobbling mouse under a toothpick is how people scratch a lens they were trying to save. If your mouse has a removable weight tray or a magnetic bottom cover, leave it in place for now, since you don’t need to open anything to clean an external sensor lens. Opening the shell is a separate, riskier job that this walkthrough deliberately skips.
Step 2: Inspect the sensor and locate the debris
Look at the small round or oval window on the underside, usually recessed a millimeter or two below the shell. Under the lamp you’ll spot exactly what’s wrong: a hair looped across the opening, a ball of lint packed into the recess, or a cloudy film of dried oil across the lens itself. Note which problem you have, because each one calls for a slightly different touch. Loose lint blows right out. A greasy film needs alcohol. A hair wedged under the lens edge needs a gentle lift.
While you’re down there, check the PTFE feet, the little white or grey skates at the corners. Grime packed into their edges raises the mouse at an angle and throws off the sensor’s read height, which produces the same skipping you’d blame on the lens. We’ll clean those in the final step. It also helps to note which sensor type your mouse uses, optical or laser, since laser units sit slightly deeper and tend to trap more lint in the recess. The cleaning method stays the same for both, but a laser recess usually needs an extra burst of air to clear it fully. Take a quick photo with your phone under the lamp if you want a before-and-after reference for how much grime you actually removed.
Step 3: Blow out loose dust first
Start dry, always. Hold the compressed air can upright and give the sensor recess two or three short bursts from a couple inches away. Short bursts matter, because a long tilted spray can spit cold liquid propellant onto the lens and leave a frost mark. If you’re using a hand blower, a few firm squeezes clear the same debris without any risk of moisture. This single step fixes a surprising share of tracking issues on the spot, so reconnect and check the cursor before you go wet if the lens already looks clear.
Got a stubborn hair wrapped around the lens? Slide the wooden toothpick under it and lift it out slowly. Never dig straight down into the glass. The sensor lens is a coated plastic element on most mice, and a metal pin or a hard scrape leaves a permanent gouge that no cleaning will undo.
Step 4: Wipe the lens with isopropyl alcohol
If a film or smudge remains after blowing, it’s time for the swab. Dampen one end of a cotton swab with isopropyl alcohol so it’s moist, not dripping. Squeeze off any excess against the bottle rim. Then wipe the lens in a single gentle circular motion, and follow immediately with the dry end of the swab to lift the residue before it evaporates and streaks. Alcohol flashes off in seconds and won’t harm the sensor, which is exactly why it’s the standard here instead of water. Water leaves mineral spots; alcohol doesn’t.
For a recessed lens you can’t reach flat-on, wrap the microfiber cloth over the toothpick tip, add a drop of alcohol, and work it into the recess at an angle. Let the lens air-dry for thirty seconds or so. Hold it back under the lamp and confirm the surface reads clear and glossy, with no lint left behind by the swab itself. Cheap swabs shed cotton, so a final dry pass with the blower is smart insurance.
Step 5: Clean the feet and confirm tracking
Now finish the underside. Run an alcohol-dampened swab or cloth around each PTFE foot to strip off the black gunk collected at the edges, then dry them. Clean feet sit the mouse at its designed height, and that height is what the sensor was tuned for. While you’re at it, wipe down the mousepad surface, because a filthy pad re-contaminates a freshly cleaned sensor within days. A hard pad can be wiped with a damp cloth; a soft cloth pad usually takes mild soap and lukewarm water, then a full air-dry.
Reconnect the mouse or switch it back on and move it slowly across the pad, then fast, then in tight circles. The cursor should track smoothly with no jumps or dead zones. If you want a precise read, open a drawing app and sketch slow diagonal lines. Any waviness or stair-stepping means debris is still present, so repeat step 3 and step 4. Most of the time, one pass does it. A big part of keeping a work setup reliable is this kind of five-minute maintenance, the same logic behind picking a durable clicker from our best mouse for work roundup and then actually looking after it.
Troubleshooting common issues
The cursor still stutters after cleaning
If tracking is still rough, the surface is the next suspect. Glossy desks, glass tabletops, and reflective surfaces confuse optical sensors no matter how spotless the lens is. Move to a proper mousepad and check tracking again. Failing that, swap the USB port or replace the wireless battery, since a weak signal or low charge produces stutter that looks identical to a dirty sensor. Software matters here too. An outdated mouse driver, a polling-rate conflict, or a background app hammering your USB bus can all mimic a hardware fault, so reboot once and update your drivers before you assume the sensor is still dirty.
There’s a visible scratch on the lens
A scratch from a previous aggressive cleaning can scatter the sensor’s light and cause permanent inaccuracy. There’s no home fix for a gouged lens. If tracking is genuinely unusable and the mouse is out of warranty, that’s your cue to replace it rather than chase a repair that isn’t practical.
The wireless cable keeps snagging mid-swipe
Clean tracking won’t help if a wired or charging cable drags. That resistance yanks the mouse off-line and reads as a skip. A simple cable holder solves it, and our best mouse bungee 2026 picks cover exactly that. It’s a small accessory that removes a whole category of phantom tracking problems.
Wrist pain is making the problem worse
If you’re gripping harder to compensate for jittery tracking, you may be straining your wrist. A cleaner sensor helps, but posture matters too. Readers dealing with discomfort often move to an ergonomic mouse or step up to a vertical mouse, which changes hand angle without changing how you clean the sensor underneath.
Wrapping up
Cleaning a mouse sensor is genuinely one of the highest-value ten-minute jobs on a PC. Power down, inspect under good light, blow out the loose dust, wipe any film with 99% isopropyl on a cotton swab, and finish by cleaning the feet and the pad. Go dry before wet, never scrape the lens with metal, and confirm tracking with a slow diagonal-line check afterward. Do this every few months and most of the “my mouse is dying” panic never arrives, because the sensor stays as accurate as the day you bought it.
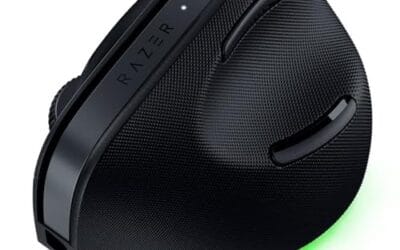
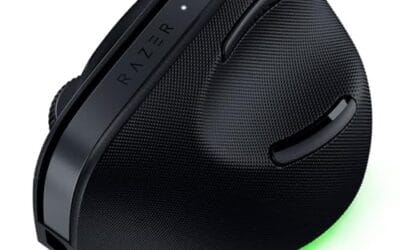
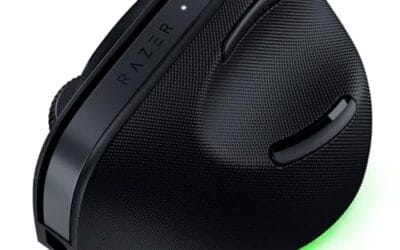
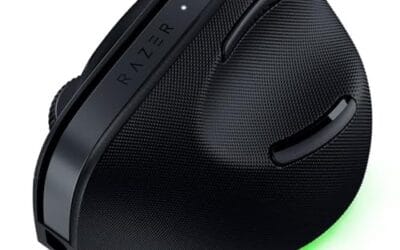
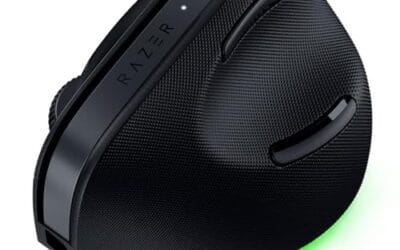
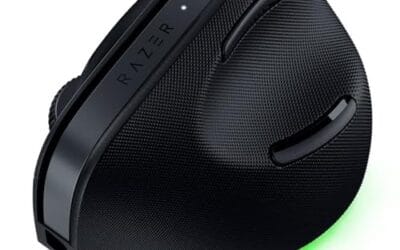
That said, some mice are built to shrug off grime better than others, with sealed sensor housings and higher-quality feet that stay cleaner longer. If your current model is scratched, worn, or simply uncomfortable, an upgrade can be worth it. For anyone leaning toward a comfort-first design, the Razer Pro Click V2 is a solid vertical option at $113.99 with a 4.7 rating, a 6-button ergonomic shape, and flexible connectivity across 2.4GHz, Bluetooth, and USB-C wired mode. It’s a reasonable landing spot if a cleaning session convinces you it’s time for something new.

Pros
- Focus Pro 30K sensor handles glass and reflective desks that trip up older vertical mice
- Battery rated up to 6 months, 5 minute top-up returns roughly 3 working days of use
- Three connectivity modes with up to 5 paired devices covers desktop, laptop, and tablet rotation
Cons
- Limited owner feedback at time of writing, so long-term reliability signal is not yet available
- Vertical handshake shape has a real learning curve for existing claw and fingertip grip users
- Mouse weight and max DPI are not specified in source, hard to gauge fast-tracking responsiveness
The Pro Click V2 Vertical is Razer's ergonomic wireless mouse aimed at knowledge workers and creators who log long sessions on Windows or Mac systems. The 6 button layout adds a dedicated AI prompt key tied into Razer Synapse 4 shortcuts for summarizing text and drafting emails.
The defining trait is the angled handshake shell with a wrist base that lifts your palm off the deck, reducing pronation on long days. Razer's Focus Pro 30K optical sensor handles glass and high-gloss surfaces, which vertical mice at this tier often struggle with due to older 3200 to 12000 DPI sensors.
Trade-offs are honest. Vertical shells force a handshake grip, so claw and fingertip users will fight muscle memory for a week or more. Battery is rated up to 6 months, but 18 zone Chroma with full underglow will cut that hard if you leave reactive lighting on. Mouse weight is not specified.
Buy this if you already know a vertical shape helps your wrist and you need one mouse hopping between a Windows tower, a MacBook, and a tablet over Bluetooth. Skip it if you plan to play competitive FPS titles, since vertical shells punish rapid tracking flicks and micro adjustments.
Sensor: Focus Pro 30K optical sensor with a claimed 99.8% resolution accuracy. Razer uses this same sensor family across its high-end lineup, so tracking on glass, mousepads, and gloss desks is realistic. Max DPI and polling rate are not specified in source data.
Switches and Buttons: Mechanical switches rated to a 60 million click lifecycle. Six total buttons include a dedicated AI prompt key mapped through Synapse 4 for text summarization and email drafting shortcuts on Windows.
Connectivity: Three modes ship in the box: 2.4GHz HyperSpeed via bundled dongle, Bluetooth with up to 3 host pairings, and USB-C wired. Combined device ceiling is 5, letting you rotate between desktop, laptop, tablet, and a secondary machine without re-pairing.
Battery and Charging: Rated up to 6 months under standard test conditions, with 5 minutes of USB-C charging yielding roughly 3 working days. The 18 zone Chroma RGB plus full underglow will cut that figure significantly if reactive lighting stays enabled.


























Write Your Review
No reviews yet. Be the first to share your experience!