

If your cursor drifts farther than your hand moves, or two identical flicks land in two different spots, mouse acceleration is usually the reason. Windows calls the feature “Enhance pointer precision,” and it’s switched on by default. Checking whether it’s active takes about a minute, and knowing the answer matters a lot if you’re aiming in shooters, editing photos pixel by pixel, or just trying to build muscle memory. This guide walks through exactly where to look on a PC, how to confirm the setting in the OS and inside popular mouse software, and what to change if you’d rather have a one-to-one response. If you’re shopping while you’re at it, our roundups of the best gaming mouse picks and the best mouse for work both flag which models ship with acceleration off out of the box.
Here’s the short version before we dig in. Acceleration means the cursor’s on-screen distance depends on how fast you move the mouse, not just how far. Turn it off and the same physical swipe always covers the same pixels. That consistency is what most enthusiasts want. Let’s find out what your system is doing right now.
What you’ll need
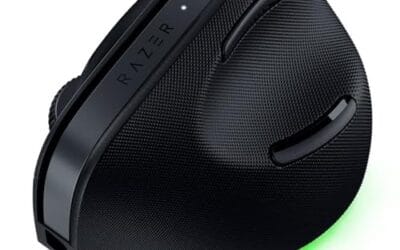
Not much. A Windows 10 or 11 PC, the mouse you’re already using, and five spare minutes. That’s the whole list. You don’t need admin rights for the OS check, though you might for installing vendor software. If your mouse came with a companion app (Razer Synapse, Logitech G Hub, SteelSeries GG, Corsair iCUE), have it installed, because acceleration can live in two places at once and both need checking. A mouse with reliable hardware tracking makes the difference easier to feel afterward. The Razer Pro Click V2 is a solid example of an ergonomic pointer built for long sessions, and it ships with clean sensor behavior.

Pros
- Focus Pro 30K sensor handles glass and reflective desks that trip up older vertical mice
- Battery rated up to 6 months, 5 minute top-up returns roughly 3 working days of use
- Three connectivity modes with up to 5 paired devices covers desktop, laptop, and tablet rotation
Cons
- Limited owner feedback at time of writing, so long-term reliability signal is not yet available
- Vertical handshake shape has a real learning curve for existing claw and fingertip grip users
- Mouse weight and max DPI are not specified in source, hard to gauge fast-tracking responsiveness
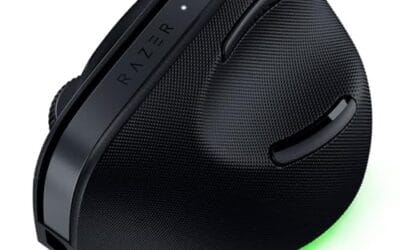
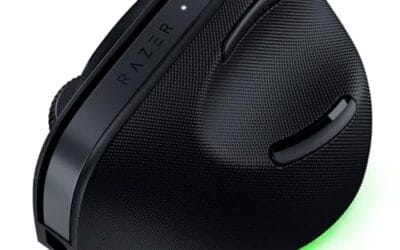
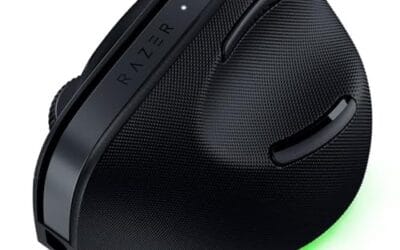
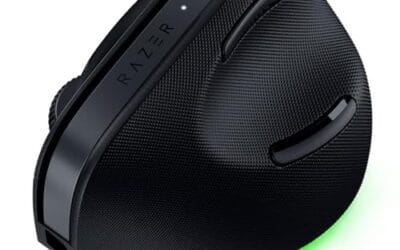
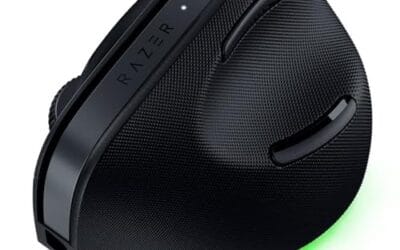
The Pro Click V2 Vertical is Razer's ergonomic wireless mouse aimed at knowledge workers and creators who log long sessions on Windows or Mac systems. The 6 button layout adds a dedicated AI prompt key tied into Razer Synapse 4 shortcuts for summarizing text and drafting emails.
The defining trait is the angled handshake shell with a wrist base that lifts your palm off the deck, reducing pronation on long days. Razer's Focus Pro 30K optical sensor handles glass and high-gloss surfaces, which vertical mice at this tier often struggle with due to older 3200 to 12000 DPI sensors.
Trade-offs are honest. Vertical shells force a handshake grip, so claw and fingertip users will fight muscle memory for a week or more. Battery is rated up to 6 months, but 18 zone Chroma with full underglow will cut that hard if you leave reactive lighting on. Mouse weight is not specified.
Buy this if you already know a vertical shape helps your wrist and you need one mouse hopping between a Windows tower, a MacBook, and a tablet over Bluetooth. Skip it if you plan to play competitive FPS titles, since vertical shells punish rapid tracking flicks and micro adjustments.
Sensor: Focus Pro 30K optical sensor with a claimed 99.8% resolution accuracy. Razer uses this same sensor family across its high-end lineup, so tracking on glass, mousepads, and gloss desks is realistic. Max DPI and polling rate are not specified in source data.
Switches and Buttons: Mechanical switches rated to a 60 million click lifecycle. Six total buttons include a dedicated AI prompt key mapped through Synapse 4 for text summarization and email drafting shortcuts on Windows.
Connectivity: Three modes ship in the box: 2.4GHz HyperSpeed via bundled dongle, Bluetooth with up to 3 host pairings, and USB-C wired. Combined device ceiling is 5, letting you rotate between desktop, laptop, tablet, and a secondary machine without re-pairing.
Battery and Charging: Rated up to 6 months under standard test conditions, with 5 minutes of USB-C charging yielding roughly 3 working days. The 18 zone Chroma RGB plus full underglow will cut that figure significantly if reactive lighting stays enabled.
If your current mouse is inconsistent even after you disable acceleration, the sensor itself may be the culprit rather than a software setting. Vertical designs like the ones in our best vertical mouse 2026 list keep your wrist neutral without sacrificing tracking, which helps you tell hardware problems apart from settings problems. Before you start, jot down two numbers your mouse already reports: its DPI and its polling rate. Both shape how movement feels, and confusing them for acceleration is a common mistake when you first go digging.
Step 1: Open the mouse settings in Windows
Press the Windows key, type “mouse settings,” and hit Enter. On Windows 11 that lands you in Settings, Bluetooth & devices, Mouse. On Windows 10 it’s Settings, Devices, Mouse. Either way, scroll down and click “Additional mouse settings” (Windows 11) or “Additional mouse options” (Windows 10) under the Related settings header. That link opens the classic Mouse Properties control panel, the same one that’s been around since the XP days. It’s the real home of the acceleration toggle, so this is the window that matters.
A quick shortcut if you’d rather skip the menus: press Windows + R, type main.cpl, and press Enter. That drops you straight into Mouse Properties, handy when you’re doing this on several machines. The modern Settings page also holds scroll speed and the primary button, but none of those touch acceleration, which lives only in the classic control panel.
Step 2: Find the Pointer Options tab
Inside Mouse Properties, look at the row of tabs across the top: Buttons, Pointers, Pointer Options, Wheel, Hardware. Click Pointer Options. The very first section is labeled “Motion,” and under it sits a slider plus a single checkbox that reads “Enhance pointer precision.” That checkbox is the acceleration setting. Microsoft renamed it years ago, but the behavior is the same thing gamers have always called mouse accel.
Here’s how to read it. If the box is checked, acceleration is on, and your cursor speed scales with how fast you flick. If it’s unchecked, you’ve got a flat one-to-one response. Make a mental note of the current state before you touch anything, so you can confirm the change actually stuck. What “Enhance pointer precision” does under the hood is apply a small curve that nudges the cursor farther on fast motions and reins it in on slow ones. That variable speed is exactly the thing anyone building aim is trying to remove.
Step 3: Confirm the current state with a movement check
Don’t just trust the checkbox. Verify it with your hand. Pick a fixed reference on your desk, the left edge of your mousepad works well. Place the cursor at the center of the screen, then move the mouse slowly to the right by exactly, say, five centimeters and note where the cursor lands. Return to center. Now cover that same five centimeters as fast as you can. If the cursor ends up farther right on the fast swipe, acceleration is active. If both swipes land in the same spot, you’ve got a clean, consistent response.
This physical check is the honest answer. Software labels can lie or lag behind a pending restart, but your cursor never does. Photographers and designers who rely on the best ergonomic mouse models for precision work run this exact check whenever they sit down at an unfamiliar rig. For a stricter version, draw a straight horizontal line in any paint app, once slowly and once fast, without lifting the mouse. With acceleration off, both lines end at the same spot for the same physical distance. With it on, the fast line overshoots.
Step 4: Check your mouse vendor software too
Windows isn’t the only place acceleration hides. Gaming mice with onboard processors often carry their own accel curve in the companion app, and that layer stacks on top of the OS setting. So even with “Enhance pointer precision” unchecked, a curve inside Razer Synapse or Logitech G Hub can still bend your aim.
Open your app and look for a Performance, Sensitivity, or DPI section. In Synapse it’s under the mouse’s Performance tab, where a slider governs acceleration and a separate one covers sensitivity. G Hub tucks it into Sensitivity (DPI) settings, sometimes behind an “acceleration” toggle in the advanced view. iCUE and SteelSeries GG follow similar layouts, pairing the accel control with a DPI stage list. Set the accel value to zero or off. Wireless competitive models, including the picks in our best wireless gaming mouse guide, almost always default to a flat curve, but it’s worth confirming rather than assuming.
While you’re in there, sanity-check the polling rate and DPI too, since both often sit on the same screen. Polling rate is how many times per second the mouse reports its position, listed as 125, 500, 1000 Hz, or higher on newer models. It doesn’t cause acceleration, but a low polling rate makes tracking feel choppy in a way people mistake for a software problem, so set it to at least 1000 Hz for gaming. DPI sets how many counts of movement the sensor sends per inch, a raw hardware value that isn’t the same as in-game sensitivity, which multiplies DPI inside a specific title. Keep DPI at a native stage the sensor supports, commonly 400, 800, or 1600, so you avoid software scaling that mimics accel.
Step 5: Disable acceleration and apply the change
If you decided you want a one-to-one response, uncheck “Enhance pointer precision” in the Pointer Options tab, then click Apply followed by OK. No reboot needed. The change takes effect the moment you apply it. Set the vendor-app accel to zero as well so the two layers agree, and if the driver offers per-game profiles, disable acceleration in each one, not just the default, since a game-specific profile can quietly re-enable a curve the instant that title launches.
One thing worth knowing about the speed slider right above the checkbox: keep it at the sixth notch, the exact middle. That center position is the only setting where Windows sends raw cursor movement without scaling pixels up or down. Push it left or right and you reintroduce a different kind of distortion, which defeats the point. Middle notch, box unchecked. That’s the clean combo most enthusiasts run, and rerunning the paint-app line check from Step 3 afterward confirms both layers are truly flat.
Troubleshooting common issues
The checkbox is unchecked but my aim still feels floaty
Check the vendor software from Step 4. A curve inside Synapse or G Hub overrides the OS, so a floaty feel usually traces back to an app-level accel value you missed. Also confirm the Windows speed slider sits at the middle notch, since off-center positions add their own scaling. If both layers are clean and it still feels off, drop your polling rate check into the mix, since a stuttering 125 Hz report rate can read as vague tracking even with acceleration fully disabled.
The setting keeps turning itself back on
Some games force acceleration through their own settings, and a few utilities reset it at launch. If it flips back after a specific program runs, that program’s the source. Look inside the game’s mouse menu for a “raw input” option and enable it, which tells the game to bypass Windows pointer scaling and read the sensor directly. Most competitive titles, from CS2 to Valorant to Apex, expose raw input as a simple on/off, and when it’s active the Windows accel setting no longer touches that game at all.
My DPI feels wrong after disabling accel
That’s expected. Acceleration masked your true sensitivity, so a flat curve can feel slower at first. Don’t crank DPI to compensate right away. Give your hand a day or two to adjust, then fine-tune. Most players settle around 800 to 1600 DPI once the accel crutch is gone. Remember the DPI versus sensitivity split: raise DPI only if wide turns feel physically cramped on your pad, and use the in-game sensitivity slider for finer control.
The cursor drags near cable tension
A wired mouse whose cord catches on the desk edge can mimic inconsistent tracking. A mouse bungee fixes that by lifting the cable off the surface. Our best mouse bungee 2026 picks cover a few that hold tension without yanking.
Before and after expected outcomes
With acceleration off and the slider centered, identical physical swipes now land in identical spots every single time. Flick shots become repeatable, cursor placement in editing apps gets predictable, and your muscle memory finally has something stable to lock onto. The trade is a short adjustment period: slow, deliberate movements no longer get a speed bonus, so precise pixel work needs a touch more travel. Most people adapt within a couple of days and never look back.
Common questions
Is mouse acceleration on by default in Windows?
Yes. “Enhance pointer precision” ships checked on both Windows 10 and 11, so unless you or a game changed it, acceleration is active on a fresh install. That’s why running the Step 3 movement check matters even if you never touched the setting yourself.
Does turning off acceleration make me a better aimer?
Not instantly, but it removes a variable. A flat one-to-one response means practice builds reliable muscle memory instead of chasing a moving target, which is exactly why competitive players run accel off.
Where is acceleration on a Razer or Logitech mouse?
In Razer Synapse it’s under the mouse’s Performance tab as a dedicated slider. In Logitech G Hub it’s inside the Sensitivity (DPI) area, sometimes under an advanced acceleration toggle. Set it to zero in either app so it doesn’t stack on top of the Windows setting, and disable it in every per-game profile, not just the default.
Do I need to restart after changing the setting?
No. Clicking Apply in Mouse Properties takes effect immediately. Vendor apps like Synapse and G Hub also apply instantly. If a change doesn’t seem to register, it’s usually because a second accel layer is still active somewhere, not because a reboot is pending.



























Write Your Review
No reviews yet. Be the first to share your experience!