

DLSS can turn a stuttering mess into a smooth 60-plus frames per second, but only if your PC actually supports it and you’ve flipped the right switches. If you’re not sure whether your machine can run Nvidia’s upscaler, or you enabled it once and can’t tell if it’s doing anything, this walkthrough sorts it out. We’ll confirm your GPU, verify the driver, check each game’s settings, and prove the feature is live. Most of it takes about five minutes. If you’re still shopping for the right card, our roundup of best GPU deals and the picks in best GPU for 4K gaming are worth a look before you spend a dollar on anything else.
Quick reality check first. DLSS (Deep Learning Super Sampling) is an Nvidia-only feature, and it needs an RTX card, not the older GTX line. So the very first thing we’re checking is hardware. If you’re running a GTX 1660 or anything from the 900 or 1000 series, DLSS simply won’t appear, no matter how many settings you poke. That’s not a bug. It’s a hardware wall. The tensor cores that DLSS relies on only exist on RTX silicon, which is why the GTX line, however capable elsewhere, can’t run it. Keep that distinction in mind and the rest of this guide falls into place quickly.
What you’ll need
Nothing you have to buy, in most cases. You’ll need an Nvidia RTX GPU (any RTX 20, 30, 40, or 50 series card), a current GeForce driver or the new Nvidia app, and a game that actually supports DLSS. A free tool like GPU-Z helps if Windows is being vague about which card you own. That’s the whole kit. If your rig is still on an older GTX card and you want DLSS, the fix is a hardware upgrade, and a compact prebuilt like the ones in our best RTX 5060 Ti prebuilt PC guide gets you there without a full parts list.
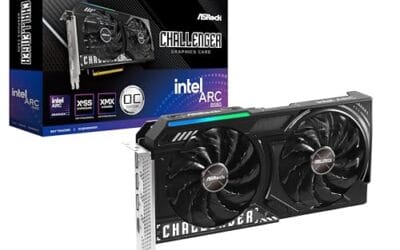
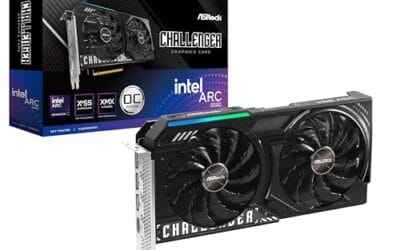
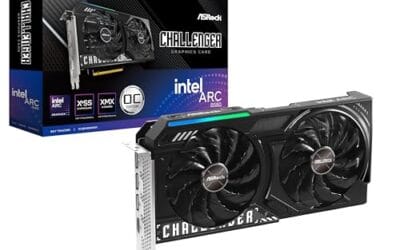
One honest aside for anyone who lands here with an AMD or Intel card. DLSS won’t work for you, but you’re not locked out of upscaling. Intel’s Arc line runs XeSS, its own version, and it’s genuinely decent. The ASRock Intel Arc B580 Challenger 12GB OC sits at $309.99 with a 4.3 rating, and its 12GB of GDDR6 across a 192-bit bus, a 2740MHz clock, and DP 2.1 output make it a reasonable 1080p and 1440p option if you’re building around XeSS instead of DLSS. It’s not a DLSS card, so don’t buy it expecting Nvidia’s feature. But as an upscaling-capable alternative, it’s on the table.

Pros
- 12GB VRAM on 192-bit bus gives headroom over8GB rivals at 1440p.
- Single 8-pin connector and 650W PSU target means broad build compatibility.
- DisplayPort 2.1 with UHBR13.5 suports high-refresh QHD and 4K panels natively.
- 2-slot 249mm length fits compact ATX and many mATX chassis without clearance issues.
Cons
- Limited owner feedback at time of writing makes long-term reliability signals thin.
- PCIe 4.0 x8 interface can bottleneck slightly on older PCIe 3.0 platforms.
- Intel Arc driver maturity in older DX9/DX11 titles still trails NVIDIA and AMD.
The ASRock Arc B580 Challenger 12GB OC is a mid-range 1440p GPU built on Intel's Xe2-HPG architecture with 20 Xe cores, 160 XMX engines, and a 2740MHz boost clock. It targets QHD gamers and content creators who want more VRAM than 8GB competitors offer at this bracket, without moving up to a 200W-plus card.
The defining feature is the 12GB GDDR6 pool on a 192-bit bus running at 19 Gbps, which gives real texture and framebuffer headroom at1440p. Combined with XeSS 2 AI upscaling and DirectX 12 Ultimate support, Arc B580 cards in this tier typically handle modern raster titles at high settings QHD, based on Intel's reference silicon behavior.
Trade-offs are typical for Intel Arc at this stage. The PCIe 4.0 x8 interface can shave frames on PCIe 3.0 boards, and driver polish on legacy DX9/DX11 games still lags competing vendors. The card requires a single 8-pin, 650W recommended PSU, and 249mm length, so verify chassis clearance and rail headroom before pairing with older bronze-tier supplies.
Buy this if you want a 1440p card with 12GB VRAM, DP 2.1 outputs, and XeSS 2 support on a modern PCIe 4.0 platform. Skip this if your library leans heavily on older DirectX 9 or 11 titles, or your motherboard is PCIe 3.0.
Resolution target: With 12GB GDDR6 on a 192-bit bus at 19 Gbps, this card is positioned for 1440p high settings in modern raster titles, with XeSS 2 upscaling extending playable framerates in heavier ray-traced workloads. 1080p esports at high refresh is well within scope.
Power and PSU pairing: ASRock lists a 650W recommended PSU and a single 8-pin connector. GPUs in this class typically draw around 190W board power, so pair with a quality 650W to 750W unit to leave transient headroom on ATX 3.0 or olderATX 2.x rails.
Build clearance: The2-slot cooler measures 249mm long, 132mm wide, and 41mm high. That fits most mid-towers and many mATX cases, but confirm front-radiator or HDD-cage clearance in compact builds beforeordering, especially SFF chassis rated under 250mm GPU length.
Display outputs: Three DisplayPort 2.1 ports (one primary up to UHBR13.5) plus one HDMI 2.1a drive up to four displays with resolutions up to 8K. UHBR13.5 suports high-refresh 4K and 1440p panels natively without DSC compromises.
Step 1: Confirm you have an RTX GPU
Press the Windows key, type “Device Manager,” and open it. Expand the Display adapters entry. You should see your graphics card listed by name. If it reads something like “NVIDIA GeForce RTX 4070,” you’re set. If it says GTX, or lists Intel or AMD, DLSS isn’t available on that hardware. Simple as that.
Device Manager sometimes shows a generic label after a fresh Windows install, so if the name looks vague, grab GPU-Z. It’s a tiny free download that reads your card’s exact model, memory, and even the driver version on one screen. The name matters here because DLSS support tracks the RTX branding, not raw power. A card built for streaming or high-refresh play, like the options in best GPU for gaming and streaming, will show its RTX designation clearly.
Step 2: Update your Nvidia driver
DLSS improvements ship inside driver updates, so an old driver can hide features or leave you on a stale version of the tech. Open the Nvidia app (it replaced GeForce Experience in late 2024) and head to the Drivers tab. Click Check for updates, then Download and install the Game Ready driver if one’s waiting. A clean install is the safer choice if you’ve had graphics glitches, since it wipes leftover files.
After the install finishes, reboot. Don’t skip that part. Half the “DLSS won’t turn on” reports we’ve researched trace back to a driver that installed but never fully loaded because the machine wasn’t restarted. Once you’re back at the desktop, you’ve got a current driver and the newest DLSS runtime Nvidia has pushed for your card.
While you’re in the Nvidia app, take thirty seconds to check the System tab. It lists your driver version and the GPU it’s paired with, which doubles as a second confirmation of Step 1. If the app refuses to install or hangs on the download, disable any VPN and pause security software briefly, then retry. Those two things block the driver download more often than a genuinely broken install does. A clean, current driver is the foundation everything else here stands on.
Step 3: Check whether your game supports DLSS
Here’s the catch a lot of people miss. Your card can support DLSS while the specific game you’re playing doesn’t. DLSS is added per title by developers, and roughly 700-plus games and apps carry it now, but plenty of older or smaller releases never got it. Launch your game, open the graphics or video settings, and look for a section labeled DLSS, Nvidia DLSS, or sometimes “Super Resolution” under an upscaling menu.
If you find a DLSS dropdown with modes like Quality, Balanced, Performance, and Ultra Performance, congratulations, that game supports it and your hardware qualifies. If the whole section is missing, the game likely doesn’t offer DLSS at all. The Nvidia website keeps a running list of supported titles, so a quick search there confirms it before you go hunting through menus. It’s faster than guessing.
Step 4: Verify your DLSS version
Not all DLSS is equal. The feature has moved through several versions, and DLSS 3 added Frame Generation (exclusive to RTX 40 and 50 cards), while DLSS 3.5 brought Ray Reconstruction. The version a game ships with lives in a file called nvngx_dlss.dll, usually tucked inside the game’s install folder. You can find it by browsing the folder and checking the file’s Properties, then the Details tab, which lists the product version.
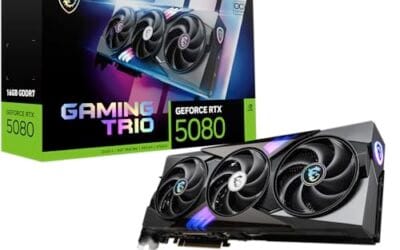
Why bother? Because a newer DLL often means sharper image quality and fewer artifacts, and enthusiasts sometimes swap in a fresh version manually. You don’t have to do that. But knowing which version you’re running tells you what to expect. A high-end build, say something from our best RTX 5080 prebuilt PC picks, ships with the newest DLSS features baked in, so you rarely touch the DLL yourself.
A fast way to read the version without digging through folders: some games print it right in the DLSS settings label, and third-party overlays can surface it live. If you see version 2.x, you’ve got standard super resolution. Version 3.x adds Frame Generation on RTX 40 and 50 hardware. Version 3.5 layers in Ray Reconstruction for cleaner ray-traced scenes. Knowing the number sets your expectations before you ever load a level, and it saves you from blaming the card for something a driver update would fix.
Step 5: Enable DLSS and confirm it’s working
Back in the game’s graphics menu, set DLSS to Quality for the best balance of sharpness and speed. Apply the change. Now you want proof it’s actually running, not just a menu that says it’s on. Turn on an FPS overlay: the Nvidia app has one under the Statistics overlay, or you can use the in-game counter if the title offers it.
Note your frame rate with DLSS off, then flip it to Performance mode and watch the number climb. A real jump, often 30 to 70 percent depending on the game and resolution, confirms DLSS is doing its job. If the frame rate barely moves, something’s off, and the troubleshooting section below covers why. The bigger the resolution, the bigger the gain usually is, which is exactly why 4K players lean on it hardest. Pair it with a strong CPU like the builds in our best GPU for 9800X3D guide and the frame gains stack even higher.
One extra tip for confirming it’s genuinely active. Toggle DLSS off and on while the FPS overlay is up, and watch for the number to snap between two clearly different values. If it swings the moment you apply the change, the feature is live. If nothing budges, the setting may not have saved, or the game needs a scene reload. Trust the frame counter, not the menu text. Menus can say “On” while the runtime quietly failed to load.
If something goes wrong
Most DLSS problems fall into a few buckets. Here’s how to clear the common ones fast.
The DLSS option is greyed out
This usually means your resolution or another setting blocks it. Some games disable DLSS below a certain resolution, or when a competing feature like a specific anti-aliasing mode is active. Set your display to its native resolution, switch the anti-aliasing option to TAA or the game’s default, and the DLSS dropdown often unlocks. A restart of the game after a driver update fixes it more often than you’d think.
DLSS doesn’t appear at all
If there’s no DLSS section anywhere, the game doesn’t support it, or your card isn’t an RTX model. Double-check Step 1. It’s an easy thing to assume wrong, especially on a used PC where you didn’t pick the parts. Older GTX cards will never show the option, so no amount of driver updating changes that.
The image looks blurry or has ghosting
Aggressive modes like Ultra Performance sacrifice sharpness for speed, so step up to Quality mode first. If ghosting trails behind moving objects, your DLSS version might be dated. Updating the driver, or in stubborn cases swapping the nvngx_dlss.dll for a newer build, usually cleans it up. A touch of in-game sharpening helps too.
Frame rate didn’t improve
If FPS barely moved, you might be CPU-bound rather than GPU-bound, meaning your processor is the bottleneck and DLSS (which offloads the GPU) can’t help much. This shows up most at lower resolutions. Bump the resolution up, and DLSS gains become obvious. Confirm the mode actually applied, since some games need a scene reload before the change takes hold.
Wrapping up
Checking DLSS comes down to three questions: do you own an RTX card, is your driver current, and does the game support it? Answer yes to all three and you’re a couple of clicks from free performance. The FPS overlay is your proof, so always confirm the number climbs rather than trusting the menu. If your hardware falls short, that’s the real fix, not more settings tweaks, and a modern RTX build like the ones in our best RTX 5070 Ti prebuilt PC guide opens the door to every DLSS feature at once. Now go turn it on and reclaim those frames. Five minutes of checking beats hours of wondering why your game still stutters.



























Write Your Review
No reviews yet. Be the first to share your experience!