

A new prebuilt arrives, you power it up, and the desktop’s already cluttered with trial antivirus nag screens, a browser toolbar you never asked for, and three “PC optimizer” apps that exist mostly to slow things down. That junk software is bloatware, and on a budget prebuilt it can eat RAM, hog startup time, and pepper you with popups from day one. Stripping it out is one of the easiest wins for a smoother, faster machine, and you don’t need to reinstall Windows to do it. This walkthrough covers the safe, methodical way to clear the clutter without breaking anything your PC actually needs.
Why does a fresh machine ship this loaded? Manufacturers get paid to preinstall trial software, and a budget tower’s thin margins make those deals hard to pass up. That’s not a knock on the hardware. It just means the first hour of ownership is yours to reclaim. Done right, a cleanup is completely reversible, and you’ll feel the difference the very next boot.
What you’ll need
Not much, honestly. You’ll want an admin account on the PC, a stable internet connection, and about 30 to 45 minutes. Windows already ships with everything required: Settings, the Control Panel’s Programs list, PowerShell, and Task Manager. It helps to have the machine’s model and manufacturer handy so you can tell genuine drivers from disposable trial apps. If you bought a budget rig recently, our roundups of the best budget prebuilt PCs of 2026 and the best budget prebuilt for 1080p gaming are worth bookmarking so you know what a clean baseline should look like. Create a restore point before you start, and you’ve got a safety net if you remove something you shouldn’t.
Step 1: Create a restore point and inventory what’s installed
Before deleting anything, give yourself an undo button. Type “restore point” into the Start menu, open Create a restore point, pick your system drive, click Configure to enable protection if it’s off, then hit Create and name it “Pre-bloatware cleanup.” That snapshot lets you roll back in minutes if a removal goes sideways.
Now take inventory. Open Settings, go to Apps, then Installed apps. Sort by install date so the factory-loaded software clusters together, since it all landed the same day the image was built. Scroll the full list and note what you don’t recognize. Trial security suites, “driver updater” tools, casino game bundles, and manufacturer “assistant” apps are prime candidates. Leave anything labeled as a driver, a runtime like Microsoft Visual C++, or a genuine chipset utility. When in doubt, search the exact app name before touching it. A minute of research beats an afternoon of troubleshooting.
Jot your list down somewhere, a notepad file or a scrap of paper, split into two columns: remove and keep. Having it written out keeps you from second-guessing halfway through, and if a removal later causes trouble you’ll know precisely what you touched. Group the “remove” pile by type as well, trials in one bunch, toolbars in another, game demos in a third. Working in categories is faster than hopping around the list at random, and it makes the whole job feel less like whack-a-mole.
Step 2: Uninstall the obvious junk through Settings
Start with the safe, click-to-remove stuff. In Settings, Apps, Installed apps, find each item you flagged, click the three-dot menu beside it, and choose Uninstall. Work through trial antivirus first, because those suites plant deep hooks and love to reinstall themselves. If a bundled security app resists a normal uninstall, grab the vendor’s official removal tool, most major antivirus makers publish one, and run that instead.
Knock out the rest one at a time: toolbar add-ons, “PC speedup” utilities, redundant media players, and game demos you’ll never open. Uninstall, wait for it to finish, then move to the next. Doing them individually means that if the machine hiccups, you know exactly which removal caused it. Some apps ask to reboot, so save that for the end of your batch rather than restarting after every single one. It’s slower to reboot ten times than to clear the whole list and restart once.
Watch for the sneaky uninstall dialogs, too. Some bloatware tries a last-ditch guilt trip, offering to “keep some features” or “pause instead of remove.” Decline all of it and choose the full uninstall. Others bundle a browser extension that outlives the app, so after you’re done, open your browser’s extensions page and clear anything you don’t recognize. The manufacturer’s own hub app is a judgment call. If it only exists to upsell software, drop it, but if it handles genuine driver updates for your specific model, you may want to keep that one.
Step 3: Remove stubborn preinstalled apps with PowerShell
Some Windows Store style apps and manufacturer packages don’t show an uninstall option, or they reappear after you remove them. That’s where PowerShell earns its keep. Right-click the Start button and open Terminal (Admin) or Windows PowerShell (Admin). To see the provisioned packages, type Get-AppxPackage | Select Name, PackageFullName and press Enter. You’ll get a long list of internal app names.
To remove one, use Get-AppxPackage *appname* | Remove-AppxPackage, swapping in a keyword from the app’s name. Go slow here and only target things you’ve confirmed are junk, because a few core packages keep the Start menu and Settings working. Don’t blanket-remove everything. Stick to clearly named bloat like third-party game hubs or trial productivity suites. If a command errors out, note it and move on rather than forcing it. PowerShell is precise, but it doesn’t ask twice, which is exactly why that restore point from Step 1 matters.
Type each keyword carefully and read the package name it returns before you commit. If the result surprises you, cancel and search that name first. It’s smart to remove one package, then check that the desktop, Start menu, and taskbar still behave before moving to the next. That way a bad call stays isolated to a single app instead of cascading. When you’re finished, close the terminal and open the Installed apps list again to confirm the stubborn entries are actually gone rather than just hidden.
Step 4: Trim startup programs so boot times drop
Removing an app doesn’t always stop its helpers from launching at boot. Open Task Manager with Ctrl+Shift+Esc, click the Startup apps tab, and look at the Startup impact column. Anything marked High that you don’t actively use is fair game. Right-click and choose Disable. Updaters, cloud sync tools you don’t use, and manufacturer “assistants” are common offenders that quietly add seconds to every boot.
Disabling here doesn’t uninstall the app, it just stops it from auto-launching, so it’s low risk and easy to reverse. On a budget prebuilt with a hard drive or a slow SSD, this single step can shave a noticeable chunk off startup time. If you’re eyeing a faster machine for smoother multitasking, our guide to the best budget prebuilt for 1440p gaming shows what a well-configured rig feels like out of the box.
Don’t stop at the Startup apps tab. Some updaters and helpers run as background services rather than startup entries, so they won’t show up there. Open Settings, Apps, then Startup for the modern view, and for a deeper look type “services” into Start to see what’s set to run automatically. Be conservative with services, though. Only disable ones tied clearly to software you already removed, and set them to Manual rather than Disabled so Windows can still start them if something genuinely needs them. Leave anything from Microsoft or your hardware vendor alone. The goal is trimming fat, not cutting muscle.
Step 5: Clean up leftovers and reboot
Uninstallers often leave scraps behind: empty folders, orphaned registry entries, and cached files. Run the built-in Disk Cleanup (search it in Start), tick the temporary files and system cache boxes, and let it sweep. Then check Program Files and Program Files (x86) for empty folders left by apps you removed and delete those manually if they’re clearly abandoned.
Finish with a full restart, not a shutdown, so Windows fully reloads its services. After it comes back, watch the system tray and the Task Manager startup list to confirm nothing you disabled crept back on. Give it a day of normal use. If everything feels snappier and no popups return, you’re done. If a genuinely needed feature broke, roll back to your restore point and remove more carefully next time. Sometimes a machine ships so loaded down that a clean start is the better path, and a straightforward prebuilt makes a fine baseline. The abytespark Intel Core i7 business office tower, around $499.99 with a 4.4 rating, is one budget example of a straightforward Core i7 desktop to build from.
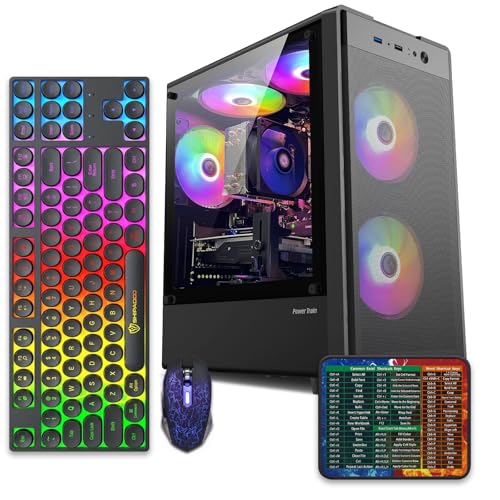
Pros
- 512GB SSD bot drive avoids the HDD bottleneck common in budget prebuilts
- RX 590 8GB VRAM buffer handles 1080p textures better than 4GB budget cards
- Complete bundle with RGB peripherals means no extra spend to start using
- Genuine Windows 11 Home 64-bit preinstalled, no activation hassle out of box
Cons
- Limited owner feedback at time of writing, verify seller reputation before purchase
- Core i7-4770 is Haswell era LGA150, no upgrade path and weak IPC versus modern CPUs
- Windows 11 on 4th-gen Intel is unsupported by Microsoft and may miss feature updates
- No CD/DVD-ROM support and RAM/GPU generation limits future workload headroom
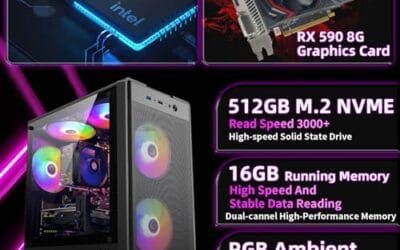
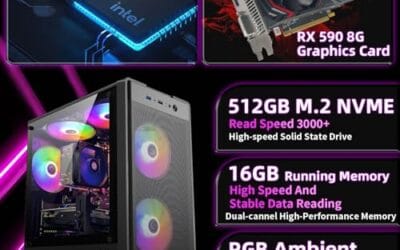
This is an entry-tier prebuilt tower built around an Intel Core i7-4770 Haswell CPU, 16GB RAM, a 512GB SSD, and an AMD Radeon RX 590 8GB GDDR5 GPU. It targets budget buyers who need a working office and light gaming PC with peripherals bundled, not enthusiasts chasing current-gen performance.
The defining feature is the RX 590 8GB paired with a 512GB SSD, an uncommon combo at this price band. Cards in this class typically handle 1080p esports titles at 60+ FPS on medium to high, matching the vendor claim for CS:GO, League of Legends, Apex, and Overwatch. Newer AA titles will need lowered settings.
Trade-offs are significant. The i7-4770 launched in 2013, so IPC, single-thread performance, and platform features like NVMe bot, PCIe Gen4, and modern USB are limited. Windows 11 runs here but sits outside Microsoft's official supported CPU list. There is no realistic CPU or socket upgrade path on LGA1150.
Buy this if you need a plug-and-play 1080p esports and office tower with keyboard, mouse, and RGB included at a low outlay. Skip this if you want current-gen platform support, sustained AA 1440p gaming, or a build with a meaningful upgrade runway.
GPU class: The AMD Radeon RX 590 8GB GDDR5 is a Polaris-refresh card roughly equivalent to a GTX 1060 6GB tier. Expect 1080p 60+ FPS in esports titles like CS:GO, Overwatch, Apex, League, and Fortnite on medium settings, matching the listing's claims.
AAA and modern titles: The vendor lists GTA V, Warzone, Hogwarts Legacy, and The Division 2. Realistically, these run at 1080p low to medium with FSR upscaling where suported.Ray tracing is unsupported on RX 590. No DLSS, no frame gen, no AV1 encode.
CPU bottleneck: The Core i7-4770 quad-core with 8threads at up to 3.9GHz will bottleneck the RX 590 in CPU-heavy titles like Warzone and Escape from Tarkov. Expect frame time inconsistency in large team fights even when average FPS looks aceptable.
Storage and RAM fit: 512GB SSD holds Windows plus 3 to 5 modern game installs before space pressure. 16GB DR3-era RAM is adequate for current esports but leaves no headroom for heavy streaming, browser tabs, and OBS NVENC alongside a game session.
Troubleshooting common issues
An app won’t uninstall or keeps coming back
Trial antivirus and some manufacturer suites reinstall themselves by design. Use the vendor’s dedicated removal utility instead of the standard uninstaller, then reboot and confirm it’s gone. For Store style apps that reappear, the PowerShell Remove-AppxPackage command from Step 3 usually sticks where the Settings uninstall didn’t.
Something broke after I removed an app
Roll back to the restore point you made in Step 1. Open Create a restore point, click System Restore, and pick your “Pre-bloatware cleanup” snapshot. It reverts installed software and settings without touching your personal files. Then repeat the cleanup, removing fewer items at a time so you can pin down the one that caused trouble.
I’m not sure if something is bloatware or a driver
If the name includes “driver,” “chipset,” “audio,” “graphics,” or a runtime like Visual C++ or .NET, leave it. Those keep hardware working. Search the exact app name plus your PC’s model before removing anything you can’t identify. When it’s a coin flip, disable it at startup rather than uninstalling, so you can watch for problems and reverse it instantly.
Can I just reset Windows instead?
You can, and Settings, System, Recovery, Reset this PC with the “clean install” option skips reinstalling manufacturer bloat. It’s more thorough but also more work, since you’ll reinstall your own apps and re-enter logins afterward. For most prebuilts, targeted removal is faster and keeps your setup intact. Save the full reset for a machine that’s genuinely a mess.
Wrapping up
Clearing bloatware from a prebuilt is mostly patience and a little caution. Make a restore point, inventory what’s installed, uninstall the obvious junk through Settings, use PowerShell for the stubborn holdouts, trim your startup list, then clean up leftovers and reboot. Done in that order, you’ll reclaim RAM, cut boot time, and lose the popup nagware without risking anything important. If you’re shopping for your next machine and want less cleanup out of the box, our picks for the best AMD prebuilt gaming PCs point toward builds that ship lean. A tidy system is a faster system, and now yours is one.



























Write Your Review
No reviews yet. Be the first to share your experience!