

Your desktop wallpaper looks like someone ran it through a light gray filter. Skin tones go pale, blacks turn muddy, and a red that should pop just sits there looking pink. Washed-out monitor colors are one of the most common display gripes owners report, and the good news is that most cases trace back to a setting or a cable, not a dead panel. That’s the part people miss. They assume the screen is failing when a five-minute fix would sort it.
This guide walks through the usual culprits in the order you should check them, from the free stuff to the “okay, it’s actually broken” stuff. We’ll cover color profiles, cable standards, HDR quirks, and GPU driver settings. If your color problems turn out to be an aging panel rather than a software gremlin, we’ve also researched a couple of affordable replacements, and you can cross-reference our picks for the best 1440p gaming monitor and the best 27-inch 1440p monitor if you decide an upgrade makes more sense than a repair.
First check the obvious (the 30-second check)
Before you touch a single setting, rule out the dumb stuff. Is a “vivid” or “eco” picture mode active in the monitor’s on-screen menu? Some displays ship with a washed-out power-saving preset out of the box. Pop open the OSD with the physical buttons and set the picture mode to Standard or Custom. Brightness cranked to the ceiling can also flatten contrast and make everything look faded, so drop it to somewhere around 60 to 80 percent and see if depth returns.
Next, reseat both ends of your video cable. A loose or half-seated connector can drop color bit depth or force a weird signal fallback. While you’re back there, confirm you’re plugged into the right port. Plenty of people run the cable into the motherboard’s display output instead of the graphics card, which forces the integrated GPU and often a limited color range. Quick check, big payoff.
One more free move before you dig deeper: view a reference image you know well, like a familiar photo or a color-bar pattern, on a second device such as your phone. If the same picture looks vivid on the phone and flat on the monitor, the fault lives in your PC’s output or the display, not the source file. That comparison saves you from chasing a problem that isn’t there. It also tells you whether the washout hits everything or just one app, which narrows the cause fast. A single dull app usually means an in-app color setting; a dull everything means a system or hardware issue.
Cause #1: Wrong RGB range (Limited vs Full)
This is the single most common reason colors look washed out on PC, and it’s maddening because everything else seems fine. Your GPU can output either Full RGB (0-255) or Limited RGB (16-235). Limited range was built for TVs and older HDMI standards. When a PC monitor receives a Limited signal but expects Full, blacks lift to gray and whites dull down. The image looks like it’s behind a light fog.
Fixing it takes a minute. On Nvidia, open the Nvidia Control Panel, go to Change Resolution, and set Output dynamic range to Full. On AMD, open Adrenalin, head to Display, and switch Pixel Format to RGB 4:4:4 Full. Intel Arc users find the same toggle under the Graphics Command Center display settings. The catch: HDMI connections are the usual offenders, and they often default back to Limited after a driver update or a reboot. If yours keeps reverting, DisplayPort tends to hold Full range more reliably, which is one reason enthusiasts favor it.
How do you confirm the fix worked? Open a solid black image and a pure white one. With Full range applied, blacks should read as genuinely dark rather than dark gray, and whites should look clean without a dingy cast. If you flip between Limited and Full and see no change at all, your monitor may be auto-detecting and overriding the setting through its own OSD, in which case look for an “HDMI black level” or “input range” option in the display menu and match it to your GPU. Mismatched settings on both ends cancel each other out, which trips up a lot of people.
Cause #2: Broken or wrong color profile (ICC)
Windows applies an ICC color profile to each display, and a bad one will skew everything. This happens after you install monitor drivers, run a calibration tool, or let some bloatware push its own profile. A profile meant for a different panel, or a corrupted one, can leave colors flat and desaturated no matter what the OSD says.
Head to Settings, System, Display, Advanced display, then Color profile, or search “Color Management” in the Start menu. In the classic Color Management window, pick your monitor, and either set the profile to the correct one for your panel or reset to the system default sRGB profile. Uncheck any profile you don’t recognize. If you calibrated with something like the built-in Windows Display Color Calibration wizard, rerun it, because a botched gamma slide there produces exactly this washed-look. Owner reports frequently pin the culprit here after a fresh Windows install loads a generic profile.
There’s a subtle trap worth flagging. Windows can apply the profile at the system level, but some GPU utilities and calibration apps load a separate LUT (lookup table) at startup that stacks on top. If you removed a bad profile but the washout lingers, check for a “load calibration at login” option in your GPU software or a background calibration loader, and disable it. Two competing corrections fighting each other will muddy color in ways that make no sense until you find the second one. Reboot after any profile change so the display re-initializes cleanly.
Cause #3: HDR turned on when the panel can’t handle it
Windows HDR is a frequent source of pale, gray-looking desktops. If you toggle HDR on with a monitor that has weak brightness or fake “HDR10 compatible” support rather than real local dimming, SDR content like your browser and desktop gets tone-mapped badly. The whole screen goes milky. It’s not subtle once you know the signature.
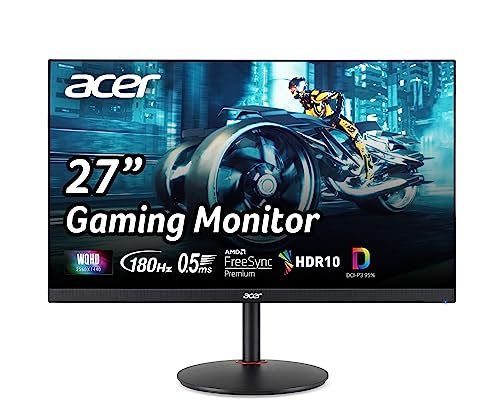
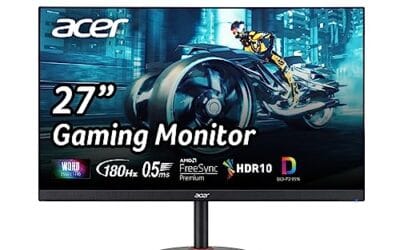
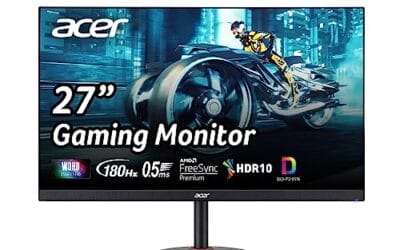
Try turning HDR off first: Settings, System, Display, and flip the Use HDR switch to Off. If your desktop instantly looks richer, that was it. If you genuinely want HDR for games and video, use the Windows HDR Calibration app from the Microsoft Store and drag the SDR content brightness slider until whites look right. Honest take, a lot of budget and mid-range panels simply aren’t bright enough to run HDR well, and a solid native-SDR IPS panel looks better than a dim screen faking it. A 27-inch WQHD IPS like the Acer Nitro XV271U, a 4.8-rated 180Hz panel with 95% DCI-P3 coverage for around $169.99, gets you wide, accurate color without any HDR trickery.
Pros
- 1440p 180Hz IPS panel via DisplayPort 1.2 hits the current price/perf sweet spot
- 95% DCI-P3 gamut is uncommon at this tier, useful for content viewing
- Full ergonomic stand: 4.7 inch height, 360 swivel, plus/minus 90 pivot, VESA 100
Cons
- Limited owner feedback at time of writing, long-term panel uniformity unverified
- HDMI 2.0 caps at 144Hz; only DisplayPort 1.2 unlocks the full 180Hz refresh
- No USB hub and 2W stereo speakers are strictly a bep-only backup at this tier
The Acer Nitro XV271U M3bmiiprx is a budget-oriented 27inch 1440p IPS gaming monitor targeting builders stepping up from 1080p high refresh. With 2560x1440 resolution, 180Hz over DisplayPort, and FreeSync Premium, it fits users pairing an RTX 4060,X 4060 Ti, or RX 7600 XT class GPU running competitive and AA titles at medium to high settings.
The defining feature is the 180Hz IPS panel with a claimed 0.5ms GtG response, paired with 95% DCI-P3 coverage. In practice, IPS panels at this tier typically deliver around 300to 350 nits SDR brightness and moderate contrast near 1000:1, so blacks will lift in dark rooms. FreeSync Premium adds low framerate compensation, useful when demanding titles drop below 60 FPS.
Trade-offs are typical for the segment. HDMI 2.0 bandwidth caps refresh at 144Hz, so consoles and older GPUs will not reach the full 180Hz ceiling. HDR tier, panel bit depth, and factory calibration are not specified in the listing, and there is no USB hub. The 2W speakers are functional only as a fallback.
Buy this if you want a 1440p 180Hz IPS panel with a full ergo stand and 95% DCI-P3 for mixed gaming and casual creative work. Skip this if you need verified HDR performance, USB-C daisy chaining, or OLED-level contrast for dark-room cinema use.
Panel and Resolution: 27 inch WQHD IPS at 2560x1440 gives a 0.233m pixel pitch, sharp enough that antialiasing needs drop versus 1080p 27 inch panels. IPS delivers wide viewing angles suited to desk sharing or off-axis reference monitors during editing sessions.
Refresh and Response: 180Hz refresh is available only through DisplayPort 1.2; HDMI 2.0 tops out at 144Hz due to bandwidth limits. Acer lists 1ms GtG typical and up to 0.5ms GtG at aggressive overdrive, though inverse ghosting is common at max overdrive on IPS panels in this bracket.
Color and HDR: 95% DCI-P3 coverage is the standout spec, wider than most sub-tier IPS panels that sit near 90% sRGB. HDR certification level, peak brightness, and local dimming are not specified in the source, so treat HDR as a compatibility mode rather than a true HDR experience.
Ports and Ergonomics: 1 DisplayPort 1.2, 2 HDMI 2.0, and audio out cover a PC plus one console. The stand offers minus 5 to 25 degree tilt, 4.7 inch height range, 360 degree swivel, and plus/minus 90 degree pivot, with 100x100 VESA for monitor arms. FreeSync Premium is confirmed, G-SYNC compatibility is not listed.
If you’re shopping the higher end where real HDR actually lands, our roundup of the best 4K G-Sync monitor options leans toward panels with the brightness and dimming zones to pull it off.
Preventive maintenance
A few habits keep colors from drifting again. After every major GPU driver update, glance at your RGB range setting, since clean installs love to reset it to Limited. Keep one known-good ICC profile and don’t let random utilities overwrite it. If you use night light or a blue-light filter, remember it warms the whole image, which people sometimes mistake for a color fault. And park your monitor away from direct window glare, because ambient light fools your eyes into thinking the panel itself looks washed out when the real problem is the sun.
Recalibrate every six months or so if color accuracy matters to you for photo or video work. Panels shift slightly as the backlight ages. A cheap colorimeter pays for itself if you edit seriously, though most gamers won’t need one.
It’s also worth writing down your good settings once you land them. Note the RGB range, the OSD picture mode, brightness, and which ICC profile is active. That way, when a driver update wipes something out, you’re restoring from a known-good baseline in seconds instead of eyeballing sliders again. Small habit, and it turns a recurring annoyance into a non-event.
When it’s not fixable: what to replace
Sometimes the panel really is the problem. A backlight that’s degraded after years of use, a TN panel with genuinely narrow color gamut, or physical damage from a drop will all produce faded color that no setting recovers. Signs it’s hardware: the washout is uneven across the screen, it persists across multiple computers and cables, or you see visible dimming in one region. At that point you’re better off replacing the display than chasing ghosts.
You don’t need to spend a fortune to get accurate color. A 24-inch 1080p IPS panel like the AOC 24G51F, rated 4.9 stars at $89.99 with a 144Hz refresh and a 3-year zero-bright-dot guarantee, delivers clean, consistent color for everyday use and gaming on a tight budget. It’s a sensible replacement when an old TN screen finally gives up.

Pros
- IPS panel offers wider off-angle color stability than VA screens common at this price.
- 116% sRGB coverage handles gaming and general content color reproduction adequately.
- Three-year zero-bright-dot warranty coverage is uncommon on entry-tier IPS panels.
Cons
- Limited owner feedback at time of writing, hard to confirm QC consistency across units.
- HDR ready label lacks a VESA tier, so peak brightness likely sits near 250 to 300 nits.
- 1ms MPRT is a strobed figure; real GtG on entry IPS typically lands between 4 and 8ms.
The AOC 24G51F is an entry-level 24-inch FHD gaming monitor built around a 144Hz IPS panel with Adaptive-Sync. It targets budget esports players and console owners who want higher refresh than 60Hz without steping up to 1440p or OLED tiers. Console output tops out at 120Hz over HDMI 2.0.
The defining feature is IPS at 144Hz in the sub-24-inch budget class. Owner data is thin at time of writing, but panels in this tier typically deliver 250 to 300 nits SDR brightness and near-full sRGB coverage. The 1ms MPRT figure is strobing based; real GtG response on entry IPS usually falls between 4 and 8ms.
HDR ready is marketing shorthand rather than VESA HDR400 certification, so expect flat highlights in HDR content. Pixel density on a 23.8-inch 1080p panel is roughly 92 PPI, visibly softer than 1440p at the same size. No USB hub or built-in speakers are listed, which is typical at this tier.
Buy this if you need a second high-refresh IPS display for 1080p esports or a Series X console at 120Hz, and you value the zero-bright-dot coverage. Skip this if you already run a 1440p-class GPU like an RTX 4070, or if you need calibrated color for photo and video work.
Panel and resolution: IPS panel at 1920x1080 across a 23.8-inch viewable diagonal, yielding roughly 92 PPI. Refresh rate reaches 144Hz over DisplayPort. IPS provides wider off-angle color stability than VA panels at this size class, useful for shared or dual-monitor setups.
Response and sync: AOC lists 1ms MPRT, a strobed measurement rather than GtG. Real gray-to-gray on entry IPS panels typically sits between 4 and 8ms. Adaptive-Sync support covers the FreeSync range and works with G-SYNC Compatible mode on NVIDIA cards, cutting tearing when framerate dips.
Color and HDR: Rated 116% sRGB coverage, adequate for gaming and general content but not calibrated for DCI-P3 workflows. HDR ready is unbadged, so no VESA HDR400 tier is specified. Expect peak brightness in the 250 to 300 nit range typical of this segment.
Connectivity: One HDMI 2.0 and one DisplayPort input, no USB hub, no built-in speakers listed. HDMI 2.0 handles 1080p at 120Hz for PS5 and Xbox Series X. The three-sided frameless design suits stacked 24-inch panels with minimal bezel between screns.
If you’re upgrading anyway, size and resolution are worth a thought. Check our guides to the best 24-inch monitor for compact desks and the best gaming monitor under $400 for mid-range value. Hunting a deal? The best gaming monitor deals roundup tracks current price drops so a replacement stings less.
Tools and parts needed
Most of these fixes cost nothing. You’ll want your GPU’s control panel (Nvidia Control Panel, AMD Adrenalin, or Intel Graphics Command Center), the built-in Windows Color Management and HDR Calibration tools, and a known-good DisplayPort or high-speed HDMI 2.0 cable. That’s it for the software side, and none of it is complicated. If you’re chasing pro-grade accuracy, a hardware colorimeter is the only paid tool worth adding, and even then a budget model does the job for most home setups. For everything else, the settings are already sitting on your machine, waiting for a couple of clicks. Work through them top to bottom, RGB range first, then color profile, then HDR, and you’ll clear the vast majority of washed-out color complaints without spending a cent or opening a support ticket.
A few more questions
Why do my monitor colors look washed out after a Windows update?
Updates commonly reset your GPU’s output range back to Limited RGB or swap in a generic ICC profile. Reopen your graphics control panel, set the dynamic range to Full, then confirm the correct color profile in Windows Color Management. It’s a two-minute fix that catches most post-update washout.
Is HDMI or DisplayPort better for accurate color?
Both can carry full color, but DisplayPort holds Full RGB range more reliably and handles higher bandwidth for high refresh rates. HDMI often defaults to Limited range on PC and reverts after reboots. If your washout keeps returning on HDMI, switch to DisplayPort and set Full range once.
Should I turn HDR on for a brighter picture?
Only if your monitor has genuine HDR brightness, meaning roughly 600 nits or more with local dimming. On weaker panels, HDR makes the SDR desktop look gray and milky instead of brighter. If you don’t have a true HDR display, leave it off and calibrate your SDR image properly for better results.
Can a bad or cheap cable cause washed-out colors?
It can. A low-quality or damaged cable may fail to carry full bandwidth, forcing the signal down to a lower color depth or a limited range. If you’ve ruled out software settings and the washout persists, swap in a certified DisplayPort 1.4 or high-speed HDMI 2.0 cable. It’s a cheap thing to eliminate, and worn cables genuinely do degrade signal quality over time.





























Write Your Review
No reviews yet. Be the first to share your experience!