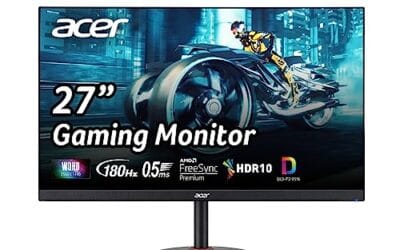
HDR on Windows 11 can look fantastic, but only when the whole chain is set up correctly. The display has to support HDR, the cable and port need enough bandwidth, Windows has to be sending an HDR signal, and the game or video app needs settings that match what your monitor or TV can actually show.
This guide walks through how to enable HDR in Windows 11 for a desktop monitor, laptop panel, or living-room TV. We’ll cover the Windows switches, Auto HDR, Microsoft’s HDR Calibration app, and the small SDR brightness setting that often decides whether the desktop looks normal or washed out. If you’re still deciding what kind of screen makes HDR worth using, our guides to OLED monitors and OLED vs Mini-LED monitors are useful background reading.
Related buying guides: gaming TV picks, HDMI 2.1 monitor picks, Mini-LED monitor picks, 4K gaming monitor guide, and Xbox monitor picks.
What you’ll need
Before you change anything in Windows, make sure you have the right hardware path. HDR is not just a checkbox in the operating system. You’ll need an HDR-capable display, a graphics processor that can output HDR, and a cable or connection that can carry the resolution, refresh rate, color depth, and HDR metadata without falling back to a lower mode.
For most modern gaming PCs, that means a Windows 11 system with a recent NVIDIA GeForce, AMD Radeon, or Intel Arc/iGPU graphics driver, plus a display connected through HDMI 2.0 or newer, DisplayPort 1.4 or newer, USB-C DisplayPort Alt Mode, or Thunderbolt. If you’re using a 4K TV at 120Hz, the connection matters even more. HDMI 2.1 is usually the cleanest path for 4K 120Hz HDR on TVs, while DisplayPort is common on PC monitors. Our HDMI 2.1 vs DisplayPort 2.1 explainer breaks down the differences if you’re comparing ports.
You don’t need a paid utility for the basic setup. Windows 11 includes the HDR controls, and Microsoft’s Windows HDR Calibration app is available through the Microsoft Store. You’ll also want the remote or on-screen display controls for your monitor or TV, because some screens hide HDR behind input-specific modes such as Enhanced HDMI, Game Mode, Deep Color, Input Signal Plus, or PC Mode.
Step 1 — check monitor/TV HDR support
Start with the display itself. Open the monitor’s manual, product page, or on-screen menu and confirm that it supports HDR10. Windows HDR on normal PC displays is built around HDR10, so a label like HDR10, DisplayHDR, HDR Gaming, Dolby Vision compatible, or HDR TV support is the clue you’re looking for. Dolby Vision support on a TV doesn’t automatically mean every PC mode will use Dolby Vision, but HDR10 support is enough for the Windows 11 HDR workflow.
Next, check the exact input you’re using. Many TVs only enable full-bandwidth HDR on certain HDMI ports, often labeled HDMI 3/4, 4K 120Hz, eARC, or Game. Some older 4K TVs support HDR on one or two ports but not all of them. In the TV menu, look for an option such as HDMI Enhanced Format, Ultra HD Deep Color, Input Signal Plus, 4K Enhanced, or HDMI 2.1 Mode. Turn it on for the port connected to your PC.
On a monitor, open the on-screen display and look for HDR, local dimming, color space, or input mode settings. If the monitor has separate DisplayPort versions, set it to the newest stable option available. If it has a USB-C input, confirm that the port supports DisplayPort Alt Mode at the refresh rate you want. Not every USB-C cable is equal, and a charge-only cable won’t carry video at all.
Step 2 — enable HDR in Windows 11 Settings
Once the display side is ready, turn HDR on in Windows 11. Right-click the desktop and choose Display settings, or open Settings, then System, then Display. If you have more than one display connected, click the monitor or TV you want to configure. This part matters because Windows stores HDR settings per display.
Scroll to Brightness and color, then select HDR. On some builds of Windows 11, you’ll see a simple Use HDR toggle directly on the Display page. On others, clicking HDR opens a separate page with more detail. Turn Use HDR on. The screen may go black for a second while the display switches modes. That’s normal.
On the HDR page, look at the Display capabilities section. Windows should list items such as Use HDR, HDR video streaming, Auto HDR, and possibly Wide color gamut. If Use HDR says Supported, you’re in the right place. If it says Not supported, Windows is not detecting an HDR-capable path. That usually points back to the display input mode, cable, driver, adapter, or a dock that can’t pass the signal properly.
If HDR turns on but the desktop looks gray, dim, or too bright, don’t panic. SDR desktop content is being mapped into an HDR output container. That can look strange until you tune the SDR brightness slider in Step 5. It doesn’t mean HDR is broken.
For multi-monitor setups, enable HDR only on the screen where it makes sense. A high-end OLED or Mini-LED main monitor might look great in HDR, while a side IPS productivity monitor may look flatter with HDR enabled. Windows can run mixed SDR and HDR displays, but dragging windows between them can cause brief brightness changes. Annoying, but normal.
Step 3 — turn on Auto HDR for games
Auto HDR is a Windows 11 feature that can add HDR-style brightness expansion to many older DirectX 11 and DirectX 12 games that were originally built for SDR. It doesn’t replace native HDR in games that already support it, but it’s useful for titles that never received a proper HDR option.
To enable it, go back to Settings, System, Display, HDR, then turn on Auto HDR if the option appears. If you don’t see it, first make sure Use HDR is on for the selected display. Auto HDR depends on the display running in HDR mode. Some systems may also require a supported GPU and updated drivers before the option appears.
For games with native HDR settings, use the game’s own HDR mode first. Native HDR usually gives you controls for peak brightness, paper white, black level, UI brightness, and sometimes separate TV or monitor presets. Auto HDR is better treated as a fallback for older games. If both native HDR and Auto HDR seem active, turn Auto HDR off for that title and use the in-game option.
If a specific game looks too bright, has blown-out clouds, or makes dark corners look lifted, don’t assume Windows is the only problem. Many PC games have their own HDR sliders, and some use confusing labels. Peak brightness should usually match your display’s real capability, not the biggest number the menu allows. A 400-nit monitor should not be configured like a 1,000-nit Mini-LED panel.
Step 4 — run Windows HDR Calibration
The Windows HDR Calibration app helps Windows understand your display’s minimum luminance, maximum luminance, and maximum full-frame brightness. Those values affect how HDR content is tone-mapped, especially in games and apps that use the Windows color-management path. It’s one of the easiest ways to make HDR look less random.
Open the Microsoft Store, search for Windows HDR Calibration, install the app, and launch it while your HDR display is selected and Use HDR is enabled. The app will guide you through a few screens where you adjust a pattern until it is barely visible or no longer visible. Follow the on-screen instructions carefully. Don’t crank every slider to the maximum just because the image looks punchier in the moment.
Run the calibration in the display mode you actually use. If you game in the monitor’s HDR Game mode, calibrate in that mode. If your TV has a separate PC Mode and Game Mode, pick the one you plan to keep. Changing local dimming, dynamic tone mapping, contrast enhancer, black level, or picture mode after calibration can change the result, so it’s best to settle the display settings first.
Step 5 — tune SDR brightness / per-game settings
After HDR is enabled and calibrated, tune the setting most people miss: SDR content brightness. In Settings, System, Display, HDR, look for the SDR content brightness slider. This controls how normal SDR desktop apps appear while Windows is outputting HDR. It affects web pages, file windows, many productivity apps, and older games running in SDR.
There is no universal perfect value. In a dim room, a lower setting may look more natural and reduce eye strain. In a bright room, you may need a higher setting so the desktop doesn’t look dull. Start around the middle, open a familiar web page or document, and adjust until white backgrounds look comfortable rather than glowing or gray.
Then handle games one by one. In a game with native HDR, open its display or graphics menu and set the peak brightness to match your display as closely as possible. If the game asks for paper white, that usually controls the brightness of ordinary UI and mid-tone content, not the brightest explosions or sunlight. Many players prefer paper white somewhere around 200 to 300 nits on a typical desktop setup, but your room and display matter.
If a game has black-level or minimum-luminance sliders, adjust them so near-black detail is visible without making the whole image foggy. On OLED displays, you usually want blacks to stay black. On some LCD and Mini-LED displays, pushing black level too low can crush shadow detail. Small moves. Big difference.
If something goes wrong
Windows says HDR is not supported
First, confirm you’re selecting the right display in Settings. Then check the cable, port, and display input mode. Passive adapters, older HDMI cables, office docks, KVM switches, and capture devices can block HDR or reduce bandwidth. Connect the PC directly to the display with a known-good HDMI 2.1 or DisplayPort cable if possible.
The screen looks washed out
Washed-out HDR usually comes from one of three issues: SDR brightness is set poorly, the display is using the wrong picture mode, or the GPU and display disagree on RGB range. Tune the SDR brightness slider first. Then set the display to its HDR Game, HDR Standard, or PC mode. If blacks still look gray, check full versus limited range in the GPU panel and the display’s HDMI black-level menu.
The display flickers or drops signal
Signal dropouts usually mean the link is running near the edge of its bandwidth or stability. Try a shorter certified cable, reduce refresh rate temporarily, or switch ports. On a 4K 120Hz TV, use the HDMI ports labeled for high refresh rate. On a monitor, try DisplayPort instead of HDMI if both are available.
Games look worse with HDR on
Some PC HDR implementations just aren’t great. If a game has native HDR and it looks wrong even after calibration, try disabling HDR in that game and using SDR. If the game relies on Auto HDR, toggle Auto HDR off for comparison and keep the version that looks more natural. You don’t have to use HDR everywhere just because your monitor supports it.
Wrapping up
Enabling HDR on Windows 11 is mostly about getting the order right. Confirm the display and port first, turn on Use HDR for the correct screen, enable Auto HDR only where it helps, run Windows HDR Calibration, then tune SDR brightness and individual game settings. Do that, and HDR stops feeling like a random toggle and starts behaving like a display mode you can trust.
If your screen still doesn’t impress you after that, the limitation may be the panel rather than Windows. Entry-level HDR monitors can accept the signal without delivering deep contrast. A stronger OLED or Mini-LED display will usually make the same settings look more convincing.
For further reading, this Windows 11 Quick Reference guide is the most relevant option from the provided list.

Pros
- Laminated 11 x 8.5 inch surface resists coffee spills and repeated handling at a desk
- Pamphlet binding lays flat next to a keyboard without a spine fighting back
- Targets Windows 11 specifically, useful for users migrating off Windows 10
- Lightweight at 0.01 inch thickness, slips into a laptop sleeve or binder pocket
Cons
- Limited owner feedback at time of writing, so quality of content is hard to verify
- Static print cannot track Windows 11 feature updates like Copilot or new Settings layouts
- No feature list or table of contents provided in source data to confirm coverage depth
This is a budget-tier laminated quick reference pamphlet for Windows 11, published by TeachUcomp. At 11 x 8.5 inches and roughly 0.01 inch thick, it targets casual users, office staff, and trainers who want a physical shortcut and instructions card at the desk rather than a full printed manual or ebook.
The defining feature is the laminated pamphlet format itself. Cards in this tier typically pack keyboard shortcuts, Start menu navigation, File Explorer tips, and Settings paths onto both sides of a single sheet. Based on the format and TeachUcomp's other reference guides, expect dense two-column layouts rather than screnshots or step-by-step tutorials.
Trade-offs are typical at this tier. Source data lists no features, no page count beyond a pamphlet binding, and no table of contents, so buyers cannot confirm which Windows 11 areas are covered before purchase. Owner feedback is also limited at time of writing, which makes content accuracy and print quality hard to validate independently.
Buy this if you want a wipe-clean desk card for Windows 11 keystrokes and Settings paths in a training room, help desk, or shared workstation. Skip this if you need screnshots, dep tutorials on Copilot and virtual desktops, or a reference that will stay current across Windows 11 feature updates.
Format: Pamphlet binding in a laminated sheet layout, listed under the Book product group. The laminated finish is designed for repeated handling, wipe-down cleaning, and desk-side reference rather than long-form reading, which matches how similar TeachUcomp guides are structured.
Dimensions: 11 x 8.5 x 0.01 inches, matching US Letter footprint. This size fits inside a standard three-ring binder sleeve, a laptop sleeve pocket, or flat under a monitor stand. The 0.01 inch thickness indicates a single laminated sheet rather than a multi-page booklet.
Content scope: Titled as a quick reference covering instructions, tips, and shortcuts for Windows 11. Specific topics, keystroke counts, and coverage of features like Snap Layouts, Widgets, or Copilot are not specified in the source data, so verify contents with the publisher before ordering in bulk.
Publisher: TeachUcomp, Inc., a training publisher that produces similar laminated quick reference guides for Microsoft Office, Windows, and QuickBooks. Edition, revision date, and ISBN details beyond the ASIN 1958446025 are not specified in the source data.