

You bought a monitor that says HDR on the box, flipped a Windows toggle, and now you’re staring at a washed-out desktop wondering if it’s even working. That’s the whole problem with high dynamic range on a PC. It’s easy to enable and surprisingly hard to confirm. This walkthrough shows you how to check HDR on a monitor on your PC properly, from verifying the panel actually supports it to reading Windows’ own status page and calibrating so bright highlights pop without crushing shadow detail. If you’re still shopping and want a panel that does HDR justice, our roundup of the best 1440p gaming monitor picks and the best 4K G-Sync monitor guide both flag which models carry real DisplayHDR certification instead of a marketing sticker.
Here’s the short version of why this matters. A lot of budget displays advertise HDR10 support but can’t hit the brightness or contrast needed to show any benefit. Checking properly saves you from chasing a setting that was never going to look good. Let’s go through it step by step.
What you’ll need
Not much, which is the good news. You need the monitor itself, a PC running Windows 10 (version 1803 or later) or Windows 11, and a graphics card that supports HDR output. Most GPUs from the last several years qualify, including anything Nvidia GTX 950 and up or the AMD Radeon RX 400 series onward. You’ll also want the right cable, either DisplayPort 1.4 or HDMI 2.0 at minimum, since older HDMI 1.4 links choke on HDR at higher refresh rates. Grab your monitor’s spec sheet too. You’ll reference it more than once.
One quick word on connections before you start. HDR is bandwidth-hungry, and the combination of resolution, refresh rate, and color depth all draw from the same pipe. A 1440p panel at 144Hz with 10-bit color needs far more headroom than a 1080p screen at 60Hz, and if the cable can’t carry it the system quietly falls back to 8-bit or a lower refresh. That fallback is invisible unless you go looking for it, which is exactly why the verification step later matters. Keep the DisplayPort cable that shipped with the monitor within reach, since it’s rated for the panel’s full spec.
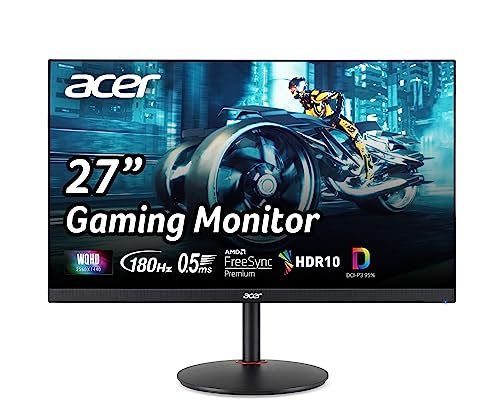
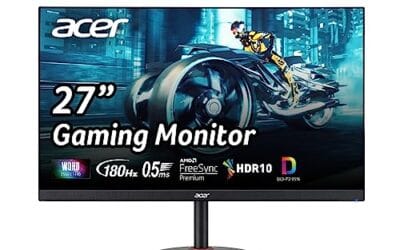
If you’re evaluating a new display as part of this, a modern IPS panel like the Acer Nitro 27″ WQHD gives you a useful reference point. It runs $169.99, carries a 4.8 rating, and pushes a 2560 x 1440 resolution up to a 180Hz refresh with 95% DCI-P3 color coverage over its DisplayPort 1.2 and dual HDMI 2.0 inputs. Wide color gamut like that DCI-P3 figure is a big part of what makes HDR content look richer, so it’s a handy yardstick when you’re comparing what your current screen can do.
Pros
- 1440p 180Hz IPS panel via DisplayPort 1.2 hits the current price/perf sweet spot
- 95% DCI-P3 gamut is uncommon at this tier, useful for content viewing
- Full ergonomic stand: 4.7 inch height, 360 swivel, plus/minus 90 pivot, VESA 100
Cons
- Limited owner feedback at time of writing, long-term panel uniformity unverified
- HDMI 2.0 caps at 144Hz; only DisplayPort 1.2 unlocks the full 180Hz refresh
- No USB hub and 2W stereo speakers are strictly a bep-only backup at this tier
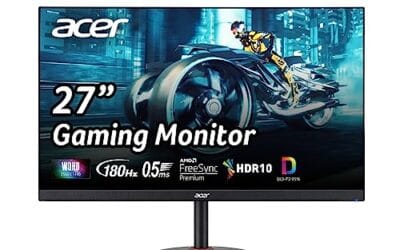
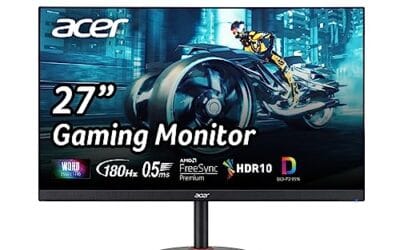
The Acer Nitro XV271U M3bmiiprx is a budget-oriented 27inch 1440p IPS gaming monitor targeting builders stepping up from 1080p high refresh. With 2560x1440 resolution, 180Hz over DisplayPort, and FreeSync Premium, it fits users pairing an RTX 4060,X 4060 Ti, or RX 7600 XT class GPU running competitive and AA titles at medium to high settings.
The defining feature is the 180Hz IPS panel with a claimed 0.5ms GtG response, paired with 95% DCI-P3 coverage. In practice, IPS panels at this tier typically deliver around 300to 350 nits SDR brightness and moderate contrast near 1000:1, so blacks will lift in dark rooms. FreeSync Premium adds low framerate compensation, useful when demanding titles drop below 60 FPS.
Trade-offs are typical for the segment. HDMI 2.0 bandwidth caps refresh at 144Hz, so consoles and older GPUs will not reach the full 180Hz ceiling. HDR tier, panel bit depth, and factory calibration are not specified in the listing, and there is no USB hub. The 2W speakers are functional only as a fallback.
Buy this if you want a 1440p 180Hz IPS panel with a full ergo stand and 95% DCI-P3 for mixed gaming and casual creative work. Skip this if you need verified HDR performance, USB-C daisy chaining, or OLED-level contrast for dark-room cinema use.
Panel and Resolution: 27 inch WQHD IPS at 2560x1440 gives a 0.233m pixel pitch, sharp enough that antialiasing needs drop versus 1080p 27 inch panels. IPS delivers wide viewing angles suited to desk sharing or off-axis reference monitors during editing sessions.
Refresh and Response: 180Hz refresh is available only through DisplayPort 1.2; HDMI 2.0 tops out at 144Hz due to bandwidth limits. Acer lists 1ms GtG typical and up to 0.5ms GtG at aggressive overdrive, though inverse ghosting is common at max overdrive on IPS panels in this bracket.
Color and HDR: 95% DCI-P3 coverage is the standout spec, wider than most sub-tier IPS panels that sit near 90% sRGB. HDR certification level, peak brightness, and local dimming are not specified in the source, so treat HDR as a compatibility mode rather than a true HDR experience.
Ports and Ergonomics: 1 DisplayPort 1.2, 2 HDMI 2.0, and audio out cover a PC plus one console. The stand offers minus 5 to 25 degree tilt, 4.7 inch height range, 360 degree swivel, and plus/minus 90 degree pivot, with 100x100 VESA for monitor arms. FreeSync Premium is confirmed, G-SYNC compatibility is not listed.
Step 1: Confirm your monitor actually supports HDR
Before you touch any Windows setting, find out what your panel is really capable of. Pull up the model’s spec page on the manufacturer’s site and look for two things: an HDR standard (HDR10 is the baseline) and a VESA DisplayHDR tier. DisplayHDR 400 is entry level and honestly barely qualifies as HDR, since it only requires 400 nits peak brightness and doesn’t mandate local dimming. DisplayHDR 600, 1000, and the True Black OLED tiers are where the effect gets convincing.
Why does this step come first? Because if your monitor tops out at DisplayHDR 400 or lists no tier at all, no amount of tweaking will make highlights genuinely bright. You’ll spend an hour fighting Windows for a payoff that isn’t there. Check the panel type while you’re at it. VA and OLED handle the deep blacks HDR wants better than a basic IPS with edge-lit backlighting. If your display comes up short, our best gaming monitor deals page tracks discounts on certified panels, and the best 27-inch 1440p monitor roundup lists sizes that fit most desks.
Step 2: Check your cable and connection
HDR needs the bandwidth to carry the extra color and brightness data, and the wrong cable silently kills it. Plug your monitor into the graphics card, not the motherboard’s video output, unless you’re running an integrated setup on purpose. Use DisplayPort where you can. It’s the most reliable route for HDR at high refresh rates on a PC.
If you’re on HDMI, confirm it’s an HDMI 2.0 port or newer on both ends. The Acer Nitro’s dual HDMI 2.0 inputs, for reference, handle 1440p HDR signals fine, while an older HDMI 1.4 cable would force the system to drop color depth or refresh to fit. One more thing: some monitors only enable full HDR on a specific input, so peek at the manual if one port behaves differently from another. A bad or under-spec cable is the single most common reason HDR looks broken.
Step 3: Enable HDR in Windows display settings
Now the actual toggle. On Windows 11, right-click the desktop, choose Display settings, pick your monitor if you run more than one, and switch on Use HDR. On Windows 10 the path is Settings, System, Display, then the Use HDR slider (older builds call it Windows HD Color). The screen may flash black for a second as the signal renegotiates. That’s normal.
You’ll probably notice the desktop looks dimmer or a little gray right after enabling it. Don’t panic. That’s Windows remapping standard content into the HDR container, and it’s fixable in the calibration step. If the Use HDR toggle is missing or grayed out entirely, jump to the troubleshooting section below, because that points to a driver, cable, or panel-support issue rather than a setting you can flip.
Step 4: Verify HDR is actually active
This is the step most people skip, and it’s the one that answers your real question. Back on that same Display settings page in Windows 11, click your monitor’s name to open its detail page and look under Display information or the HDR section. It reports whether HDR is supported and currently on, and it lists the peak brightness and color space the system detected. Windows 10 users can click the HDR link on the display page for the same readout.
Want a real-world confirmation? Open a native HDR video. YouTube tags HDR clips with an HDR badge in the quality menu, and if your setup is working the highlights, like sunlight or neon, will look noticeably brighter than the rest of the frame instead of uniformly flat. You can also run the free DisplayHDR Check app from the Microsoft Store, which cycles brightness patterns your panel either reproduces or clips. Between the Windows readout and a live clip, you’ll know for certain. If highlights still look dull on a screen rated for it, that hints your panel is more of a mainstream gaming display than a true HDR performer, and the best 360Hz gaming monitor guide explains why high-refresh panels often trade peak brightness for speed.
Step 5: Calibrate for the best result
HDR that’s on but uncalibrated often looks worse than a good SDR image, so finish the job. Download the Windows HDR Calibration app from the Microsoft Store. It walks you through three calibration patterns that set the minimum black level, maximum brightness, and color saturation your specific panel can show, then saves an ICC-style profile Windows uses going forward. Takes about two minutes.
The other lever is the SDR content brightness slider, found right below the Use HDR toggle. Because desktop apps, browsers, and most of Windows still render in SDR, this slider controls how bright that everyday content appears inside the HDR signal. Nudge it until your desktop looks natural, usually somewhere in the middle. Adjust it in the daylight and lighting you actually use the PC in. Get these two things right and HDR stops looking washed out and starts doing what it’s supposed to.
Troubleshooting common issues
Even a supported setup hits snags. Here are the ones that come up most, and how to clear them.
The HDR toggle is grayed out or missing
This almost always means Windows doesn’t see an HDR-capable path. Update your GPU driver first, since a stale driver frequently hides the option. Then swap to a DisplayPort or HDMI 2.0 cable and reseat both ends. If you’re using an adapter or a KVM switch, bypass it and connect straight to the card. Confirm the monitor’s own firmware or OSD has HDR enabled too, because some panels ship with it switched off in the menu.
Colors look washed out or gray
That faded desktop is Windows tone-mapping SDR content, and it means you skipped calibration. Run the Windows HDR Calibration app and set the SDR content brightness slider as described in step 5. If it’s still off, check that the monitor’s OSD picture mode isn’t locked to a preset that overrides HDR, and turn off any dynamic contrast or eco setting fighting the signal.
Games won’t switch into HDR
Enabling HDR in Windows doesn’t force every game into it. Open the game’s own video or display options and turn HDR on there separately. For older titles that predate HDR menus, Windows 11’s Auto HDR feature can add it, found under the HDR settings page. Run the game in exclusive fullscreen, not borderless windowed, since borderless sometimes routes through the SDR desktop and blocks true HDR output.
The screen is too dim or flickers
A dim HDR image usually traces back to a low-tier panel or a wrong brightness calibration, so revisit both. Flicker points at a bandwidth problem: drop the refresh rate a notch or switch to DisplayPort, then raise it again once the link is stable. On some monitors, variable refresh and HDR together cause issues, so toggle FreeSync or G-Sync off briefly to isolate the cause.
Wrapping up
Checking HDR on your PC comes down to a simple chain: confirm the panel supports it, feed it the right cable, flip the Windows toggle, verify status on the display detail page, and calibrate so the picture looks right. If any link in that chain is weak, the whole thing falls apart, which is why so many people think their HDR is broken when it’s really just a missing calibration or an under-spec cable. Work through the five steps in order and you’ll know exactly what your display is doing. Bookmark the Windows display detail page, since it’s the fastest way to spot-check HDR status any time you swap a cable, update a driver, or move the monitor to a different input down the road.
If this exercise revealed that your current monitor tops out at DisplayHDR 400 or has no certification at all, that’s useful information, not a dead end. It just means an upgrade is where real HDR lives. For a starting point on a budget, our best gaming monitor under $400 guide highlights models that hit brighter HDR tiers without draining your wallet, and you’ll walk away knowing what to look for instead of guessing at a spec sheet.




























Write Your Review
No reviews yet. Be the first to share your experience!