

Sizing a power supply is one of those build steps people either overthink or skip entirely, and both mistakes cost you. Buy too small and your rig crashes under load or won’t post at all. Buy a 1000W unit for a 350W system and you’ve wasted money while running the PSU in its least efficient zone. Calculating PSU wattage correctly means adding up what your parts actually draw, adding a safety margin for spikes and future upgrades, then matching that to a supply with the right efficiency and connectors. This walkthrough does it step by step, using real numbers you can pull from your own components.
If you’re already shopping and want to see how sizing plays out in real builds, our guides to the best modular PSU for a gaming PC in 2026 and the best PSU for the 9800X3D pair well with the math below. Let’s get your number.
What you’ll need
You don’t need tools, just information and a little time. Gather the exact model of your CPU and GPU, since those two parts dominate your total. Know your RAM count, how many drives you’re running, and roughly how many fans and RGB strips are in the case. Have a browser open for a reputable PSU calculator, and grab a notepad. If you’re planning an overclock or a future GPU swap, note that too, because it changes your headroom target. That’s the whole prep list.
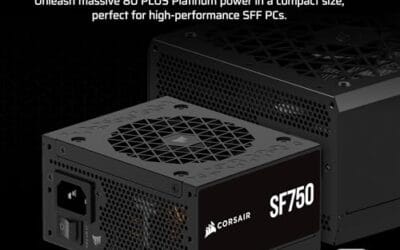
For small-form-factor builders the connector and size story matters as much as raw wattage. The Corsair SF750 (2024) is a fully modular SFX unit at $159.99 with a 4.1 rating, and it’s 80 Plus Platinum, ATX 3.1 compliant, and PCIe 5.1 ready with a bracket included. That ATX 3.1 and PCIe 5.1 support is the part worth flagging early: modern GPUs pull sharp transient spikes, and a unit built to the newer spec handles those swings without tripping protection. Keep it in mind as you calculate, because the standard your PSU meets is as important as the number on the box.

Pros
- ATX 3.1 compliant with PCIe 5.1 support, resists transient spikes from RTX 50 and RX 9000 series GPUs.
- Zero RPM Mode eliminates fan noise at low and medium loads, a real advantage in acoustically sensitive SFF builds.
- Fully modular design with short SFX cables reduces cable management friction in sub-10-liter cases.
- 105 degree C Japanese capacitors indicate quality component selection typical of high-tier SFX units.
Cons
- Limited owner feedback at time of writing; real-world noise, ripple, and transient performance are unverified by community data.
- Short SFX cables are unsuitable for mid-tower or full-tower cases without aftermarket cable extensions.
- 750W ceiling may fall short for extreme SFF builds pairing a 300W-plus TGP GPU with a high-core-count CPU.
The Corsair SF750 (2024) is a high-end SFX PSU targeting SFF builders who need substantial wattage in a compact footprint. With 80 Plus Platinum certification and ATX 3.1 compliance, it sits at the upper tier of the SFX market, aimed at builders pairing it with current-gen discrete GPUs inside sub-10-liter cases.
The most defining specification here is ATX 3.1 compliance combined with PCIe 5.1 readiness. This means the unit is rated to handle the sharp transient power spikes that RTX 50 and RX 9000 series GPUs can produce, where non-compliant PSUs may trigger overcurrent protection. At 750W, it covers most single-GPU SFF configurations without derating concerns.
The honest trade-off is the review data gap. At time of writing, no substantial owner feedback exists to validate Corsair's noise and ripple claims under real load. The Zero RPM Mode claim and 92mm fan acoustics are based on spec sheets only. Buyers should also note that SFX cable lengths are intentionally short and will not reach connectors in mid-tower or larger cases without extensions.
Buy this if you are building an SFF PC around a single high-TGP GPU and need confirmed ATX 3.1 compliance in a modular SFX unit. Skip this if you want a large ATX case build, need more than 750W for a dual-component high-wattage system, or require extensive owner testing before purchasing.
Form Factor and Mounting: This is a standard SFX form factor PSU, not SFX-L. Verify your case specifies SFX compatibility before purchasing. An SFX-to-ATX bracket is included, allowing installation in ATX-footprint cases, though short cable lengths will require extensions in anything larger than a compact SFF enclosure.
Power Standard and Connector: ATX 3.1 compliant with PCIe 5.1 readiness. The unit supports the 12V-2x6 connector standard, relevant for RTX 40 and RTX 50 series GPUs as well as AMD RX 7000 and RX 9000 cards with high transient draw. Non-ATX 3.1 units can trigger OCP shutdowns above 150 percent peak load spikes.
Efficiency and Thermal Operation: 80 Plus Platinum certification indicates roughly 92 percent efficiency at 50 percent load under 115V. The 92mm PWM fan uses a fluid dynamic bearing and Zero RPM Mode activates at low loads, which in SFF cases where airflow is restricted can noticeably reduce system acoustic output.
GPU Wattage Pairing: At 750W, this PSU pairs appropriately with GPUs up to approximately 300W TGP when combined with a mid-range CPU. For a 320W-plus TGP GPU alongside a 65W-plus CPU, headroom becomes tight and a higher-wattage SFX unit should be considered instead.
Step 1: Find your CPU and GPU power draw
Start with the two parts that matter most. Look up your CPU’s rated power, sometimes listed as TDP but more usefully as its maximum turbo power or PPT. A modern mainstream CPU might pull 65W to 105W sustained, while a high-end chip pushing all cores can hit 150W to 230W. Write down the peak figure, not the base TDP, because peak is what your PSU has to survive.
Now the GPU, which is usually the single biggest draw in a gaming build. Find the card’s total board power, often called TBP or TGP. A midrange card sits around 200W to 250W, while a top-tier card can demand 350W to 450W or more during transient spikes. Add those two numbers together first. A 105W CPU next to a 320W GPU already puts you at 425W before anything else is counted, which tells you a 550W unit is cutting it close.
Where do you get accurate figures? Manufacturer spec pages list the official numbers, but independent review sites that measure real power at the wall are more honest, because factory-overclocked cards and unlocked CPUs routinely exceed the paper rating. If your card is a partner model with a beefed-up cooler and a raised power limit, use the higher measured figure, not the reference spec. Ten or twenty watts of difference on paper can become fifty watts of real draw once a manufacturer opens up the board power. When in doubt, round the peak up rather than down.
Step 2: Add the rest of the system
The supporting cast is smaller but it adds up. Budget roughly 5W per stick of RAM, so a 32GB two-stick kit is about 10W. Each SATA SSD or hard drive draws 3W to 8W, and an NVMe drive under load can hit 7W to 10W. Case and CPU cooler fans run 1W to 3W each, and RGB strips or an AIO pump add another 5W to 20W depending on the setup. Motherboard overhead, chipset, VRMs, USB, and networking usually lands around 30W to 80W for a mainstream board.
Tally it honestly. A typical build might add 10W of RAM, 15W across two drives, 20W of fans and lighting, and 50W of board overhead, so about 95W on top of your CPU and GPU. Using the earlier 425W example, you’re now at roughly 520W of real component draw. That’s your baseline system power, and it’s the foundation the next step builds on.
A couple of extras deserve a mention if they apply to you. USB devices that pull bus power, external drives, capture cards, and add-in networking or sound cards each nibble a few more watts. So does a beefy custom-loop pump or a bank of high-static-pressure fans running full tilt. None of these alone changes your tier, but three or four of them together can add 30W to 40W. If your build is loaded with peripherals, pad the baseline slightly rather than pretending they draw nothing.
Step 3: Apply a headroom margin
Never buy a PSU rated exactly at your calculated draw. Two reasons. First, transient spikes from modern GPUs can briefly exceed rated board power by a wide margin, and a supply running at 100 percent load will stumble. Second, power supplies are most efficient and run coolest and quietest at 40 to 60 percent load, so leaving headroom actually improves longevity and reduces fan noise. The standard advice is to size your PSU so your peak draw lands around 50 to 60 percent of its rated capacity.
Take your baseline and multiply by about 1.5 to 1.8. Our 520W example times 1.6 lands at roughly 830W, which points you at an 850W unit sitting comfortably in its efficient band. If you’re planning to overclock or drop in a hungrier GPU later, lean toward the higher multiplier. Builders chasing every megahertz should read our notes on the best 1000W PSU for overclocking, since sustained all-core loads eat headroom fast.
Think of headroom as insurance against three things at once: the momentary spikes that paper math never captures, the slow capacity fade every PSU suffers as its capacitors age over years of use, and the upgrade you haven’t planned yet but probably will. A supply sized with real margin still has plenty of runway when you swap in a thirstier card two years from now. That said, don’t run away with the multiplier and land on a 1200W unit for a 520W build. The aim is a healthy cushion, not a comically oversized supply that spends its whole life loafing below its efficient zone.
Step 4: Verify with a reputable calculator
Now sanity-check your hand math against a trusted online PSU calculator. Enter your exact CPU, GPU, drive count, RAM, fans, and any overclock, and it’ll spit out a recommended wattage. Good calculators account for capacitor aging and transient behavior, so their number is often a little higher than a naive parts sum. If your manual total and the calculator land within 50W to 100W of each other, you can trust the result. If they diverge wildly, you probably missed a part or used base TDP instead of peak power somewhere.
Treat the calculator as confirmation, not gospel. It doesn’t know the specific quality of your chosen unit or how aggressive your GPU’s spikes are. Use it to catch mistakes and to settle borderline cases where you’re torn between two capacity tiers. When both methods agree, round up to the nearest common size, which is usually 550W, 650W, 750W, 850W, or 1000W.
Step 5: Match efficiency, connectors, and form factor
Wattage isn’t the only spec that matters. Efficiency rating tells you how much wall power becomes usable DC and how much becomes waste heat, so an 80 Plus Gold or Platinum unit runs cooler and costs less to feed than a basic model. Confirm the connectors match your GPU too, since newer cards use the 12V-2×6 connector and you want a supply built for that rather than a fistful of adapters. ATX 3.1 units are designed around exactly these transient loads.
Form factor closes the loop. A standard ATX case takes an ATX PSU, but a compact build needs SFX or SFX-L, which is where a small platinum unit earns its place. If you’re squeezing a capable rig into a tiny chassis, our roundup of the best 1000W PSU for small form factor shows how much power fits in the little enclosures now. Match wattage, efficiency, connectors, and size together and you’ve got the right supply.
Cable count and modularity round things out. A fully modular unit lets you attach only the cables you need, which keeps a small case tidy and airflow clean, while a non-modular supply hangs every cable whether you use it or not. Check that the PSU includes enough PCIe and SATA connectors for your parts before you buy, because running short means adapters or a return. For a gaming build with a single power-hungry card, confirm it ships with the native 12V-2×6 cable rather than a bundled splitter. These details don’t change your wattage number, but they decide whether the install goes smoothly or turns into a cable-management headache.
Troubleshooting common issues
My system reboots under load even though the wattage seems fine
This is the classic transient-spike symptom. Your average draw might sit well under the PSU rating, but a GPU spike lasting a millisecond can trip overcurrent protection on an older or borderline unit. Either move up a capacity tier or switch to an ATX 3.1 supply built to ride out those swings. It’s not always that your PSU is undersized on paper. It’s that the spec it meets can’t handle modern spikes.
I used TDP and my numbers came out low
Base TDP is a thermal figure, not a peak power figure, and modern chips draw far more than TDP when they boost. If your calculation feels suspiciously small, that’s usually the culprit. Redo the CPU and GPU lines using maximum turbo power and total board power instead. The gap between TDP and real peak draw can be 50 percent or more on high-end parts.
Is a bigger PSU always safer?
Bigger isn’t harmful, but past a point it’s wasteful. A vastly oversized unit spends its life below its efficient load band, which can mean slightly worse real-world efficiency and money spent on capacity you’ll never use. The goal is peak draw near 50 to 60 percent of rated wattage, not the absolute largest number you can afford.
Does 80 Plus rating affect the wattage I need?
Not directly, since the rating on the label is the DC output your parts can draw regardless of efficiency tier. What efficiency changes is how much wall power the unit wastes as heat and how hard its fan has to work. A higher-rated Gold or Platinum unit runs cooler and quieter at the same load, so it tends to last longer and cost less to run. Pick your wattage first, then choose the best efficiency tier your budget allows at that capacity.
Wrapping up
Calculating PSU wattage comes down to five honest steps: peak CPU plus GPU draw, the rest of the system, a 1.5 to 1.8 headroom multiplier, a calculator cross-check, then matching efficiency, connectors, and form factor. Do that and you’ll land on a supply that runs cool, quiet, and stable for years instead of one that crashes under a spike or wastes money on idle capacity. Write your number down, round up to a common tier, and buy the quality unit that fits. Your build will thank you.


























Write Your Review
No reviews yet. Be the first to share your experience!