

Your prebuilt has gotten sluggish, it’s throwing errors, or you just want a clean slate before selling it. Reinstalling Windows fixes a huge range of software gremlins that no amount of cleanup utilities will touch. The good news is that on a prebuilt from a major brand, the process is well-worn and forgiving. You don’t need to be a technician. You need a USB stick, an hour or so, and a little patience. This walkthrough covers a full clean reinstall of Windows 11, the kind that wipes the drive and gives you a fresh start. If your machine came from one of the systems in our budget prebuilt roundup, the steps below map cleanly onto it.
What you’ll need
Gather a few things before you start. You’ll want a USB flash drive of at least 8GB that you don’t mind erasing, a working internet connection, and a second device (phone or laptop) to download the installer if this PC is the one being wiped. Grab your Windows product key situation sorted too, though most prebuilts store a digital license in the motherboard firmware, so you often won’t need to type anything. Back up your files first. A clean install deletes everything on the target drive, so copy documents, photos, and game saves to an external drive or cloud storage before you begin. That’s the step people skip and regret.
It also helps to note your prebuilt’s model and any special drivers, particularly for Wi-Fi and the graphics card. Write down the brand and model number now. You’ll thank yourself in Step 5.

One more decision before you dive in: full clean install versus the built-in reset. Windows has a “Reset this PC” option that reinstalls the OS while keeping the process simple, and for mild slowdowns that’s often enough. A clean install from USB goes further, wiping every leftover partition and any bloatware the manufacturer preloaded, which is why it’s the better choice before selling the machine or when it’s genuinely misbehaving. This guide covers the thorough USB route.
Step 1: Back up and create the installation media
On a working PC, head to Microsoft’s official Windows 11 download page and grab the Media Creation Tool. Run it, accept the license, and choose “Create installation media for another PC.” Select your language and the 64-bit edition, then pick your USB drive as the destination. The tool downloads roughly 5GB and writes a bootable installer automatically. This takes 15 to 30 minutes depending on your connection, so let it run.
While that’s cooking, do your final backup pass. Double-check that your important folders are safely copied elsewhere. Sign out of apps tied to a device limit, like some music or design software, so you don’t burn an activation. Once the USB tool reports “Your USB flash drive is ready,” you’ve got your media. Set it aside and move to the machine you’re reinstalling.
Think through the easy-to-forget items while you’re at it: browser bookmarks and saved passwords, two-factor authenticator seeds, license keys for paid software, and the AppData folders some games use for saves. A password manager and browser sync cover most of it, but authenticator apps often need a manual transfer before the wipe. Handle those now. Recovering a locked-out account after the fact is far more painful than a two-minute export today.
Step 2: Boot from the USB drive
Plug the USB stick into the prebuilt, ideally into a rear USB port directly on the motherboard rather than a front-panel one, since rear ports are more reliable during boot. Restart the PC and tap the boot-menu key repeatedly as it powers on. That key is usually F12, F11, F8, or Esc depending on the brand, and many prebuilts flash it briefly on the startup logo. If you miss it, just restart and try again.
In the boot menu, select your USB drive. It’ll often appear twice, once as a regular entry and once prefixed with “UEFI.” Choose the UEFI version for a modern Windows 11 install. The screen should go black, then show the Windows setup logo. If the PC boots straight into your old Windows instead, the boot order didn’t take, so restart and make sure you picked the USB entry, not the internal drive.
Step 3: Run setup and wipe the drive
Once Windows Setup loads, pick your language and keyboard layout, then click “Install now.” When it asks for a product key, click “I don’t have a product key.” Your prebuilt’s digital license reactivates automatically after install, so there’s nothing to type. Choose the Windows edition that matches what shipped on the machine, usually Home or Pro, then accept the license terms.
Now the important choice. Select “Custom: Install Windows only (advanced),” not the Upgrade option. You’ll see a list of drives and partitions. This is where you erase the old install. Identify your main drive by its size, then delete each partition on it one by one until it shows as a single block of “Unallocated Space.” Be careful here. If you have a second drive with backups on it, do not touch that one. Once your target drive is unallocated, select it and click Next. Setup creates fresh partitions and starts copying files.
A quick note on identifying drives, since the partition screen labels them Drive 0, Drive 1, and so on rather than by friendly name. Match them by capacity. A 500GB boot SSD shows around 465GB of usable space, and a 1TB backup drive shows near 931GB. When in doubt, unplug the second drive physically before you start so there’s only one option on screen. That single move has saved countless people from wiping the wrong disk.
Step 4: Complete the Windows setup screens
The PC reboots a couple of times on its own during file copying. Leave the USB in until Windows loads to the desktop-setup phase, then you can remove it. You’ll land in the out-of-box experience, the blue setup screens. Pick your region, keyboard, and network. If your Wi-Fi adapter’s driver isn’t recognized yet, plug in an Ethernet cable for now, you’ll install the proper driver in the next step.
Sign in with your Microsoft account to sync the digital license and settings, or choose an offline account if you prefer a local login. Skip the optional add-ons you don’t want, decline the ones you’re unsure about, and set your privacy toggles. In a few minutes you’ll reach a clean Windows 11 desktop. It’ll feel snappy because there’s nothing on it yet. That’s the point.
Take a moment here to resist the urge to reinstall everything at once. Get the base system stable and updated first, in Step 5, before you pile apps back on. A clean desktop with correct drivers is the foundation. Loading it up with a dozen programs before the drivers are sorted just muddies the water if something acts up later.
Worth knowing: Windows 11 setup pushes you toward a Microsoft account by default, and on some builds it hides the offline-account path. If you’d rather run local, look for a “Sign-in options” link or disconnect from the network before this screen appears. Either way, remember that the digital license lives in your motherboard, not your account, so a local login won’t cost you activation. Pick whichever fits how you use the machine.
Step 5: Install drivers and updates
A fresh install ships with generic drivers, so your job now is to get the real ones. Open Settings, go to Windows Update, and run it two or three times until it stops finding anything, rebooting when asked. Windows Update pulls a surprising number of correct drivers on its own. Next, visit your prebuilt maker’s support page, enter your model number, and download the chipset, network, and audio drivers specific to that machine.
For gaming rigs, grab the graphics driver straight from Nvidia or AMD rather than relying on the generic one, since the vendor package unlocks full performance and features. If you’re not sure which components you have, our guides to the best 1080p prebuilts and the best AMD prebuilt gaming PCs break down the typical parts inside these systems, which helps you know what drivers to hunt for. Once drivers are in and updates are done, reinstall your apps and restore your backed-up files. You’re finished.
Do a quick health check before you call it done. Open Device Manager and confirm there are no yellow warning triangles next to any device, which would flag a missing driver. Verify activation under Settings, run a reboot, and make sure sound, network, and display all behave. Set a System Restore point now so you’ve got a clean rollback target. Then, and only then, start loading your everyday programs back onto a machine that’s genuinely fresh.
Troubleshooting common issues
The PC won’t boot from the USB drive
If the boot menu never appears or skips past the USB, enter the BIOS instead (usually Del or F2 at startup) and look for Secure Boot and Fast Boot settings. Leave Secure Boot on for Windows 11, but temporarily disabling Fast Boot often makes the USB detectable. Also confirm the stick was written as UEFI, not legacy. Re-creating the media with the official tool usually resolves a stubborn stick.
Setup says the drive can’t be installed to
This message typically means the drive is in the wrong partition style or the SATA/NVMe mode changed. In the Custom install screen, deleting all partitions to unallocated space and letting Windows recreate them fixes most cases. If a specific drive still refuses, check the BIOS storage mode is set to AHCI or the NVMe default your board expects.
Windows didn’t reactivate after install
Give it 24 hours connected to the internet and signed into the Microsoft account you used before, since digital licenses sometimes reactivate on a delay. If it’s still not activated, run the Activation troubleshooter in Settings and choose “I changed hardware on this device recently.” For a genuine prebuilt that never had its board swapped, activation almost always sorts itself out.
Wi-Fi or sound doesn’t work after install
That’s a missing driver, not a hardware fault. Connect via Ethernet, run Windows Update fully, then install the network and audio drivers from your prebuilt maker’s support page for your exact model. A reboot afterward usually brings both back to life.
Wrapping up
A clean Windows reinstall is one of the most satisfying maintenance jobs you can do on a prebuilt. It clears out years of software clutter, resets performance, and gives you a machine that feels new without spending a dime. The whole run takes about an hour of active attention, most of which is just waiting on progress bars. Keep your backups until you’ve confirmed everything works, and hold onto that USB installer, it’s handy the next time a system needs a refresh.
If your current tower is genuinely long in the tooth and a reinstall only masks aging hardware, it might be time to look at newer options rather than nurse the old one along. Compact, ready-to-run systems like the abytespark Intel Core i7 desktop ($499.99, rated 4.4) show how affordable a fresh office or light-gaming tower has become. For deeper comparisons, our 1440p prebuilt guide covers where the money’s best spent.
Pros
- 512GB SSD bot drive avoids the HDD bottleneck common in budget prebuilts
- RX 590 8GB VRAM buffer handles 1080p textures better than 4GB budget cards
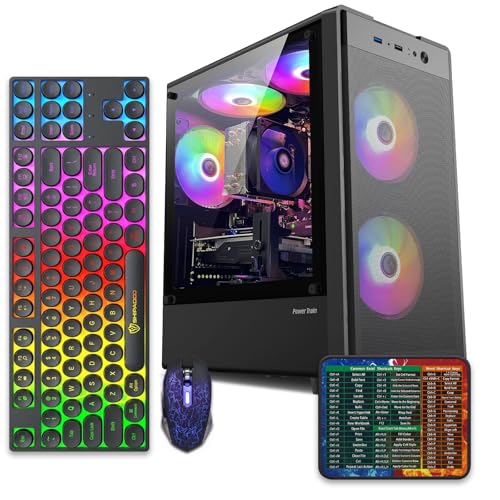
- Complete bundle with RGB peripherals means no extra spend to start using
- Genuine Windows 11 Home 64-bit preinstalled, no activation hassle out of box
Cons
- Limited owner feedback at time of writing, verify seller reputation before purchase
- Core i7-4770 is Haswell era LGA150, no upgrade path and weak IPC versus modern CPUs
- Windows 11 on 4th-gen Intel is unsupported by Microsoft and may miss feature updates
- No CD/DVD-ROM support and RAM/GPU generation limits future workload headroom
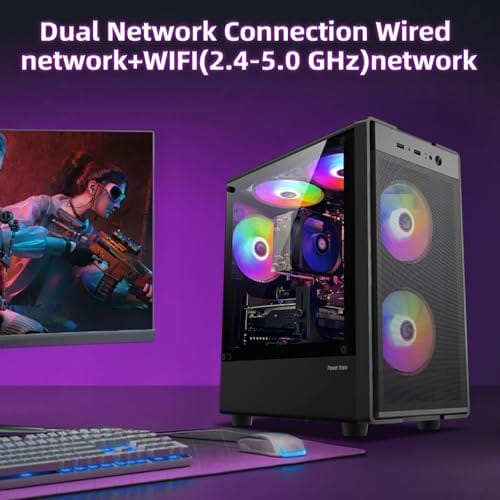
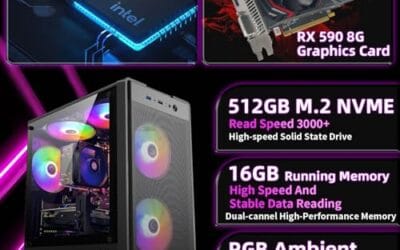
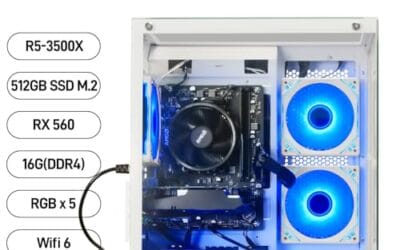
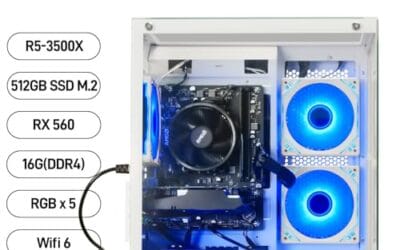
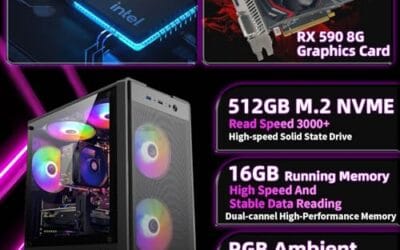
This is an entry-tier prebuilt tower built around an Intel Core i7-4770 Haswell CPU, 16GB RAM, a 512GB SSD, and an AMD Radeon RX 590 8GB GDDR5 GPU. It targets budget buyers who need a working office and light gaming PC with peripherals bundled, not enthusiasts chasing current-gen performance.
The defining feature is the RX 590 8GB paired with a 512GB SSD, an uncommon combo at this price band. Cards in this class typically handle 1080p esports titles at 60+ FPS on medium to high, matching the vendor claim for CS:GO, League of Legends, Apex, and Overwatch. Newer AA titles will need lowered settings.
Trade-offs are significant. The i7-4770 launched in 2013, so IPC, single-thread performance, and platform features like NVMe bot, PCIe Gen4, and modern USB are limited. Windows 11 runs here but sits outside Microsoft's official supported CPU list. There is no realistic CPU or socket upgrade path on LGA1150.
Buy this if you need a plug-and-play 1080p esports and office tower with keyboard, mouse, and RGB included at a low outlay. Skip this if you want current-gen platform support, sustained AA 1440p gaming, or a build with a meaningful upgrade runway.
GPU class: The AMD Radeon RX 590 8GB GDDR5 is a Polaris-refresh card roughly equivalent to a GTX 1060 6GB tier. Expect 1080p 60+ FPS in esports titles like CS:GO, Overwatch, Apex, League, and Fortnite on medium settings, matching the listing's claims.
AAA and modern titles: The vendor lists GTA V, Warzone, Hogwarts Legacy, and The Division 2. Realistically, these run at 1080p low to medium with FSR upscaling where suported.Ray tracing is unsupported on RX 590. No DLSS, no frame gen, no AV1 encode.
CPU bottleneck: The Core i7-4770 quad-core with 8threads at up to 3.9GHz will bottleneck the RX 590 in CPU-heavy titles like Warzone and Escape from Tarkov. Expect frame time inconsistency in large team fights even when average FPS looks aceptable.
Storage and RAM fit: 512GB SSD holds Windows plus 3 to 5 modern game installs before space pressure. 16GB DR3-era RAM is adequate for current esports but leaves no headroom for heavy streaming, browser tabs, and OBS NVENC alongside a game session.



























Write Your Review
No reviews yet. Be the first to share your experience!