A second monitor changes how you work. Code on one panel, documentation on the other. Spreadsheet on the left, source data on the right. Studies from Jon Peddie Research peg the productivity gain at roughly 42% for office tasks, and anyone who’s gone back to single-screen after a year of dual will tell you it feels like working in a closet. Setting it up takes 15 minutes if you’ve got the cables and ports. Here’s the full path from box to working desktop.
What you’ll need
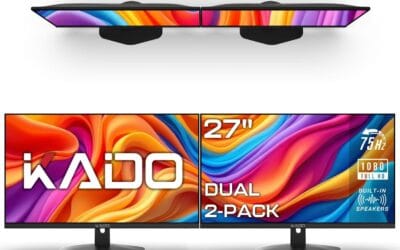
Two monitors that match in resolution and ideally refresh rate. Mismatched panels work, but cursor speed and refresh feel off when you drag windows across. If you’re starting fresh, two identical 27-inch 1440p panels at 144 Hz hit the sweet zone for productivity and gaming. Both monitors need a free input – check the back panel for HDMI, DisplayPort, or USB-C.
Two video outputs on your PC. Most desktop GPUs ship with 3 DisplayPort and 1 HDMI – more than enough. Laptops are trickier. A modern laptop with USB-C/Thunderbolt 4 can drive two external monitors through a hub. Older laptops with only one HDMI port need a USB display adapter (DisplayLink) for the second screen, which works but loses some refresh rate and adds CPU overhead.
Cables matching the output and input. HDMI 2.0 handles 4K 60 Hz or 1440p 144 Hz. HDMI 2.1 handles 4K 120 Hz+. DisplayPort 1.4 handles 4K 144 Hz with DSC. USB-C with DisplayPort Alt Mode handles up to 4K 60 Hz on most laptops. Don’t cheap out on cables – a $3 HDMI on Amazon will work for static desktop work but flake out at high refresh rates. Spend $10-15 per cable for confidence.
Optional but useful: a dual monitor arm. Frees up desk space, lets you align panels precisely, and makes height adjustment painless. VIVO and Ergotron stands clamp to most desks and handle screens up to 32 inches.
Step 1: Plug in and power up
Power off the PC. Connect the first monitor to your GPU’s primary output – usually the top DisplayPort or the HDMI port closest to the bracket. Connect the second monitor to any other free port. If you’re using a laptop with a USB-C dock, plug the dock into Thunderbolt 4 (look for the lightning symbol next to the port) and connect both monitors to the dock’s HDMI or DisplayPort outputs.
Power on both monitors first, then boot the PC. Windows usually detects both panels during boot and shows the desktop on the primary while the secondary mirrors or extends. If the second monitor stays black after boot, press Win+P and choose “Extend”. That instantly enables both as separate displays.
Step 2: Configure Windows display settings
Right-click the desktop and select “Display settings”. You’ll see two numbered boxes representing your panels. Click “Identify” – each monitor flashes its number on screen so you know which is which. Drag the boxes in the settings panel to match the physical layout on your desk. If monitor 2 is on the right of monitor 1, drag box 2 to the right of box 1. If it’s above, drag it up.
Set the primary display. Click the box for the monitor you want as your main screen (where new windows open and the taskbar lives), scroll down, and check “Make this my main display”. Set resolution and refresh rate for each. Click each box separately and scroll to Display resolution. Pick the native resolution – that’s the one marked “Recommended”. Then click “Advanced display” and set refresh rate to the panel’s max (144 Hz, 165 Hz, whatever your monitor supports).
Step 3: Align the panels physically
Even on identical monitors, factory tolerances mean the bezels rarely line up perfectly. Adjust height so the top edges match – your eyes shouldn’t have to retrain when shifting between screens. Tilt both inward by about 10 degrees so they form a slight arc. The geometric ideal: both screens equidistant from your face. You shouldn’t have to turn your head more than 15 degrees to look at either edge.
If you’re mounting on a desk arm, this is where the arm earns its money. Height, tilt, and rotation adjust independently. If you’re on the included stands, you may need to stack books under one monitor to match heights – it’s ugly but it works. Check that desk lamps and overhead lights don’t reflect on either panel. Glare on a secondary monitor at the edge of your vision is a constant low-grade annoyance you stop noticing but never adapt to.
Step 4: Set scaling and arrangement
For 1440p 27-inch panels, 100% scaling works for most people. For 4K 27-inch or any panel above 32 inches, bump to 125% or 150% to avoid squinting. Set each monitor’s scaling independently in Display settings – they don’t have to match. Windows handles mixed-scaling pretty well in 2026, though you’ll still occasionally hit an app that renders blurry on the secondary screen until you log out and back in.
Decide where the taskbar lives. By default it shows on both screens. If you want it on the primary only, right-click the taskbar, Settings, scroll to “Taskbar behaviors”, and toggle off “Show my taskbar on all displays”. Color profile mismatches between panels are common – if one monitor looks warmer than the other, use Windows Color Management or the monitor’s OSD to calibrate them closer together.
Step 5: Customize for productivity
Snap layouts are your best friend with dual monitors. Hover over the maximize button on any window and Windows shows snap zones. You can split each monitor into halves, quarters, or thirds. Combined with Win+arrow keys for keyboard-driven snapping, you can lay out 4-6 windows across both screens in seconds.
PowerToys FancyZones (free from Microsoft) gives you custom snap regions if the built-in options don’t fit your workflow. Set up a 3-column layout on your main 1440p panel and a 2-column on the secondary, and you’ve got six dedicated zones for documents, terminals, chat, and reference material. Virtual desktops (Win+Ctrl+D for new, Win+Ctrl+arrow to switch) extend the multi-screen idea further – each virtual desktop remembers its own window layout across both panels.
Verify it worked
Open a window on the primary monitor and drag it slowly to the secondary. The cursor should glide across the bezel boundary without lag or jump. Check the secondary monitor’s refresh rate in Advanced Display settings – it should show what you set, not “60 Hz”. If it dropped to 60, the cable is the limit; swap for a higher-rated one. Play a YouTube video at 4K on the secondary and confirm it doesn’t drop frames – if it stutters, the GPU may be encoding through DisplayLink instead of a native output.
Common questions
Can I use a laptop screen plus two external monitors?
Yes, most modern laptops with Thunderbolt 4 or USB-C DisplayPort Alt Mode support 2-3 external displays plus the built-in panel. Check your laptop’s specs – “supports up to N external displays” tells you the limit. Older USB-C laptops without TB4 often cap at one external.
Why does my second monitor keep going to sleep?
Usually a power management issue. Open Device Manager, expand “Universal Serial Bus controllers”, right-click each USB Root Hub, Properties, Power Management tab, uncheck “Allow computer to turn off this device”. Also check the monitor’s OSD for an “auto-off” or “ECO mode” feature – turn it off.
Do I need the same brand monitors?
No. Mixing brands works fine. Aim for matching resolution and refresh rate for the best experience. Color profiles vary between brands even at similar specs, so be ready to calibrate or accept a slight tonal difference between panels.
Will a second monitor slow down gaming?
A bit. Having an active second display adds a few percent GPU overhead. If you’re competitive in esports, disable the secondary or set it to a static image while playing. For casual gaming, the impact is invisible – you won’t feel the difference.