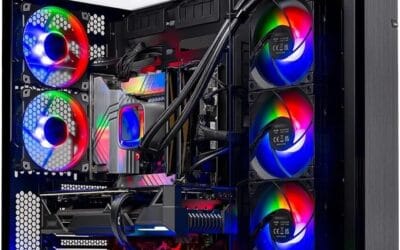
Building a PC takes about 3 hours the first time, and half of that is unboxing parts and squinting at motherboard manuals. The actual assembly? It’s mostly connecting things in the right order and not forcing anything that doesn’t slide in easy. You don’t need to be technical. You don’t need an engineering degree. What you need is patience, a clear desk, and a magnetic-tip Phillips screwdriver so you’re not fishing dropped screws out of the case for twenty minutes. This guide walks you through every step in the order that works, with the exact parts we’d use for a 1440p gaming rig in 2026.
Before you start
Clear a large desk or kitchen table. You’ll want room for the open case, the motherboard box (which doubles as an anti-static work surface for prep), and space to lay out screws by size. Good lighting matters more than you’d think. A desk lamp angled into the case saves a lot of headaches when you’re hunting for the 8-pin EPS header.
Read both manuals first. The motherboard manual shows you which slot to use for single-stick RAM (it’s usually A2, not A1), where the front-panel headers live, and which M.2 slot runs at full Gen5 speed. The case manual covers fan orientation and where the standoffs go. Ten minutes of reading saves an hour of backtracking.
Static is real but rarely catastrophic. Touch a bare metal part of the case before handling components, or wear an ESD strap clipped to the case if you live somewhere dry. Don’t build on carpet in wool socks. And don’t open any component boxes until every part has arrived. Returning a half-built kit because the GPU got delayed is miserable.
Tools and parts you’ll need
A gaming PC needs seven core parts: CPU, motherboard, RAM, GPU, storage, power supply, and case. Thermal paste comes pre-applied on most AIO coolers and air coolers now, so you can skip the tube unless you’re reusing an old heatsink. That’s it. Everything else is optional.
For tools, a single Phillips #2 screwdriver handles 95% of the build. Magnetic tip is non-negotiable in our book. A few zip ties or velcro straps help tidy cables behind the motherboard tray, and a small flashlight helps when you’re peering at tiny front-panel pins. Skip the fancy toolkits unless you’re planning to do this often.
Here’s the CPU we’d build around in 2026. It’s still the gaming benchmark and runs on AM5, so you’ve got an upgrade path through 2027 at least.

AMD Ryzen 7 9800X3D 8-Core 16-Thread Desktop Processor with 96MB 3D V-Cache and Zen 5 Architecture
Pros
- Best-in-class gaming performance thanks to the combination of Zen 5 IPC gains and 3D V-Cache technology
- AM5 socket compatibility makes it an easy upgrade for existing Ryzen 7000 series platform owners
- Excellent power efficiency relative to its performance tier reduces long-term energy costs
- Outstanding user satisfaction reflected in a near-perfect rating from thousands of verified buyers
- High boost clock of 5.2GHz ensures strong performance in both gaming and productivity tasks
Cons
- Cooler is not included in the box, adding to the total system cost for new builders
- Premium pricing puts it at the higher end of the consumer CPU market, which may not suit budget-focused builds
- Requires an AM5 motherboard, so users on older AM4 platforms will need a full platform upgrade
The AMD Ryzen 7 9800X3D is AMD's flagship gaming processor for the desktop market, sitting at the top of the Ryzen 9000 series lineup. Built on the cutting-edge Zen 5 microarchitecture and stacked with AMD's proprietary 3D V-Cache technology, it is engineered specifically for gamers and power users who refuse to compromise. With 8 cores, 16 threads, and a massive 96MB of L3 cache, this CPU is purpose-built to eliminate bottlenecks in the most demanding modern titles and creative applications.
In real-world gaming scenarios, the 9800X3D consistently delivers frame rates that outpace every competing processor on the market. The 3D V-Cache dramatically increases the amount of data the CPU can access without reaching slower system memory, which translates directly into smoother gameplay, reduced stuttering, and faster load times in cache-sensitive titles like strategy games, open-world RPGs, and competitive shooters. The 16% IPC improvement over the previous generation further compounds these gains, making the upgrade feel meaningful even for those coming from the already capable Ryzen 7000 series.
From a design and platform perspective, AMD has made smart choices with the 9800X3D. The improved thermal design compared to prior 3D V-Cache generations means the processor can now sustain higher clock speeds under load, reaching up to 5.2GHz boost. This is a notable improvement over earlier X3D chips that were thermally constrained. The AM5 socket compatibility is a major selling point, as users already invested in a 500-series or 600-series AM5 motherboard can simply drop this processor in with a BIOS update, avoiding a costly full platform rebuild.
There are a few considerations worth noting. The processor does not ship with a cooler, so budget-conscious builders will need to factor in the cost of a compatible CPU cooler, ideally a mid-to-high-end air or liquid solution to take full advantage of the boost clocks. Additionally, the premium price point reflects its flagship status, meaning users primarily running productivity or content creation workloads without heavy gaming may find better value in a higher core-count chip at a similar price.
Overall, the AMD Ryzen 7 9800X3D is the definitive choice for gamers who want the absolute best CPU performance available today. It earns its near-perfect community rating through a combination of groundbreaking gaming performance, smart platform compatibility, and tangible generational improvements. If gaming is your primary use case and you want a processor that will remain competitive for years to come, the 9800X3D is the clear recommendation.
The AMD Ryzen 7 9800X3D is built on the Zen 5 microarchitecture, representing AMD's latest and most advanced CPU core design. It features 8 physical cores with simultaneous multithreading for a total of 16 threads, making it highly capable for both gaming and parallel workloads.
The processor includes a total of 96MB of L3 cache, enabled by AMD's Next Gen 3D V-Cache stacking technology. This is the primary driver of its exceptional gaming performance. The boost clock reaches up to 5.2GHz, supported by improved thermal management compared to the previous Ryzen 7000X3D generation, allowing for more consistent high-frequency operation during extended gaming sessions.
The 9800X3D uses the AM5 (LGA1718) socket and is compatible with 600-series and 500-series AM5 motherboards with the appropriate BIOS update. It supports DDR5 memory and PCIe 5.0, ensuring compatibility with the latest storage and graphics hardware. A CPU cooler is not included and must be purchased separately. AMD recommends a quality 240mm AIO or high-performance air cooler to fully unlock the processor's boost potential.
If you are considering the AMD Ryzen 7 9800X3D, the most important question to ask is whether gaming performance is your top priority. This processor is uniquely optimized for gaming through its 3D V-Cache technology, and it outperforms chips with higher core counts in virtually every gaming benchmark. For gamers, it is the best CPU money can buy at this tier.
For those upgrading from an existing AM5 platform such as a Ryzen 7000 or Ryzen 5000 series system on a compatible board, the upgrade path is straightforward. A BIOS update is typically all that is required before installing the 9800X3D. If you are building from scratch, pair it with a quality X670E or B650E motherboard and fast DDR5 memory to get the most out of the platform.
Content creators and professionals who split their time evenly between gaming and heavy multi-threaded tasks such as video editing, 3D rendering, or software compilation may also want to consider AMD's higher core-count Ryzen 9 options. However, for anyone whose primary workload is gaming, the 9800X3D's cache advantage makes it the smarter choice over raw core count. Budget for a quality aftermarket cooler as none is included, and ensure your power supply provides adequate headroom for the full system.
Pair it with a fast DDR5 kit at the proven speed. AM5 loves 6000 MT/s with tight timings, and 32GB is the new baseline for AAA games that stream textures aggressively.
Step 1 – Prep the motherboard outside the case
Lay the motherboard on top of its box. This gives you clearance underneath and a static-safe surface. Install the CPU first while you’ve got full access. Lift the retention arm on the socket, look for the small triangle on one corner of the CPU, and match it to the arrow printed on the socket. Drop the chip in. Don’t push. If it’s aligned, it falls into place under its own weight. Close the arm and accept that it feels alarmingly stiff, that’s normal.
RAM goes in next. For a 2-stick kit, populate slots A2 and B2 (check the manual, but it’s almost always the second and fourth slot from the CPU). Open the clips at both ends, line up the notch, then push down firmly on both ends at once until the clips snap closed. If only one side clicks, you’re not done yet.
Install your M.2 SSD in the top slot. Remove the heatsink screw, angle the drive into the slot at about 30 degrees, push it flat, and secure the tiny screw. Reinstall the heatsink with the thermal pad film peeled off.
Step 2 – Mount the motherboard in the case
Most modern motherboards have the I/O shield pre-attached, which is a small mercy. If yours doesn’t, snap the shield into the rear cutout of the case from the inside, making sure the lettering faces out. Push from the corners until all four sides click flush.
Check the case standoffs next. ATX boards need nine, and most cases ship with them pre-installed in the right pattern. Count them against the mounting holes on your motherboard. Extra standoffs in the wrong spot can short out the back of the board, so remove any that don’t line up.
Lower the motherboard into the case at a slight angle, sliding the I/O ports into the shield first, then settling the board flat onto the standoffs. The screw holes should line up. Start all nine screws by hand a few turns before tightening any of them, that way the board can self-align. Snug them down with the screwdriver but stop the moment you feel resistance. Overtightening cracks PCBs. Finger-tight plus a quarter turn is plenty.
Step 3 – Install PSU and route cables
The PSU drops into the lower chamber of any modern case. Orient the fan facing down if your case has a bottom intake vent with a dust filter, which almost all of them do now. This pulls cool air from outside the case and keeps PSU intake separate from the warm GPU exhaust above. Secure with four screws on the rear panel.
Now’s the time to plug cables into the PSU side and route them before anything else gets in the way. You’ll need the 24-pin ATX (the giant one), the 8-pin EPS (sometimes labeled CPU), the 12V-2×6 or dual 8-pin for the GPU, and SATA power if you’ve got any 2.5-inch drives. Don’t connect the GPU cable to a card yet, just route it up through the case to where the GPU will sit.
Feed cables behind the motherboard tray through the rubber grommets. Plug in the 24-pin ATX along the right edge of the board, and the 8-pin EPS at the top-left corner near the CPU. That EPS connector is the #1 forgotten cable in first builds, so double-check it before you button up.
Step 4 – Install GPU and final connections
Remove the two or three rear PCIe slot covers that match where the GPU bracket will sit. Set those screws aside, you’ll reuse them. Find the top PCIe x16 slot (the longest one closest to the CPU) and push the retention clip down or to the side to unlock it.
Line the GPU’s gold contacts up with the slot and the bracket against the rear of the case. Push down firmly and evenly on both ends of the card until the retention clip snaps closed on its own. Secure the bracket to the case with those screws you set aside. The card should sit level. If it sags noticeably, install a GPU support bracket, modern cards are heavy enough to warp slots over time.
Connect the 12V-2×6 or 8-pin power cable, making sure it clicks all the way in. A loose 12V-2×6 is a known fire hazard, so give it a firm wiggle check. Then tackle front-panel headers: power switch, reset, HDD LED, USB 3.0, USB-C, and front audio. The motherboard manual has a diagram, and most boards include a Q-Connector block that makes this easier.

Pros
- SFF-ready 2.5-slot layout fits compact cases without sacrificing three Axial-tech fans.
- Phase-change thermal pad and MaxContact design improve heat transfer under heavy loads.
- Dual BIOS provides easy switching between Performance and Quiet fan curves.
Cons
- 12GB VRAM may limit headroom in 4K content creation or future titles with heavy texture demands.
- Requires a PSU with the correct 12V-2x6 or equivalent connector typical for this power tier.
This is a mid-range GeForce RTX 5070 graphics card from ASUS in a 2.5-slot SFF-ready form factor. It targets builders assembling small form factor systems who still want modern 1440p gaming performance with DLSS 4 support.
The most defining technical characteristic is the carefully arranged shroud, heatsink, and heat pipes that allow the three Axial-tech fans to draw air through chassis side-panel ventilation. This tier typically targets 1440p high refresh in current AAA titles when paired with a capable CPU.
Build quality includes a protective backplate, stainless steel bracket, dual-ball fan bearings, and ASUS GPU Guard adhesive at the corners. The phase-change thermal pad and MaxContact design focus on lowering GPU temperatures during extended sessions.
At this price tier the card trades some raw VRAM capacity and length for better SFF compatibility. Builders needing maximum 4K texture headroom or multi-GPU setups may prefer longer cards with higher VRAM counts.
Buy this if you are building or upgrading an ITX or SFF system and value quiet operation plus modern NVIDIA features. Skip this if you need more than 12GB VRAM or prefer a full-size card with aggressive factory overclocks.
| Architecture | NVIDIA Blackwell |
| Memory | 12GB GDDR7 |
| Interface | PCIe 5.0 |
| Display Outputs | HDMI, DP 2.1 |
| Slot Height | 2.5-slot |
| Cooling | Three Axial-tech fans, 0dB Technology |
| BIOS | Dual BIOS (Performance / Quiet) |
| Dimensions | Not specified |
| Power Connector | Not specified |
Case fit: The 2.5-slot design and SFF-ready layout allow installation in compact cases that support side-panel ventilation for the Axial-tech fans.
Power requirements: Pair with a PSU that supplies the appropriate connector for RTX 50-series cards as recommended in the product listing.
Thermal considerations: Phase-change pad and vented backplate improve heat dissipation; ensure at least 50 degrees Celsius ambient before fans restart from 0dB mode.
Software: GPU Tweak III provides monitoring and tuning while Dual BIOS lets users select Performance or Quiet curves without additional tools.
If something goes wrong
First boot doesn’t always work, and that’s fine. The most common failure is no POST, meaning fans spin but nothing displays. Nine times out of ten it’s RAM. Pull both sticks, reseat them firmly in slots A2 and B2, and try again. If it still won’t post, try a single stick in A2 alone.
Second-most-common cause: the 8-pin EPS isn’t fully seated. Pop the side panel back off and press it in until you hear a click. Confirm the 24-pin is fully home too. Modern boards have debug LEDs labeled CPU, DRAM, VGA, and BOOT, watch which one stays lit to narrow it down.
If fans spin and the debug LED lands on VGA, your GPU power isn’t connected or the card isn’t fully seated. Reseat both. If you POST but get no display, check that the monitor cable plugs into the GPU and not the motherboard’s video output. That’s a classic first-build mistake.
POST but no boot? Hit Delete or F2 to enter BIOS, confirm the SSD shows up under storage, and enable EXPO (AMD) or XMP (Intel) so your RAM runs at its rated speed. Then save and exit.
Wrapping up
Boot from a Windows 11 install USB and run through setup. Skip the Microsoft account prompt with the offline trick if you’d rather have a local user. Once you’re on the desktop, install chipset drivers first, especially on AMD where the chipset package controls power states and CPPC scheduling. GPU drivers come second, straight from Nvidia or AMD’s site, not Windows Update.
If you’re paranoid about stability, run MemTest86 from a USB stick overnight. One full pass with no errors and your RAM’s good. Otherwise, just enable EXPO in BIOS, fire up a game, and enjoy what you built.