

Port forwarding sounds intimidating, but it’s really just telling your router to send a specific type of incoming traffic to a specific device on your network. You’ll want it when you’re hosting a game server, running a personal Plex or web server, using peer-to-peer apps, or trying to fix stubborn connection issues in online games. By default your router blocks unsolicited incoming connections for safety, so nothing reaches your PC until you open a path. This walkthrough gets you there step by step, safely.
The process is the same across nearly every router brand, even if the menus look different. You’ll find your PC’s local address, log into the router, create a forwarding rule, and confirm it works. If your router is old or flaky and you’re thinking about an upgrade while you’re in there, our guides to the best gaming router and the best budget router for 2026 can help, and apartment dwellers should skim the best budget router for an apartment too. Let’s set it up.
What you’ll need
Not much, honestly. You need access to your router’s admin page, which means the router’s IP address and login password, usually printed on a sticker on the device. You’ll need the device you’re forwarding to, like your gaming PC or console, powered on and connected. And you’ll want the specific port numbers and protocol, TCP or UDP, that your game or application requires. A quick search for “[app name] port forwarding ports” turns those up fast.
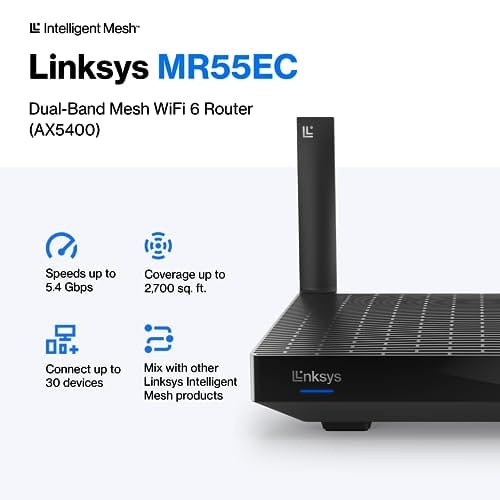
The one piece of hardware that matters most is the router itself, since it’s doing all the work. A capable modern router makes this smoother and more reliable, especially if you host servers or game seriously. The Linksys Hydra Pro 6 is a mesh Wi-Fi 6 router at $199.99 with a 4.4 rating, covering around 2,700 square feet and connecting 30-plus devices, and its admin interface handles port forwarding cleanly. A solid router like this is worth having if your current one struggles.


Pros
- AX5400 class dual-band throughput up to 574 plus 4804 Mbps on 5 GHz
- Six spatial streams with OFDMA reduce congestion for 30+ device homes
- Intelligent Mesh compatibility allows scaling coverage beyond the 2,700 sq ft rating
Cons
- Limited owner feedback at time of writing, so real-world reliability data is thin
- Dual-band only, no dedicated 6 GHz or wireless backhaul band at this tier
- Detailed specifications, WAN port sped, and waranty not specified in source listing
The Linksys Hydra Pro 6 (MR5500-AMZ) is a mid-range dual-band WiFi 6 mesh router aimed at households upgrading from an older AC1900 or extender-based setup. Linksys rates it for 2,700 sq ft and 30 plus devices, targeting medium apartments, condos, and small two-story homes with mixed smart home and streaming traffic.
The defining feature is six-stream AX5400 class WiFi 6 with quoted rates of 574 Mbps on 2.4 GHz and 4804 Mbps on 5 GHz. OFDMA and MU-MIMO help when many low-bandwidth clients share airtime, which is where WiFi 5 routers typically stall. Real-world 5 GHz throughput at range appears to land in the mid-hundreds of Mbps based on category norms.
Trade-offs are typical at this tier. It is dual-band, so there is no dedicated 6 GHz radio and no separate backhaul channel when you add mesh nodes, meaning throughput can halve on satellite hops. Linksys does not specify WAN port speed, USB, or processor details in the listing, so multi-gig ISP users should verify before buying.
Buy this if you want a single WiFi 6 router that can grow into a Linksys Intelligent Mesh system for a 2,000 to 3,000 sq ft home with 30 plus clients. Skip this if you need WiFi 6E, 2.5 GbE WAN, or a dedicated backhaul band for a large multi-story house.
Wireless class: AX5400 class dual-band WiFi 6 with quoted PHY rates of 574 Mbps on the 2.4 GHz band and 4804 Mbps on the 5 GHz band, totaling roughly 5378 Mbps aggregate across six spatial streams. No 6 GHz radio is listed, so WiFi 6E clients fall back to 5 GHz.
Coverage and capacity: Linksys rates the MR5500 for 2,700 sq ft and 30 plus simultaneous devices. OFDMA, MU-MIMO, and 1024-QAM are standard at this WiFi 6 tier and help maintain throughput as client count scales, though actual coverage depends heavily on wall material and node placement.
Mesh behavior: Intelligent Mesh lets you pair the MR5500 with other Linksys nodes to extend coverage. Because it is dual-band, backhaul shares the 5 GHz client band, so expect throughput to roughly halve one hop from the root node. A wired Ethernet backhaul between nodes avoids this penalty.
Not specified: WAN and LAN port speeds, USB ports, processor and RAM, warranty length, and physical dimensions are not disclosed in the source listing. Buyers pairing this with multi-gig fber or DOCSIS 3.1 plans above 1 Gbps should confirm port specs before purchase.
Step 1: Find your device’s local IP address
Port forwarding sends traffic to one specific device, so you need that device’s local IP address, the private one your router assigned it. On Windows, open Command Prompt and type ipconfig, then look for the “IPv4 Address” line, usually something like 192.168.1.42. On a Mac, it’s in System Settings under Network. Write it down exactly, since one wrong digit sends your traffic to the wrong place or nowhere at all.
Take note of the “Default Gateway” address while you’re in ipconfig, because that’s your router’s address for the next step. It’s commonly 192.168.1.1 or 192.168.0.1. Having both numbers ready before you log in saves you from backtracking, and it keeps the whole process to just a few minutes.
A quick word on the difference between local and public addresses, because mixing them up is the number one reason people get stuck. The local IP, the 192.168.x.x number, only exists inside your home network and identifies your PC to the router. The public IP is the single address your entire home shows to the internet, assigned by your ISP. Port forwarding is the bridge between the two: traffic arrives at your public IP on a certain port, and the router forwards it to the local IP you specify. Keep that mental model and every later step makes more sense.
Step 2: Reserve a static local IP for the device
Here’s a step people skip and then regret. Your router hands out local IP addresses dynamically, so the 192.168.1.42 your PC has today might change to a different number after a reboot. When that happens, your forwarding rule points at the old address and stops working. The fix is to reserve the address, sometimes called a DHCP reservation or static lease, so the router always gives that same device the same local IP.
Log into your router using the gateway address in a browser, find the DHCP or LAN settings, and look for an option to reserve an address by the device’s MAC address. Assign it the IP you noted in Step 1. Now that address is locked to your device permanently. It’s a two-minute step that saves you from mysteriously broken forwarding weeks later, and it’s the difference between a rule that works once and one that works for good.
Step 3: Open the port forwarding section
Still logged into your router, hunt for the port forwarding menu. It lives under different names depending on the brand: “Port Forwarding,” “Applications & Gaming,” “Virtual Server,” or sometimes tucked inside an “Advanced” or “NAT” section. On many mesh systems like the Linksys Hydra Pro 6, it’s in the advanced settings or the companion app under connectivity options. If you can’t find it, the router’s model name plus “port forwarding” in a search engine points you straight to the right menu.
Once you’re there, you’ll typically see a table where you can add a new rule. Don’t touch anything labeled DMZ, which exposes a device completely and is far less safe than a targeted rule. You want single-port or port-range forwarding, not DMZ. Keep it specific. Opening only the exact ports an app needs is the secure way to do this.
Step 4: Create the forwarding rule
Now you fill in the rule. Give it a recognizable name like “Game Server” or “Plex” so you remember what it’s for later. Enter the port number or range your application needs in both the external and internal port fields, which are usually the same. Choose the protocol, TCP, UDP, or both, based on what your app requires. When in doubt and the app lists both, select both. Then enter the reserved local IP address from Step 2 as the destination.
Double-check every field before saving. The most common mistakes are a typo in the IP address, the wrong protocol, or forwarding the wrong port number. Save the rule, and if your router prompts you to apply changes or reboot, let it. Some routers activate rules instantly while others need that restart. After it comes back up, your path from the internet to your device is open for that specific port.
One security note worth pausing on: only open the exact ports you need, and close them when you’re done if the service is temporary. Every open port is a small window into your network, so there’s no reason to forward a range of 100 ports when your app needs three. If you’re forwarding for a game server, use the specific ports the game documents rather than guessing wide. And if a service lets you change its default port, using a non-standard one cuts down on the automated scanning traffic that constantly probes common ports across the internet.
Step 5: Verify the port is open
Don’t just assume it worked. First, make sure the application you’re forwarding for is actually running on the target device, because a closed port and a stopped program look identical from the outside. A port checker only sees an open port if something is listening behind it. Start your game server, Plex, or app first, then verify.
Use a free online “open port check” tool, enter your public IP address and the port number, and run the check. Your public IP is easy to find by searching “what is my IP.” If the tool reports the port as open, you’re done. If it still shows closed, the culprit is usually your PC’s firewall blocking the app, a wrong local IP in the rule, or a second router creating a double-NAT situation. Work through those in that order.
It’s worth verifying from outside your own network when you can. Some port checkers, and some checks run from a device on the same Wi-Fi, can give a false result because the traffic never actually leaves and re-enters your network. If you’re unsure, ask a friend to try connecting from their connection, or use your phone on mobile data instead of Wi-Fi. A successful connection from a genuinely external source is the real confirmation that your forwarding rule works the way you intended.
Troubleshooting common issues
The port still shows as closed
Confirm the target app is running and actively listening, since a checker can’t see an open port with nothing behind it. Then recheck that the local IP in your rule matches the device exactly and that you reserved it. Finally, allow the app through Windows Defender Firewall, because the operating system’s own firewall can block traffic even after the router forwards it correctly.
The rule works, then breaks after a reboot
This is the classic sign you skipped the DHCP reservation. Your device got a new local IP after restarting, so the rule now points at the wrong address. Go back to Step 2, reserve a static local IP for the device, and update your forwarding rule to match. Once the address is locked, the rule stays reliable through reboots.
You have two routers (double NAT)
If your internet provider’s modem is also a router and you added your own router behind it, you’ve got two layers of network address translation, and a single forwarding rule won’t reach through both. Either set the ISP box to bridge or passthrough mode so your main router handles routing, or forward the port on both devices in sequence. Bridge mode is the cleaner fix when your provider allows it.
Your ISP uses CGNAT
Some providers put customers behind carrier-grade NAT, which means you don’t have a true public IP and port forwarding can’t work no matter what you do. If nothing you try succeeds and your public IP starts with an unusual range, call your ISP and ask if you’re on CGNAT. Many will move you to a real public IP on request, sometimes for a small fee.
Wrapping up
Port forwarding really comes down to five moves: find the device’s IP, lock it with a reservation, open the router’s forwarding menu, create a precise rule, and verify it. The reservation step is the one that separates a setup that lasts from one that quietly breaks, so don’t skip it. Keep your rules specific to the exact ports you need and avoid DMZ, and you’ll open only what you intend to.
If you host a service that you want reachable by a name instead of a changing public IP, look into dynamic DNS, which many routers support built in. It maps a memorable hostname to your current public address and updates automatically when your ISP changes it, so friends connecting to your game server never have to chase a new number. Pair that with your forwarding rule and you’ve got a setup that just works, even if your public IP shifts.
If your router’s interface fought you every step of the way or coverage keeps dropping, that’s a sign the hardware is holding you back. A modern unit like the Linksys Hydra Pro 6, with its cleaner admin tools and wide coverage, makes both port forwarding and everyday networking far less frustrating. Set your rule, confirm it’s open, and you’re ready to host. It’s genuinely a ten-minute job once you’ve done it once.
One last habit worth building: keep a short note of every rule you create, what port, what device, and what it’s for. Six months from now you won’t remember why port 25565 points at a machine in the office, and a tidy list makes it easy to clean up rules for services you no longer run. Fewer stale rules means a smaller attack surface and a router config you actually understand. That little bit of housekeeping pays off every time you revisit your network settings.































Write Your Review
No reviews yet. Be the first to share your experience!