

Maybe you’ve got a pair of DDR4 sticks already in the board and you want more capacity without tossing what you own. Or you found a cheap second kit online from a different brand and you’re wondering if it’ll play nice. Mixing RAM brands is one of those things forums argue about endlessly, and the honest answer sits in the middle. It can work, and plenty of stable rigs run mismatched sticks right now. It can also cause boot loops, random reboots, and Windows crashes that take hours to trace. The difference comes down to a handful of specs you can check before you ever open the case.
This walkthrough covers the safe way to do it. We’ll confirm the specs that actually matter, seat the sticks in the right slots, dial in the timings, and run a memory-diagnostic pass to catch instability before it bites you mid-game. The whole process takes maybe an hour of hands-on work plus an overnight verification run, and none of it needs special skills. If you can hold a screwdriver and read a spec sticker, you can do this. If you’re still shopping and want a clean starting point, our roundup of the best 32GB RAM kit for 2026 leans toward matched sets that skip this hassle entirely.
What you’ll need
Not much, honestly. A screwdriver to open the case, your motherboard manual (or its QVL page bookmarked), and both RAM kits on the desk. You’ll also want a USB stick loaded with a bootable memory diagnostic like MemTest86, since verifying stability is the whole point. Grab your BIOS/UEFI details too, because XMP and EXPO profiles live there. If you can, note the exact spec sticker on each stick before you start: capacity, speed in MT/s, CAS latency, and voltage.
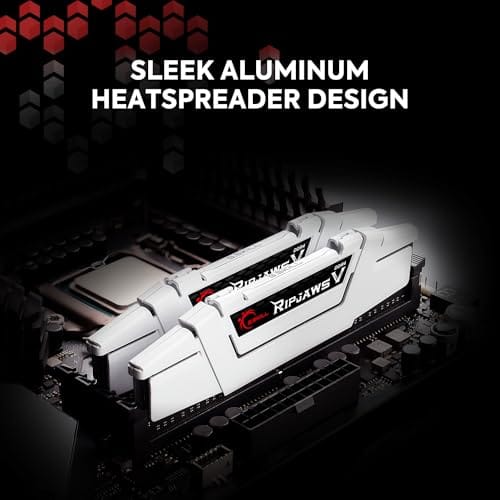
One thing worth saying up front. The safest option is a matched kit, meaning two or four sticks sold together and validated by the manufacturer to run as a set. Something like the G.SKILL Ripjaws V DDR4 32GB (2x16GB) 3600MT/s kit, priced around $219.99 with a 4.1 rating, ships as a paired 2x16GB set at CL18-22-22-42 and 1.35V. Buying a second identical kit, or replacing both sticks with one matched pair, sidesteps almost every problem below. If you’d rather not gamble, that’s the move.

Pros
- DDR4-3600 XMP at 1.35V is the Ryzen AM4 sweet spot, aligning FCLK 1:1 at 1800MHz for best latency.
- Matched 2x16GB kit is factory-tested as a pair, reducing dual-channel instability compared to mixing sticks.
- Compatible with both Intel XMP and AMD DOCP/A-XMP BIOS profiles without manual sub-timing adjustments.
- Ships with JEDEC SPD fallback so the system always boots safe at default clocks before XMP is enabled.
Cons
- CL18 primary latency is mid-range; DDR4-3600 CL16 kits exist for buyers prioritizing tighter timings.
- No ECC support, so workstation or Threadripper ECC builds need a different kit entirely.
The G.SKILL RipjawsV F4-3600C18D-32GVK is a mid-range DDR4 desktop kit targeting Intel and AMD mainstream platform builders who want 32GB capacity at DDR4-3600 without overpaying for CL14 or CL16 enthusiast kits. It ships as a matched 2x16GB dual-channel pair in the standard 288-pin U-DIMM form factor.
The defining spec here is the XMP profile: DDR4-3600 at CL18-22-22-42, 1.35V. On AMD AM4 Ryzen systems, 3600MHz is the well-documented sweet spot for achieving a 1:1 FCLK ratio at 1800MHz, which keeps infinity fabric latency in check and translates to measurable gains in lightly-threaded workloads and gaming frame times compared to DDR4-3200 or lower.
CL18 is a genuine trade-off at this speed. Competing DDR4-3600 kits with CL16 or CL14 exist and offer lower absolute latency, though they typically carry a price premium. Owners report stable XMP operation across a wide range of B450, X570, and Z490/Z590 boards, but reaching rated speed on some budget AM4 boards may require manual sub-timing adjustments or AGESA microcode updates.
Buy this if you are building or upgrading an AM4 Ryzen or Intel LGA1700 desktop and want reliable 32GB DDR4-3600 dual-channel performance without tuning. Skip this if you need CL16 or tighter for competitive latency, or if your board has a limited QVL and you have not verified compatibility via G.SKILL's configurator tool first.
Platform Support: This kit uses 288-pin DDR4 U-DIMM and is compatible with Intel LGA1700 (Z690/Z790) and AMD AM4 (B450/X470/B550/X570) platforms. AM5 uses DDR5 exclusively, so this kit is not compatible with Ryzen 7000/9000 series builds on AM5 boards.
XMP and DOCP Activation: Rated speed of DDR4-3600 CL18-22-22-42 at 1.35V requires enabling XMP (Intel) or DOCP/A-XMP (AMD) in BIOS. Default JEDEC SPD boots at DDR4-2133 or DDR4-2400. On AM4, DDR4-3600 aligns FCLK at 1800MHz for a 1:1 ratio, which is the recommended operating point for Ryzen 3000 and 5000 series CPUs.
Slot Population and Mixing: Install both sticks in the recommended dual-channel slots per your motherboard manual, typically A2 and B2 in a 4-slot board. G.SKILL explicitly warns against mixing this kit with other modules; doing so voids the matched-pair guarantee and risks instability at XMP speeds.
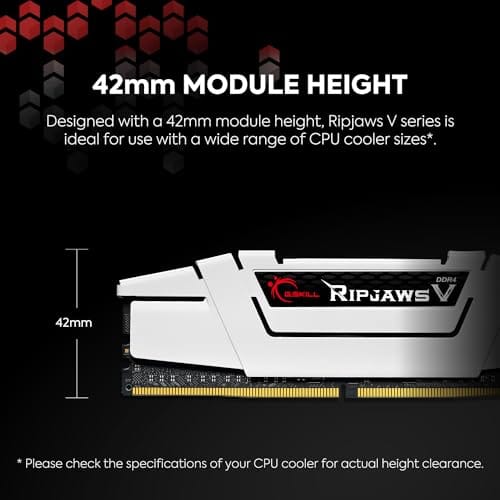
Cooler Clearance: Exact heatspreader height is not specified in the source data, but RipjawsV modules are noted for a lower profile than Trident Z or RGB variants, reducing conflicts with wide tower coolers. Verify clearance if using a low-clearance cooler on a tight ITX board.
Step 1: Confirm the same DDR generation and voltage
This is the non-negotiable one. DDR4 and DDR5 are physically and electrically different, and they aren’t cross-compatible. The notch on the stick sits in a different spot, so a DDR5 module won’t even seat in a DDR4 board. Never mix the two. Your motherboard supports one generation, full stop, and both kits have to match it. Check the sticker or the product listing if you’re unsure which you own.
Voltage matters almost as much. Most DDR4 XMP kits run at 1.35V, while JEDEC baseline sits at 1.20V. DDR5 kits typically run 1.10V to 1.35V depending on the profile. If one kit wants 1.35V and the other is happy at 1.20V, the board usually feeds both the higher figure, which is fine for the low-voltage sticks in nearly all cases. What you don’t want is a mismatch so wide the memory controller can’t settle on a stable rail. Same generation, compatible voltage. Get that right and you’ve cleared the biggest hurdle. While you’re checking specs, glance at your board’s QVL, the qualified vendor list. It won’t list every brand combo you might try, but it tells you the maximum density and speed your board was validated for, which saves you from chasing a config the hardware can’t hit.
Step 2: Seat the sticks in the correct dual-channel slots
Physical placement decides whether you get dual-channel bandwidth or fall back to single-channel, which can cost you real frames in gaming. On almost every four-slot ATX board, the dual-channel pairs are slots A2 and B2, usually the second and fourth from the CPU socket. Your manual spells this out, and it’s the one page worth reading twice. Power down, unplug, and press the retention clips open before you push a stick in.
When you’re mixing two different 16GB sticks, put one in A2 and the other in B2 so the pair spans both channels. Seat them firmly until both clips snap shut. If you’re running four sticks total from two brands, keep matched pairs together where you can: same-brand pair in A1/A2 or split so each channel sees one of each. Boards vary here, so the manual wins any argument. Line up the notch, apply even pressure, and listen for the click.
Step 3: Boot into BIOS and set XMP/EXPO or the lowest common timings
First boot with mixed sticks often lands you at default JEDEC speeds, something like 2133 or 2400 MT/s, which is slow but stable. That’s normal. Enter the BIOS (usually Delete or F2 at post) and head to the memory section. Enable XMP on Intel boards or EXPO on AMD to load a rated profile. The catch: two kits can carry different profiles, and the board can only apply one set of timings to all sticks at once.
When the kits differ, you run everyone at the slower kit’s numbers. If one kit does 3600 MT/s CL18 and the other tops out at 3200 MT/s CL16, set the whole system to 3200 and match the looser timings, meaning the higher CAS latency and wider sub-timings. Manual entry beats XMP here. Punch in the lowest common speed, the highest CL among the sticks, and the matching voltage (1.35V for most DDR4 XMP kits). It also helps to set the primary sub-timings by hand: tRCD, tRP, and tRAS all follow the CAS number, so copy them from the slower kit’s rated string. Save and exit. If it won’t post, drop the speed one step and loosen timings further. Stability first, speed second. You give up a little bandwidth this way, but the frame-rate difference between 3200 and 3600 is a few percent at most, and a crashing rig costs you the whole game.
Step 4: Verify stability with a memory-diagnostic pass
Booting into Windows isn’t proof of anything. Mixed RAM can look perfect for twenty minutes and then throw a blue screen the moment a game loads a big texture pool. So you verify. Boot the MemTest86 USB stick you prepared and let it run a full memory-diagnostic pass, ideally four complete passes or an overnight run. Zero errors across every pass is what you’re after. One error means the config isn’t safe yet.
If errors show up, don’t panic and don’t assume the RAM is dead. Head back to BIOS, drop the speed a notch, loosen timings, or nudge voltage within safe limits (staying at or below 1.4V on DDR4 for daily use). Then run the diagnostic again. This loop, adjust and verify, is how you land on a config that holds. It’s tedious, sure. But an overnight check beats a week of mystery crashes. A single passing run at idle isn’t enough either, because memory errors love heat and load, which is exactly what the diagnostic simulates across its address patterns. Once you’ve got a clean pass, you can trust the setup under load, and you won’t spend the next month wondering if that random reboot was the RAM or something else.
Step 5: Confirm dual-channel and full capacity in the OS
Last step, and it’s quick. Boot into Windows and open Task Manager, then the Performance tab, and click Memory. Check two things. Total capacity should read the full amount, 32GB if you combined two 16GB sticks, and the “Slots used” and channel line should confirm dual-channel operation. CPU-Z tells the same story on its Memory tab under “Channel,” which should say Dual.
If capacity looks short, one stick isn’t seated or isn’t recognized, so reseat and recheck. If it says single-channel, your sticks are probably in the wrong slots, back to Step 2. When both readings check out and your diagnostic pass came back clean, you’re done. Mixed brands, stable system, full bandwidth. It’s a genuinely satisfying result for something the internet swears is impossible. Owner reports across build communities show this exact approach working on Ryzen and Intel platforms alike, provided the specs line up. For anyone pairing this with a high-end chip, our notes on the best RAM for the 9800X3D cover which speeds actually pay off.
Troubleshooting common issues
Even with careful prep, mixed kits throw the occasional curveball. Here are the ones that come up most on build forums, along with the fix that usually clears each. Work through them in order.
System won’t post after adding the second kit
Pull it back to basics. Remove the new sticks, confirm the original pair boots alone, then add the sticks one at a time. Booting one kit at a time isolates a bad module or a slot conflict fast. If a single stick won’t post in any slot, that stick or its profile is the culprit. Clear CMOS (the jumper or the battery pull) to wipe a bad XMP setting, then start from JEDEC defaults and work up.
Random reboots or blue screens under load
Classic sign the timings or speed are too aggressive for the weaker kit. Windows stays up at idle, then falls over when a game or render hammers memory. Go into BIOS, drop the frequency one step, and loosen the primary timings to the slower kit’s rated numbers. Re-run the memory-diagnostic pass afterward. Nine times out of ten this clears it without touching voltage.
Only half the RAM shows up in Windows
Usually a seating problem, not a dead stick. Power down and reseat every module until each clip clicks. If capacity is still short, swap the questionable stick into a slot you know works. Also check that “Memory Remap” or the equivalent is enabled in BIOS, since an old setting can cap usable memory. A quick QVL glance confirms your board even supports that total density.
Speed drops to a slow default and won’t hold XMP
Two mismatched profiles fighting for one setting. The board bails to a safe default because it can’t reconcile them. Skip XMP and enter timings by hand at the lowest common speed with the loosest CAS. That manual approach is what makes mixed kits stable in the first place. If you’d rather not fight it, a single matched kit like the ones in our best budget RAM for content creation guide removes the guesswork.
Wrapping up
Mixing RAM brands safely isn’t luck, it’s a checklist. Match the DDR generation and voltage, seat the pair in the A2/B2 dual-channel slots, set the system to the slower kit’s speed and looser timings, verify with a full memory-diagnostic pass, then confirm dual-channel and full capacity in the OS. Follow that order and mismatched sticks from two different brands can run rock-solid for years. Skip the verification step and you’re rolling dice. If your kits refuse to cooperate after all this, or you just want the cleanest path, a matched set really is the low-stress answer. Either way, you now know exactly what to check and in what order.































Write Your Review
No reviews yet. Be the first to share your experience!