A loud PC’s almost never just one noisy fan. It’s a stack of small problems adding up: cheap stock case fans, an aggressive default fan curve in BIOS, a GPU that ramps to 100% on every boot, hard drive vibration coupling into the chassis, and coil whine from a budget PSU under load. Each cuts 2 to 6 dB on its own. Stack them and you go from a 48 dB jet engine to a 28 dB whisper without changing performance.
Expected outcome: a desktop measured at 1 meter sitting at 28 to 34 dB idle and 36 to 40 dB under gaming load. Quieter than most refrigerators. Budget runs $0 to $80 for a few fan swaps, more for a new CPU cooler or PSU. Time investment: 60 to 90 minutes for the software side, 2 to 3 hours if you do a fan swap. This guide assumes a standard ATX desktop with a discrete GPU.
What you’ll need
A free sound meter app: NIOSH Sound Level Meter (iOS) or Sound Meter Pro (Android). Both calibrated within 2 dB of pro meters. You’ll measure before and after to confirm changes are real.
Software for fan control: BIOS gives you the basics, but FanControl (free, open source, Windows) is significantly more powerful. Reads every fan header, every temp sensor, builds custom curves with hysteresis. Download it before you start.
Optional hardware: anti-vibration fan mounts (silicone grommets, $7 for 20), a $20 to $30 noise-dampening foam kit if you want to line the case panels, replacement quiet fans ($15 to $30 each), compressed air. Tools: Phillips #2 screwdriver, Torx T-10 if your case uses it, a flashlight, microfiber cloth.

AUEAR, 50 Pack 30mm Case Fan Soft Silicone Anti Noise Reducing Vibration Screws Rivet Mounting for or CPU
Step 1: Measure the baseline
Run the sound meter app for 60 seconds at 1 meter from the front of the PC, with the PC idle on the Windows desktop. Note the reading. Average 28 to 38 dB is normal for a decent build. Above 42 dB idle’s loud and means something’s clearly wrong. Above 50 dB and a single component’s failing (likely a dying fan bearing or GPU fan stuck at 100%).
Run a stress task like Prime95 small FFTs for 10 minutes, then re-measure. Note that load reading too. Typical load: 36 to 45 dB. Above 50 dB under load and the cooling solution’s inadequate or fan curves are overly aggressive.
Identify which component’s loudest. Put your ear (carefully) close to each fan and the PSU. The GPU’s usually the worst offender, especially small two-fan cards with high RPM defaults. Case fans come second, CPU air coolers and PSU fans third and fourth. Mechanical hard drives add a low 35 to 38 dB hum that’s especially noticeable late at night. Without a baseline, you’ll think every change helped even when it didn’t. The decibel scale’s logarithmic: a 3 dB drop represents a 50% reduction in sound power.
Step 2: Build proper fan curves in BIOS or FanControl
Reboot into BIOS. Find the fan control section (called Q-Fan on ASUS, Smart Fan on MSI, FanXpert on Gigabyte). Most boards default to fan curves that ramp aggressively starting at 40 to 45°C, which means the fans spool up the moment you open a browser. That’s the single biggest cause of “my PC is always loud.”
Set a flat low RPM (about 30% duty cycle, or 600 to 800 RPM on most 140 mm fans) up to 55°C. Then ramp linearly from 30% at 55°C to 80% at 75°C. Above 75°C, ramp to 100% by 85°C. This curve means fans stay quiet during browsing, light gaming, and YouTube, but kick up only when actual thermal load demands it.
For CPU fans, use CPU temperature as the source. For case fans, use a motherboard temperature sensor if your board exposes one, since CPU temp spikes briefly under load and you don’t want case fans whiplashing in response. FanControl (the third-party tool) lets you mix multiple temp sensors and apply hysteresis (a delay before changing speed), which prevents the fan from “hunting” between two speeds. BIOS doesn’t always support this.
Enable fan stop (zero RPM) on case fans below 40°C if your fans support PWM and your board allows it. Eliminates idle noise completely. CPU fan should always spin since CPU temperature can climb fast.
Re-measure idle and load dB after this single step. Usually you’ll see a 4 to 8 dB drop at idle and a small 1 to 3 dB drop under load. The biggest payoff for zero dollars.
Step 3: Tame the GPU fan curve
GPU fans default to aggressive curves at the factory. Nvidia and AMD cards target 70 to 75°C maximum, but modern GPUs are happy at 80°C with no measurable lifespan impact. Letting the GPU run 5 to 8°C hotter lets the fans spin 200 to 400 RPM slower, which translates to 4 to 6 dB quieter.
Install MSI Afterburner (works with any GPU brand). Open the fan curve editor. Set fans to 0% below 50°C (zero RPM idle, supported by most cards 2019 and newer). Ramp from 0% at 50°C to 40% at 70°C, then to 80% at 82°C. Cap maximum at 90% rather than 100%. Hitting 100% on most reference designs adds another 6 to 8 dB for almost no additional cooling.
Save the curve as a profile and enable “Apply at Windows startup.” Otherwise you’ll redo it every reboot.
If your GPU runs above 80°C with this curve during gaming, airflow into the case is the bottleneck. Add a front intake fan or clean dust from existing intakes. Undervolting’s the nuclear option: a 50 mV undervolt drops power draw 30 to 50W with zero performance loss, letting the fan curve stay slow at full load. Use MSI Afterburner’s voltage-frequency curve editor.
Step 4: Decouple vibrating components
Fans don’t just make air noise. They also transmit vibration into the case panels, which then radiate sound across a larger surface. A 140 mm fan rated at 22 dB acoustic noise can produce 28 to 32 dB at the listener if it’s hard-mounted to a thin steel panel. Soft-mounting with silicone grommets cuts that vibration coupling significantly.
Pull each case fan off the chassis. Replace the four steel screws with silicone anti-vibration mounts. They pull through the fan corner and lock into the case mounting holes. A 20-pack of grommets runs about $7. Cheap insurance. Re-mount each fan with the grommets in place.
Hard drives are the other big vibration source. A 7200 RPM 3.5-inch drive resonates at around 120 Hz, which couples into the chassis and produces an annoying low hum. If your case uses screws to mount drives, swap them for rubber-isolated drive trays (most cases ship with these but people skip installing them). For older cases, a $10 set of anti-vibration drive screws (rubber-wrapped) helps.
The PSU’s another vibration source if it’s hard-mounted. Most modern cases include a PSU shroud or rubber gasket on the bottom mount. Confirm yours is in place. Some budget cases skip this and you’ll feel the PSU vibrate the whole case bottom panel.
If you’ve got significant chassis ringing (tap the side panel and hear a metallic bonk), $25 to $30 of acoustic foam panels stuck to the inside of the side panels cuts panel resonance by 3 to 5 dB. Don’t cover ventilation holes. Just the flat panel areas.
Step 5: Replace the worst fans
After steps 1 through 4, you’ve usually cut total noise by 8 to 14 dB. If you still hear a specific fan as the loudest source, replace it. Stock case fans (the ones included in the case) are usually the cheapest part of the build and the easiest to upgrade.
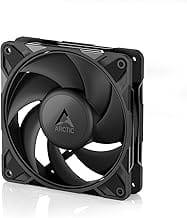
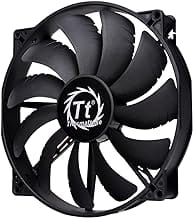
For 140 mm intake/exhaust, the be quiet! Silent Wings 4 (about $25), Noctua NF-A14 PWM ($30), and Arctic P14 PWM ($12) all rate under 25 dB at full speed. Arctic’s the budget winner: nearly as quiet as premium options at less than half the price. Get PWM versions, not DC, so fan curves work properly.
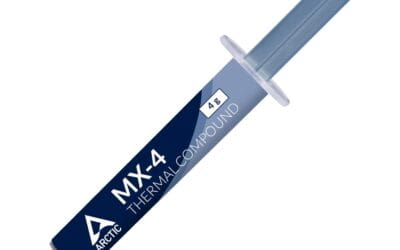
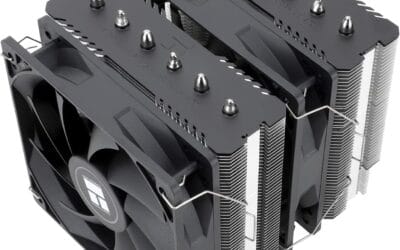
CPU air coolers: if you’ve got the stock Intel/AMD cooler, it’s almost certainly the noisiest single component. A $35 Thermalright Peerless Assassin 120 SE cools as well as $90 premium coolers at lower fan RPM. PSU: if older than 2020 or a budget unit, the fan’s probably loud. A 80 Plus Gold semi-fanless PSU (Corsair RM, Seasonic Focus GX) stops the fan below 30% load, so the PSU’s silent 80% of the time. Re-measure dB after each swap; expect 1 to 3 dB per change, stacking to 6 to 10 dB total.
Troubleshooting common issues during setup
Fans won’t ramp down even at idle. The motherboard’s fan header’s set to DC control instead of PWM, or the fan’s a 3-pin DC fan being run at a fixed voltage. Check BIOS settings and confirm PWM mode. Some boards have a per-header setting buried in the advanced fan menu.
Coil whine from GPU or PSU. Hard to fix electrically. Capping framerate (V-Sync or RTSS) at your monitor’s refresh rate reduces GPU load during light scenes and often eliminates the whine. PSU coil whine sometimes resolves itself after a few months of break-in. If it doesn’t, RMA’s an option since most manufacturers count audible coil whine as a defect.
One fan clicks or grinds. Bearing failure. Replace the fan. Don’t lubricate sleeve-bearing fans. The lubrication’s a temporary fix that lasts weeks and eventually returns louder. A $15 to $25 replacement’s the right answer.
Loud hum at low RPM, quiet at high RPM. Counterintuitive but real. Some fans have resonance points at specific RPM ranges. Adjust your fan curve to skip the resonant range (so the fan jumps from 600 RPM to 1000 RPM with no intermediate dwell). FanControl supports this directly with “step” curves.
Before / after metrics or expected outcome
Realistic targets after working through all five steps: idle dB at 1 meter drops from 38 to 45 dB (typical untouched build) to 28 to 32 dB. Gaming load drops from 46 to 52 dB to 36 to 40 dB. Total reduction’s 8 to 14 dB, which sounds roughly twice as quiet to the human ear (a 10 dB reduction’s perceptually half-volume).
A well-tuned build with Noctua or be quiet! fans and a Gold PSU running an undervolted RTX 4070-class GPU hits 30 dB idle and 38 dB under gaming load. CPU temps stay equivalent or 1 to 3°C higher since fan curves are more relaxed. GPU temps rise 3 to 6°C, well within safe operating range. Boost clocks may drop 30 to 60 MHz, less than 1% performance loss in games. Frame times and 1% lows stay identical. None of these changes affect performance under normal use.
Variations / advanced setups
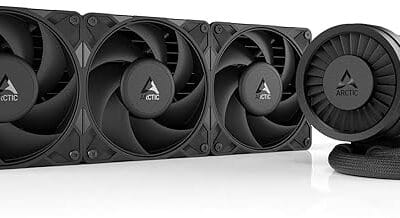
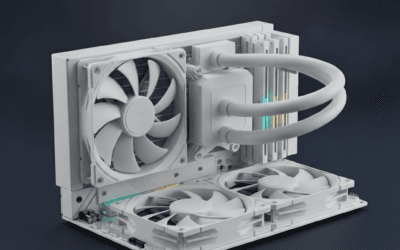
For truly silent (sub-25 dB) builds, an AIO water cooler with a 240 or 360 mm radiator lets the pump and fans run low RPM. Fractal Lumen S36 and Arctic Liquid Freezer III both score well around $90 to $120. Fanless PSUs (Seasonic Prime TX 750 Fanless, around $300) eliminate that source completely for builds under 400W. Passive GPU cooling exists for low-power cards (RX 6400, RTX 4060 with aftermarket fanless coolers), but anything above 200W TDP needs fans. For SFF builds, quiet’s harder since fans spin faster to move the same air; an NR200P-style case with mesh panels lets you use slower fans.
Common questions
Does dust really make PCs louder?
Yes. Clogged heatsink fins and dust on fan blades both raise temperatures and unbalance fans. A heatsink with 60% airflow loss from dust forces fans 30 to 40% faster to maintain temps. Clean filters monthly, heatsinks annually.
Are Noctua fans worth the extra cost?
Sometimes. At low RPM (under 800), the difference between Noctua and Arctic’s almost zero. At higher RPM, Noctua’s SSO bearing and blade design’s measurably quieter. If your fan curve keeps fans below 1000 RPM 95% of the time, save money with Arctic.
Does liquid cooling make PCs quieter than air?
Only if the radiator’s large. A 240 mm AIO can be similar to a good air cooler. A 360 mm AIO’s noticeably quieter. The pump itself adds 24 to 28 dB of low-frequency noise that some people find more annoying than fan hum.
Should I cap framerate to reduce noise?
Yes. Capping at 120 fps on a 144 Hz monitor (or 60 fps for casual gaming) reduces GPU load by 20 to 40%, which lets fans stay slow. Use RTSS for system-wide caps or in-game settings where available.