Thermal paste application is one of those tasks that gets way more debate than it deserves. YouTubers run 20-minute videos comparing the pea method versus the X pattern versus spreading with a spatula. The actual truth is boring: pretty much any sensible application works, and the difference between methods is usually 1-2 degrees Celsius at full load. What matters more is using the right amount, applying it cleanly, and not skipping the steps that actually affect performance. Here’s how to do it without overthinking.
What you need on the bench
Keep this short list within arm’s reach before you start. The job goes fast once you’re set up.
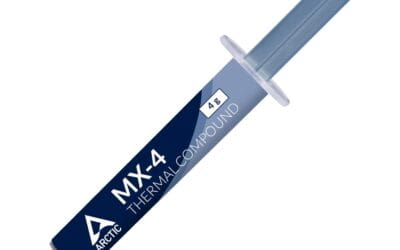
A tube of thermal paste rated 5 W/m-K or better – mid-tier options like Arctic MX-6, Noctua NT-H2, or Thermal Grizzly Kryonaut all work well. The expensive liquid metal stuff (Conductonaut, etc.) gives marginal gains and a real risk of shorting components if you slip, so skip it unless you know what you’re doing.
99% isopropyl alcohol for cleaning. Don’t use 70% rubbing alcohol from the medicine cabinet – the extra water content leaves residue. Lint-free cloth, coffee filters, or actual cleanroom wipes work for the wipe-down. Avoid paper towels because they shed fibers.
A plastic spatula or stiff card if you’re going to use the spread method. The thermal paste tube usually includes one. If not, an unused credit card works fine.
Clean off the old paste first
If you’re replacing existing paste, this is the step people skip and regret. Old paste left under fresh paste means air gaps, uneven contact, and worse temps than you started with.
Remove the cooler carefully – don’t twist hard or you can rip the CPU out of its socket if the paste has bonded. A slight twist while pulling up usually breaks the seal. Once the cooler’s off, wipe the CPU’s heat spreader and the cooler’s contact plate with isopropyl alcohol on a lint-free cloth. Use gentle pressure. Work in one direction until you see clean metal on both surfaces.
Don’t pour alcohol directly onto the CPU. Apply it to the cloth first. Liquid running into the socket or onto motherboard components is asking for trouble. Once cleaned, let everything air-dry for 30 seconds before applying new paste.

Pros
- Stainless steel material offers corrosion resistance for outdoor-rated door hardware at this price tier.
- Broad door compatibility covers glass, wood, barn sliding, aluminum, and metal door types.
- Screw-mount installation requires only hole spacing confirmation, no complex fitting process described.
Cons
- No owner reviews exist at time of writing, making real-world durability and finish quality unverifiable.
- Dimensions and load rating not specified in source data, complicating fit confirmation before purchase.
- Single handle per order with no stated hole-spacing measurements requires careful pre-purchase measurement.
The IKUMOK pull handle is a budget-tier, single-piece stainless steel door handle designed for glass, wood, barn sliding, aluminum, and metal doors. It targets homeowners, renters, or small business operators replacing worn or missing handles on interior and exterior doors without a large hardware budget.
The most defining feature is the stainless steel material, which the listing describes as having anti-rust performance suited for outdoor exposure including rain and direct sunlight. At this tier, stainless steel handles typically outlast zinc alloy alternatives in humid environments, though actual grade (304 vs 316) is not specified in the source data, so marine or coastal durability cannot be confirmed.
The primary trade-off at this tier is data scarcity. Hole-to-hole center distance, handle length, projection depth, and grip diameter are all absent from the listing. Buyers cannot confirm fit against an existing cutout without contacting the seller directly. Finish consistency and mounting hardware quality are also unverifiable without owner feedback, which does not yet exist for this listing.
Buy this if you need a low-cost replacement handle for a standard interior glass or wood door and can tolerate some installation uncertainty. Skip this if you need a confirmed hole-spacing match for an existing door prep, or if the door is in a high-traffic commercial setting where load rating and finish longevity matter.
Material and Finish: The handle is constructed from stainless steel, described in the listing as high-hardness with anti-rust performance. No specific alloy grade (e.g. 304 or 316) is stated. Surface finish is described as smooth. No coating type or thickness is specified.
Door Compatibility: Listed applications include glass doors, wood doors, barn sliding doors, aluminum doors, metal doors, shower and bathroom doors, garage doors, office doors, and hotel gates. No minimum or maximum door thickness range is provided in the source data.
Installation: Mounting uses a screw-based method. The listing instructs buyers to confirm hole-to-hole center distance before installation and to tighten screws to prevent loosening. No hole spacing dimension, screw size, or included hardware count is stated in the source data.
Purchase Configuration: Each order contains one handle, suitable for a single door leaf. Double door installations require two separate orders. No weight capacity, handle length, projection depth, or grip diameter is specified in the source data.
The pea method (recommended)
For 95% of users, this is the right method. It’s foolproof, it’s fast, and it works on every modern CPU layout.
Squeeze a dot of paste roughly the size of a small pea (4-6mm diameter, or about the size of a BB) onto the center of the CPU heat spreader. That’s it. Don’t spread it. Don’t smooth it out. Just leave the dot sitting there.
When you mount the cooler, the clamping pressure forces the paste outward in a roughly circular pattern, filling the gap between CPU and cooler evenly. The contact surface naturally pushes air out the sides as the paste spreads. Done correctly, paste should fill the entire surface without bulging over the edges.
This method works because thermal paste is designed to spread under pressure. Forcing it manually with a spatula often introduces air bubbles that hurt performance. The pea dot lets physics do the work.
The X pattern (for big CPUs)
If you’re working with a large CPU like a Threadripper or older HEDT chip with a rectangular heat spreader, the pea dot might not spread evenly to all corners. The X pattern handles this better.
Draw a thin X across the heat spreader, with each line maybe 2-3mm thick. The four arms of the X reach toward the corners and the center point covers the middle. When the cooler mounts, the X spreads outward into the four quadrants, giving more uniform coverage on large surfaces.
For standard desktop CPUs (Ryzen 5/7/9 7000-9000 series, Intel Core i5/i7/i9 12th-15th gen), this method is overkill. Pea works fine.
The spread method (last resort)
Manually spreading paste with a spatula across the heat spreader is the method most likely to introduce problems. People do it because it “looks neater,” but the risks outweigh the benefit.
If you must use this method, apply a thin layer just thick enough to cover the metal completely. You should still see the metal slightly through the paste – if you can’t, you’ve applied too much. Spread in one direction, not back and forth, to avoid trapping air bubbles.
Honestly, just use the pea method. It’s faster, cleaner, and produces better results in most cases.
Common mistakes
A few traps catch first-time applicators. Knowing them ahead of time saves rework.
Too much paste. People think more is better. It’s not. Excess paste oozes out the sides when you mount the cooler, can drip onto motherboard components, and provides zero additional cooling. If your dot is bigger than a pea, you’ve gone too far.
Too little paste. Goes the other way – a tiny dot leaves dry spots on the heat spreader where the cooler doesn’t make full contact. You’ll see this as a CPU that hits high temps under load while idling fine. The dot should look substantial when applied, not microscopic.
Forgetting to remove the plastic film. Many CPU coolers ship with a thin protective film over the contact plate. It’s clear, easy to miss, and absolutely catastrophic if left on. Always check the cooler’s base before mounting. If the plate looks too smooth or has any blue/clear sheen, peel before installing.
Lifting the cooler to check spread. Once you’ve mounted the cooler, leave it alone. Lifting it up to peek at how the paste spread breaks the seal and forces you to start over – clean both surfaces and reapply. Trust the pea dot.
How often to redo it
Modern thermal pastes last 3-5 years before drying out enough to affect performance. You don’t need to replace it annually. The signs you need a refresh: CPU temps climbing 10+ degrees above where they used to sit at the same workload, or you’ve removed the cooler for any reason (RAM swap, motherboard change, etc.) since old paste should never be reused.
If your PC is hitting thermal throttling temps unexpectedly, repasting is worth trying before assuming the cooler is dead or the CPU is failing. It’s a 15-minute job that solves more problems than people give it credit for.
Common questions
How much paste should I use?
A dot the size of a small pea (about 0.2 grams or roughly 4-6mm in diameter) is the right amount for most desktop CPUs. The cooler’s clamping pressure spreads it across the heat spreader evenly. More paste doesn’t equal better cooling – excess just oozes out the sides. A standard 4-gram tube has enough for 15-20 applications.
Pea method vs spread method – which is better?
For 95% of users, the pea method wins. It’s faster, less likely to introduce air bubbles, and produces equal or better thermal performance than manually spreading. The spread method has marginal advantages on very large rectangular CPUs like Threadripper, but for standard Ryzen and Intel Core chips, just use pea.
Can I use too much thermal paste?
Yes. Too much paste creates a thick barrier between CPU and cooler that actually reduces heat transfer compared to a thin even layer. It also squeezes out around the edges where it can drip onto motherboard components. Some pastes are slightly conductive electrically, which means runaway paste can cause shorts. Stick with a pea-sized dot.
Do I need to remove old paste first?
Always yes. Layering new paste over old paste means you’re trapping a layer of dried, hardened material between the new application and the cooler. That dried layer transfers heat poorly. Clean both the CPU heat spreader and cooler contact plate with 99% isopropyl alcohol and lint-free cloth before applying fresh paste. Takes 60 seconds, saves your temps.