

You bought fast RAM rated for 3600MT/s or 6000MT/s, but out of the box your PC is quietly running it at 2133 or 2400. That’s not a defect. It’s the default, and the fix is XMP. Enabling XMP tells your motherboard to load the memory’s rated speed, timings, and voltage in one click, which is the difference between the performance you paid for and a fraction of it. This walkthrough gets you there step by step, on both Intel and AMD boards, without guesswork.
If you’re still picking a kit, our guides to the best RAM for gaming in 2026 and the best budget RAM cover which speeds and capacities actually matter, and the best DDR5 kits if you’re on a newer platform. But once the sticks are seated, XMP is what wakes them up. Here’s how.
The whole thing takes about five minutes and doesn’t require any software or a single command line. Everything happens in your motherboard’s firmware, the screen you reach before Windows loads. Don’t let the word “overclock” scare you off either. An XMP profile is validated by the memory maker for that exact kit, so you’re not gambling with random settings, you’re loading a spec sheet the manufacturer already signed off on. Follow the steps in order and you’ll be running your rated speed before your coffee goes cold.
What you’ll need
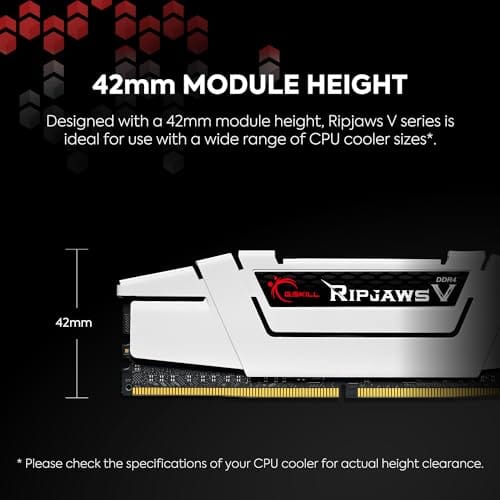
Not much. You need a motherboard that supports XMP or its AMD equivalent, which is basically every enthusiast and mid-range board from the last decade, plus a RAM kit that carries an XMP profile. Most performance memory does. A kit like the G.SKILL RipjawsV DDR4 32GB (2x16GB), rated 3600MT/s at CL18-22-22-42 and 1.35V, stores its XMP profile right on the modules, so the board just reads it and applies it. At $229.99 with a 4.6 rating, it’s a clean example of a kit built to run at its advertised speed the moment you flip XMP on. Have a few minutes and a keyboard handy, since you’ll be in the BIOS.

Pros
- DDR4-3600 XMP at 1.35V is the Ryzen AM4 sweet spot, aligning FCLK 1:1 at 1800MHz for best latency.
- Matched 2x16GB kit is factory-tested as a pair, reducing dual-channel instability compared to mixing sticks.
- Compatible with both Intel XMP and AMD DOCP/A-XMP BIOS profiles without manual sub-timing adjustments.
- Ships with JEDEC SPD fallback so the system always boots safe at default clocks before XMP is enabled.
Cons
- CL18 primary latency is mid-range; DDR4-3600 CL16 kits exist for buyers prioritizing tighter timings.
- No ECC support, so workstation or Threadripper ECC builds need a different kit entirely.
The G.SKILL RipjawsV F4-3600C18D-32GVK is a mid-range DDR4 desktop kit targeting Intel and AMD mainstream platform builders who want 32GB capacity at DDR4-3600 without overpaying for CL14 or CL16 enthusiast kits. It ships as a matched 2x16GB dual-channel pair in the standard 288-pin U-DIMM form factor.
The defining spec here is the XMP profile: DDR4-3600 at CL18-22-22-42, 1.35V. On AMD AM4 Ryzen systems, 3600MHz is the well-documented sweet spot for achieving a 1:1 FCLK ratio at 1800MHz, which keeps infinity fabric latency in check and translates to measurable gains in lightly-threaded workloads and gaming frame times compared to DDR4-3200 or lower.
CL18 is a genuine trade-off at this speed. Competing DDR4-3600 kits with CL16 or CL14 exist and offer lower absolute latency, though they typically carry a price premium. Owners report stable XMP operation across a wide range of B450, X570, and Z490/Z590 boards, but reaching rated speed on some budget AM4 boards may require manual sub-timing adjustments or AGESA microcode updates.
Buy this if you are building or upgrading an AM4 Ryzen or Intel LGA1700 desktop and want reliable 32GB DDR4-3600 dual-channel performance without tuning. Skip this if you need CL16 or tighter for competitive latency, or if your board has a limited QVL and you have not verified compatibility via G.SKILL's configurator tool first.
Platform Support: This kit uses 288-pin DDR4 U-DIMM and is compatible with Intel LGA1700 (Z690/Z790) and AMD AM4 (B450/X470/B550/X570) platforms. AM5 uses DDR5 exclusively, so this kit is not compatible with Ryzen 7000/9000 series builds on AM5 boards.
XMP and DOCP Activation: Rated speed of DDR4-3600 CL18-22-22-42 at 1.35V requires enabling XMP (Intel) or DOCP/A-XMP (AMD) in BIOS. Default JEDEC SPD boots at DDR4-2133 or DDR4-2400. On AM4, DDR4-3600 aligns FCLK at 1800MHz for a 1:1 ratio, which is the recommended operating point for Ryzen 3000 and 5000 series CPUs.
Slot Population and Mixing: Install both sticks in the recommended dual-channel slots per your motherboard manual, typically A2 and B2 in a 4-slot board. G.SKILL explicitly warns against mixing this kit with other modules; doing so voids the matched-pair guarantee and risks instability at XMP speeds.
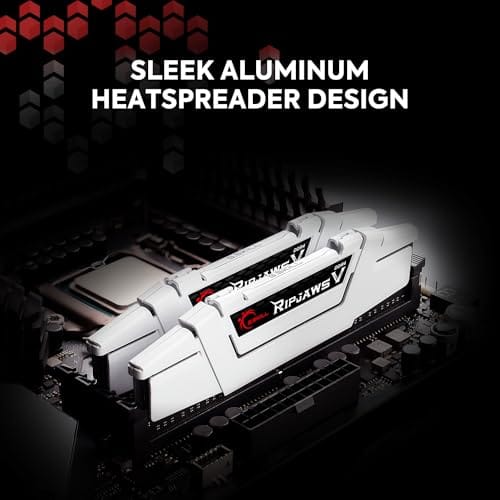
Cooler Clearance: Exact heatspreader height is not specified in the source data, but RipjawsV modules are noted for a lower profile than Trident Z or RGB variants, reducing conflicts with wide tower coolers. Verify clearance if using a low-clearance cooler on a tight ITX board.
Step 1: Enter your BIOS/UEFI
Restart the PC and press the BIOS key as it boots. It’s Delete on most desktops, or F2 on some boards and laptops. Tap it repeatedly the instant the manufacturer logo appears, before Windows starts loading. If you miss the window and Windows boots, just restart and try again, or hold Shift while clicking Restart in Windows to reach advanced startup and boot into UEFI firmware settings from there. You’ll land on either a graphical UEFI screen or an older blue text menu, depending on your board’s age.
If the screen flashes by too fast to catch the key, that’s usually Fast Boot doing its job. The Shift-plus-Restart route sidesteps it every time, taking you to Troubleshoot, then Advanced options, then UEFI Firmware Settings, and one more restart drops you straight into the BIOS. Laptop users especially should lean on this method, since many thin-and-light machines barely show a logo at all. Once you’re in, take a second to note the current memory speed shown on the main screen, because that’s the “before” number you’ll compare against after you’re done.
Step 2: Switch from EZ Mode to Advanced Mode
Many modern boards open in a simplified “EZ Mode” dashboard that shows temps, fan speeds, and a big XMP toggle right on the main page. If you see that toggle, you can honestly stop here and use it. If you don’t, press F7 or look for an “Advanced Mode” button to reveal the full menus. This is where ASUS, MSI, Gigabyte, and ASRock each hide the memory profile under a slightly different name, so knowing the layout saves you time in the next step.
Step 3: Find the XMP or EXPO/DOCP setting
The profile lives in the overclocking or memory section. On ASUS it’s under “Ai Tweaker,” on MSI under “OC,” on Gigabyte under “Tweaker,” and on ASRock under “OC Tweaker.” The setting itself has different names by brand and platform. Intel boards call it XMP. AMD boards call it DOCP or A-XMP on older DDR4 chipsets, and EXPO on newer DDR5 AM5 boards. They all do the same job, loading the memory’s stored profile. Select it and you’ll usually see one or two profiles listed, such as “XMP Profile 1” at the kit’s rated 3600MT/s.
Step 4: Select the profile and verify the values
Choose Profile 1. The board fills in the frequency, timings, and voltage automatically, so a 3600 kit jumps from a stock 2133 to its rated 3600MT/s, the timings snap to something like 18-22-22-42, and the DRAM voltage moves to 1.35V. Glance at those numbers to confirm they match what’s printed on your kit or its spec page. If your board lists two profiles, Profile 1 is the primary rated spec and Profile 2 is often a slightly slower fallback. Pick the one that matches the speed you bought. Don’t manually crank voltage past the profile value on your first pass.
On some AMD DDR5 boards you’ll also see a “memory context restore” or “power down mode” option nearby. Leave those at their defaults for now. They mainly affect boot time, not stability, and fiddling with them before you’ve confirmed the base profile works just adds variables. The goal on this first pass is simple: load the profile, save, and prove it boots clean at the rated speed. You can chase faster boot times or tighter numbers later once you know the foundation is solid.
Step 5: Save, reboot, and confirm in Windows
Press F10 to save and exit, confirm, and let the system restart. The first boot after enabling a memory profile can take longer than usual, and some boards cycle power once or twice while they train the memory. That’s normal, so don’t panic if the screen stays black for ten or fifteen seconds. Once Windows loads, open Task Manager, go to the Performance tab, and click Memory. The Speed reading should now show your rated figure. For a fuller check, CPU-Z under the Memory tab shows the actual clock, which you double for the effective rate, so 1800MHz there equals 3600MT/s.
Troubleshooting common issues
The PC won’t boot after enabling XMP
If the system fails to post, most boards auto-recover after two or three failed attempts and drop you back to default speed. If it hangs, clear CMOS using the jumper or the clear button on the rear I/O, which resets the BIOS and undoes the profile. Then re-enter BIOS and try Profile 2 if it exists, or a slightly lower manual frequency. Not every CPU memory controller hits every kit’s top rated speed, especially with four sticks installed.
Windows is unstable or crashes at the rated speed
Random crashes or blue screens after XMP usually mean the memory controller needs a touch more voltage or the speed is a hair too aggressive for your chip. Run a memory check with the Windows Memory Diagnostic, or a bootable checker like Karhu or the built-in Windows tool, to confirm. If errors show, bump the frequency down one step or use the fallback profile. Stability beats a headline number that crashes your games.
There’s no XMP option in my BIOS
A few budget or office boards lock memory to JEDEC default and never expose a profile toggle. Update to the newest BIOS from your board maker’s support page first, since the feature is sometimes added later. If it’s still absent, the board or its chipset simply doesn’t support memory overclocking, and the RAM will run at its base speed regardless of the kit’s rating.
Before and after expected outcomes
The gain is real and free. Moving a DDR4 kit from a default 2133 to a rated 3600MT/s is a roughly 70 percent bandwidth jump, and on AMD Ryzen especially, faster memory feeds the CPU’s Infinity Fabric and lifts minimum frame rates in games noticeably. You won’t see it on a desktop icon, but you’ll feel it in smoother 1 percent lows, quicker load-heavy tasks, and better performance in memory-hungry work like video editing. It’s the highest-value five-minute change you can make to a new build.
To put a number on it, run a quick before-and-after with a free tool like AIDA64’s memory bandwidth reading or the built-in benchmark in CPU-Z. At stock JEDEC speed a typical DDR4 kit reads around 34,000 MB/s of bandwidth, and enabling that 3600 profile pushes it well past 50,000 MB/s on a dual-channel setup. Latency drops too, often from the mid-70s of nanoseconds down toward the mid-60s. Those aren’t just synthetic wins. In CPU-bound games at 1080p, where the processor is doing the heavy lifting, the faster memory can add several frames per second and iron out the stutters that come from the CPU waiting on slow RAM.
Variations and advanced setups
Once XMP is stable, some builders push further by tightening primary timings by hand or nudging the frequency past the rated spec, which is manual memory overclocking rather than a one-click profile. That’s optional and carries more risk of instability, so it’s best left until you’ve confirmed the base profile runs clean for a few days. If you’re chasing every last frame on a high-end chip, our guide to the best RAM for gaming and video editing covers which kits leave headroom for that kind of tuning.
There’s also the four-stick question. Filling all four DIMM slots puts more strain on the CPU’s memory controller than running two, so a kit that hits 3600 easily as a 2x16GB pair might need a small step down, say 3400 or 3200, when you run four sticks. That’s normal and not a fault in the RAM. If you’re building for maximum capacity, buying a single matched 2x16GB or 2x32GB kit rather than mixing two separate kits gives XMP the best odds of applying cleanly at full speed, because the modules are binned and validated to run together.
Common questions
Is enabling XMP safe for my RAM and CPU?
Yes. XMP applies voltage and timing values the memory maker validated for that kit, so you’re running the sticks exactly as designed. It’s a mild, factory-sanctioned overclock, and it won’t void a RAM warranty. The only caveat is that a very old or weak CPU memory controller might not hold the top speed with all four DIMM slots filled, in which case you use the fallback profile.
What’s the difference between XMP, DOCP, and EXPO?
They’re the same idea from different camps. XMP is Intel’s Extreme Memory Profile standard. DOCP and A-XMP are how older AMD boards read that same XMP data, and EXPO is AMD’s own newer profile format for DDR5 on AM5. Whichever your board labels it, selecting the profile loads the kit’s rated speed, timings, and voltage in one step.
Do I need XMP if I bought high-speed RAM?
Absolutely, and this trips up a lot of first-time builders. Without XMP enabled, that 3600 or 6000 kit runs at the motherboard’s conservative JEDEC default, often 2133 or 4800, no matter what’s printed on the box. The rated speed only activates when you turn the profile on, so skipping this step means paying for fast memory and never using it.
Will XMP work with any motherboard?
Most enthusiast and mainstream boards support it, but some entry-level office boards lock memory to default speeds. Check your board’s spec sheet for XMP, DOCP, or EXPO support before buying a high-speed kit. If the board doesn’t support memory profiles, the RAM still works fine, it just runs at base speed rather than its rated figure.





























Write Your Review
No reviews yet. Be the first to share your experience!