Dropping a CPU into a motherboard sounds intimidating until you’ve done it once. Then it becomes the easiest part of building a PC – faster than seating RAM, less fiddly than routing cables, almost foolproof if you go slow. The components themselves are nearly bulletproof now. Intel’s LGA 1851 sockets and AMD’s AM5 platform both ship with locking mechanisms that prevent most of the disasters you’d read about in old Reddit threads. Bent pins are still possible, but they’re entirely a user-handling problem, not a design flaw. Here’s the actual process from removing the socket cover to closing the case.
What you’ll need on the desk
Before you start, get everything in one spot. A surprising number of failed installs come from someone getting up mid-job to grab a missing tool.
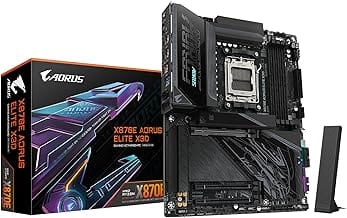
You’ll want the CPU still in its anti-static plastic clamshell, the motherboard out of the case (or accessible if it’s mounted), a tube of thermal paste rated for at least 5 W/m-K, a CPU cooler ready to install (air or liquid), a Phillips #2 screwdriver, and lint-free cloth or coffee filters for cleanup. Skip the gloves. Bare clean hands give you better grip and tactile feedback than rubber.
Keep the motherboard on a flat, well-lit surface. The cardboard box it shipped in works perfectly as a non-conductive work mat. Don’t install on carpet – static buildup is real, even if modern components handle it better than they used to.
Step 1: Open the CPU socket
Find the metal retention arm next to the CPU socket. On both Intel LGA and AMD AM5, it’s a small lever with a hook that catches under a tab. Push the lever down slightly, then out away from the socket, then up to vertical. This releases the load plate, which is the metal frame that sits over the CPU once installed.
Lift the load plate fully open. You’ll see a plastic socket cover protecting the pins underneath. Don’t remove it yet. That cover stays in place until the CPU is seated, because the moment the socket is exposed, every speck of dust or accidental finger touch is a problem.
Step 2: Identify the CPU orientation
CPUs only go in one direction. Both Intel and AMD use alignment notches and a small gold triangle in one corner of the package. The motherboard socket has matching marks. Line them up before you go anywhere near the socket.
For Intel LGA, the triangle on the CPU corner matches a triangle stamped on the socket frame. For AMD AM5, the same triangle convention applies (which is new for AMD – older AM4 used pin grid alignment, but AM5 moved to a similar LGA-style setup).
Pick up the CPU by the edges. Never touch the gold contacts on the bottom. Skin oils transfer fast and can interfere with electrical contact, especially on Intel’s exposed land grid array. Hold it from the heat spreader (the metal top) and edges only.
Step 3: Lower the CPU into place
Position the CPU directly above the socket with the alignment triangles matched. Lower it straight down – no sliding, no tilting. The CPU should drop into the socket and sit flat without any pressure from you. If it doesn’t sit perfectly flat, it’s misaligned. Lift it straight back out, check the orientation, and try again.
Never force a CPU into a socket. If you feel resistance, stop. The chip drops in with literal zero force when oriented correctly. Pushing past resistance bends pins, ruins motherboards, and voids warranties faster than you can blink.
Once the CPU sits flat, lower the load plate back down. The plastic socket cover will pop off automatically as the plate closes. Save that cover – you’ll need it if you ever return the motherboard.
Push the retention lever back down and hook it under its tab. There’s some resistance here; it’s normal. The lever is applying real clamping force across the CPU. Don’t be alarmed by the firmness. If you’ve installed correctly, the lever closes smoothly to its locked position.
Step 4: Apply thermal paste
Thermal paste fills the microscopic gaps between the CPU’s heat spreader and the cooler’s contact plate. Without it, heat transfer is poor and your CPU throttles. With too much, paste oozes out the sides and can make a mess. The right amount is small.
The “pea-sized dot in the center” method is the easiest and most reliable. Squeeze out a single drop of paste roughly the size of a pencil eraser onto the center of the heat spreader. When you mount the cooler, the pressure spreads the paste evenly across the contact area. Done.
Other methods exist (X pattern, line pattern, spread with a card), but the pea dot works on nearly every CPU and saves you from over-applying. If your CPU has multiple chiplets (like AMD Ryzen 7000 and 9000 series), a slightly thicker line across both chiplets sometimes helps marginally, but most people don’t see a meaningful difference.
Step 5: Install the cooler
Mounting the cooler depends on which cooler you bought, so check its manual. Air coolers typically use four screws into a backplate behind the motherboard. AIO liquid coolers use a similar bracket system but the pump head goes where the air cooler’s contact plate would.
Two universal tips: First, tighten in a star pattern (think how you tighten lug nuts on a car wheel). Do partial turns on each screw, alternating across the four corners. This ensures even pressure across the CPU. Second, snug the screws firm but don’t crank. If you’re using a screwdriver bit, hand-tightening once the bit slows down is plenty. Most cooler mounts include springs that limit how much pressure you can apply anyway.
Connect the cooler’s fan cable to the CPU_FAN header on the motherboard. This is critical – if no fan is connected to CPU_FAN, most motherboards refuse to POST as a safety feature. The header is usually labeled in white silkscreen near the CPU socket.
First boot
Connect power, plug in a monitor and keyboard, and power on. First boots on new builds can take 30-60 seconds while the motherboard initializes RAM training. Don’t panic if the screen stays dark for a while.
Once you see the BIOS, check CPU temperature. Idle temps should sit at 30-45 C. Anything above 60 C at idle suggests your cooler isn’t properly mounted or thermal paste application failed. Common causes: forgot to remove the plastic film on the cooler’s contact plate (this happens more than you’d think), uneven mounting pressure, or missing thermal paste entirely.
If temps look good, you’re done. Welcome to your new PC.
Common questions about CPU installation
How much thermal paste do I need?
A drop the size of a pea or a small pearl, applied to the center of the CPU heat spreader. The cooler’s clamping pressure will spread it evenly across the contact area. Too much paste oozes out the sides and can short components if it’s electrically conductive (most pastes aren’t, but it’s still messy). Too little leaves air gaps and your CPU runs hot. When in doubt, slightly less is better than more.
Can I reuse old thermal paste?
No. Once thermal paste has been compressed between a CPU and cooler, it’s spent. Clean off the old paste with 99% isopropyl alcohol and lint-free cloth before applying fresh paste. Reusing old paste leads to poor thermal transfer and shortened CPU life. A 4-gram tube of decent paste costs $8 and lasts for 10+ applications, so there’s no reason to skip this step.
What if I see bent pins after installation?
For Intel LGA sockets, the pins are on the motherboard. You can sometimes straighten them with a fine sewing needle or mechanical pencil tip under magnification, but this voids your motherboard warranty and success rate is mixed. For AMD AM5 (also LGA), same situation. Older AMD AM4 had pins on the CPU, which were repairable but fragile. If you’re seeing bent pins, stop, take a photo, and either attempt repair carefully or RMA the motherboard if it’s new.
Do I need to ground myself before handling a CPU?
Best practice is yes. Touch a grounded metal object (an unplugged PC case works) before handling components to discharge any static buildup. An anti-static wrist strap is cheap insurance for $5 if you’re nervous. That said, modern CPUs and motherboards are far more ESD-resistant than they used to be, and millions of people install CPUs every year without grounding and have zero issues. The risk is real but small.
How long does CPU installation take?
For an experienced builder, 5-10 minutes including thermal paste and cooler mounting. For a first-timer who’s reading instructions carefully, plan for 30-45 minutes. Don’t rush. The actual mechanical steps are quick; the time goes into reading the cooler manual, double-checking orientation, and being patient with screw alignment. There’s no prize for finishing fast.