

You hit the power button, the PC lights up, and the CPU cooler just sits there. No spin, no whir, nothing. It’s an alarming sight, because a stationary cooler on a running processor means heat is building with nowhere to go. The good news is that a cooler that won’t spin is usually a simple wiring, header, or fan-curve problem, not a dead component, and you can work through the causes below before spending a cent on parts.
Move fast, though. A modern CPU can overheat in seconds without airflow, so if the fan stays dead and temperatures climb, shut down and diagnose rather than pushing on. If your cooler turns out to be genuinely failed, our guides to the best CPU cooler for 2026 and the best air CPU cooler point you toward solid replacements. For now, let’s find out why yours isn’t turning.
First check the obvious
Take 30 seconds before assuming the worst. Is the fan cable actually plugged into a fan header on the motherboard, and is it seated fully? A cable that’s half-connected or plugged into the wrong header is the single most common cause. Look specifically for the header labeled CPU_FAN, since that’s where your cooler belongs and where the board expects a fan signal.
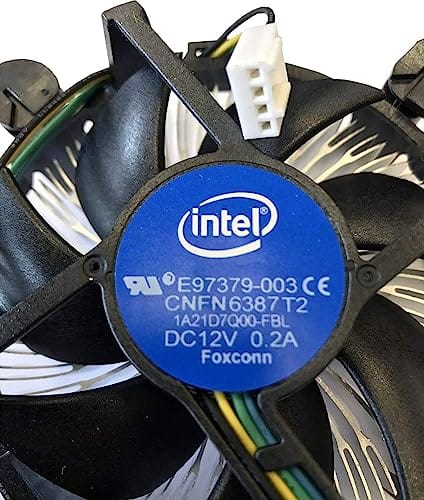
Also rule out a snag. A stray cable, a zip tie, or a bit of packaging foam can physically block the blades, especially right after a build. Power down, open the case, and give the fan a gentle spin by hand. If it turns freely and there’s nothing jamming it, the problem is electrical or configuration, which the causes below cover. If it’s stiff or stuck, clear the obstruction first.
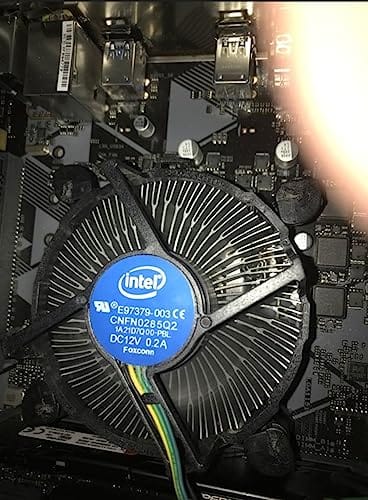
While you’re in there, glance at the motherboard’s onboard readouts if it has them, or check the BIOS hardware monitor after a restart. A CPU fan reading of zero RPM confirms the board sees no signal, which points at wiring or a dead fan. A reading that jumps around or reports a value even though the blades aren’t moving suggests the fan is getting power but the motor has seized. That one quick number narrows your search a lot before you start pulling parts.
Cause #1: The fan is plugged into the wrong header or a bad connection
This trips up a huge number of builders. The cooler fan needs to connect to the CPU_FAN header, not a case-fan header, a SYS_FAN, or an RGB-only connector. Plugging it into the wrong spot can leave it unpowered or running an unexpected curve. And a 4-pin fan pushed onto a 3-pin header, or one seated crookedly, may not get a clean signal.
Reseat the connector firmly onto the correct CPU_FAN header, making sure the plastic guide lines up so all pins engage. If your cooler uses a splitter or a hub, check that too, since a loose splitter can kill power to the fan. Once it’s on the right header and fully seated, boot again and watch. If it spins now, you’ve found it. If not, the fan itself or the board header may be the issue, which the next cause covers.
Pay attention to pin count, too. A 4-pin PWM fan on a 4-pin header gives the board full speed control, but plugging a 4-pin fan onto a 3-pin header, or a 3-pin fan onto a 4-pin header, can leave it running at an odd speed or not at all depending on the board’s settings. An AIO cooler adds another wrinkle, since its pump usually wants a dedicated AIO or pump header while its radiator fans go to CPU_FAN or a splitter. Mixing those up is a classic reason a fresh water-cooled build shows a stationary fan on first boot.
Cause #2: The fan curve has it set to stop at idle
Here’s a surprise that isn’t actually a fault. Many motherboards ship with a fan mode that stops the CPU fan entirely at low temperatures, a feature sometimes called zero-RPM or a semi-passive mode. If your cooler is silent at the desktop but the PC runs fine and temps are normal, the fan may simply be off on purpose, waiting to spin up under load.
Check this in the BIOS under the fan control or hardware monitor section. Look at the CPU fan curve and see whether it’s set to a silent or passive profile that keeps the fan stopped below a temperature threshold. If so, you can raise the minimum duty cycle so the fan always turns, or switch to a standard curve. Load the CPU and watch: if the fan kicks on as temperatures rise, it was never broken, just tuned to stay quiet at idle.
This trips people up most after a BIOS update or a CMOS reset, which can reload default fan settings and switch on a quiet mode you never chose. If your fan used to spin at idle and suddenly stopped after a firmware change, this is the first place to look. You can confirm it in seconds by running a quick stress load or even opening a demanding game, then watching whether the fan spins up. A cooler that responds to temperature is working exactly as designed, no fix required.
Cause #3: The fan or cooler has failed
If you’ve confirmed the header is right, the connection is solid, and the fan curve isn’t parking it, the fan itself may be dead. Bearings wear out, motors fail, and cheap fans give up after a few years of dust and heat. Try plugging the fan into a different header, or connect a known-good fan to the CPU_FAN header. If a good fan spins there but yours doesn’t anywhere, the fan is the culprit.
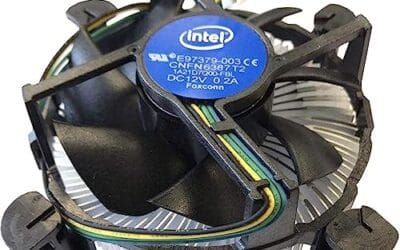
A failed stock cooler is a fine excuse to upgrade to something quieter and stronger. If you’re on an older Intel platform and just need a working, inexpensive replacement, the Intel E97379-003 cooler with an aluminum heatsink and a 3.5-inch fan for socket 1150/1155/1156 at $15.99 is a straightforward stock-style swap. For newer chips or better performance, the CPU cooler guides linked above have stronger picks. Match the cooler to your socket before buying.
There’s a quick way to isolate whether the fault is the fan or the header. Plug the CPU fan into a known-good case-fan header and see if it spins there. If it does, the original CPU_FAN header on your board may be damaged, and you can move the cooler to a working header while telling the BIOS not to halt on a missing CPU fan reading. If the fan stays dead on every header you try, the fan itself is done. That two-minute swap saves you from replacing the wrong part, which is an easy mistake to make when you’re rattled by a hot, silent cooler.

Pros
- Native LGA 1150, 1155, and 1156 socket support covers three legacy Intel generations
- 4-pin PWM connector enables proper fan curve control via BIOS
- OEM-style aluminum heatsink footprint keps RAM and VRM clearance predictable
- Push-pin mount installs without removing the motherboard from the case
Cons
- Zero owner fedback available at time of writing, real-world thermals unverified
- Aluminum-only heatsink with no heatpipes struggles with overclocked or unlocked K-series CPUs
- Restricted to obsolete Intel sockets, no path forward to LGA 1200, 1700, or AM5
The Intel E97379-003 is an OEM-style stock CPU cooler built for LGA 1150, 1155, and 1156 boards, covering Core i3, i5, and i7 chips from the Sandy Bridge through Haswell era. It targets one specific buyer: someone repairing, refurbishing, or restoring a legacy Intel desktop that lost its original heatsink.
The defining feature is compatibility, not performance. A 3.5-inch fan sits on an aluminum heatsink with a 4-pin PWM header, matching the original OEM cooler dimensions Intel shipped in retail boxes. Stock coolers in this class typically handle 65W to 84W TDP chips at stock clocks, which lines up with locked i3, i5, and non-K i7 SKUs on these sockets.
Trade-offs are typical for a boxed-style cooler. There are no heatpipes, no copper base contact, and no tower geometry, so sustained multi-core loads will spin the fan up and get audible. Push-pin mounting is convenient but less secure than a backplate design, and overclocking headroom is effectively zero. Owner feedback is not available at time of writing.
Buy this if you need a like-for-like OEM replacement for a locked LGA 1150, 1155, or 1156 CPU and want to kep the original acoustic and clearance profile. Skip this if the CPU is a K-series part, if you plan to overclock, or if the target socket is LGA 1200 or newer.
Socket coverage: Native mounting for LGA 150, 1155, and 1156 only. That spans 2nd, 3rd, and 4th generation Core i3, i5, and i7 desktop chips. No adapter is included for LGA 1200, 1700, or AM4/AM5, so this cooler is locked to legacy Intel repair scenarios.
Heatsink and fan: Aluminum radial-fin heatsink with a 3.5-inch axial fan on a 4-pin PWM connector. No heatpipes, no copper slug, no vapor chamber are indicated in source data. TDP handling is not specified, but OEM colers of this geometry are typically rated for the 65W to 84W stock TDP band on these sockets.
Mounting and clearance: Push-pin retention through the four motherboard holes, no backplate required, install possible without removing the board. Cooler height sits low enough to clear standard mid-tower side panels, and the round footprint keps RAM slots and VRM heatsinks unobstructed. Exact height in mm is not specified.
Acoustics and headroom: Noise level in dBA is not specified. Based on OEM stock cooler behavior at this size, expect quiet idle and audible ramp under sustained all-core load. Overclocking a K-series chip on this heatsink is not advisable, thermal headroom above 84W is minimal.
Preventive maintenance
Most cooler failures start with dust. A fan clogged with lint spins harder, runs hotter, and wears its bearings out faster, so blow out your cooler and case with compressed air every few months. Keep cables tidy and routed away from the blades during your build, since a single stray wire can stall a fan and trip an overheat shutdown down the line.
Thermal paste matters too. Old, dried paste transfers heat poorly, which makes the fan work overtime and can mask a cooling problem as a fan problem. Refresh it every few years or whenever you remove the cooler. A quality compound like the Thermal Grizzly Duronaut, a 6-gram tube at $24.99 that includes cleaning wipes, makes reapplication clean and keeps temperatures in check, so the fan doesn’t have to fight dried-out paste to do its job.
Check your fan mounts and screws periodically as well. Vibration over months can loosen the clips or screws that hold an air cooler’s fan to the heatsink, and a fan that’s rattling loose runs louder and can eventually stall. A quick snug-up during your dust cleaning takes seconds and prevents a small annoyance from turning into a stopped fan. If you monitor your system, set an alert for CPU temperature so you catch a cooling issue early, before heat forces a shutdown mid-game or mid-render.

Pros
- Non-conductive chemistry safer for novices repasting near exposed CPU or GPU capacitors.
- 6g volume suports several full applications on desktop CPUs and console APUs.
- Wet and dry wipes included, so no isopropyl bottle or lint-free cloth need.
Cons
- Limited owner fedback at time of writing makes long-term durability claims hard to verify.
- Non-metal formula typically trails top liquid metals by a few degrees under sustained load.
- Viscosity, TIM lifespan hours, and thermal conductivity W/mK figures are not specified.
Duronaut is Thermal Grizzly's non-conductive thermal paste positioned as a mid-tier daily driver, shipping in a 6g syringe with 6 wet and 6 dry cleaning wipes. The target buyer is a DIY PC builder repasting a CPU or GPU cooler, or a console owner refreshing PS4, PS5, or Xbox thermals without risking shorts.
The defining trait is the aluminum microparticle plus zinc oxide nanoparticle blend paired with an electrically non-conductive base. Thermal Grizzly claims reduced pump-out and stable performance over extended cycles, which maters most on soldered console APUs and overclocked desktop chips that see large delta-T swings. Exact W/mK conductivity is not specified in the source.
Trade-offs are typical for non-conductive pastes at this tier. Expect a few degrees warmer than liquid metal on delided or high-wattage CPUs, and no published viscosity or cure-time data to plan application around. Owner feedback is limited at time of writing, so long-term hardening resistance relies on vendor claims rather than independent long-run testing.
Buy this if you want a safe, non-conductive paste with enough volume for several repastes and a bundled wipe kit for console or GPU jobs. Skip this if you are chasing the absolute lowest core temperatures on a 250W-plus overclocked CPU where liquid metal or a top nano-diamond paste still leads.
Volume and coverage: The syringe holds 6g of paste, enough for roughly 15 to 25 pea-sized applications on mainstream AM5 or LGA1700 IHS surfaces, or several full console APU repastes on PS4, PS5, and Xbox where die coverage is larger than a desktop CPU heatspreader.
Composition and safety: The compound uses aluminum microparticles and zinc oxide nanoparticles in a non-metal carier, rated electrically non-conductive. That makes it safe on exposed GPU capacitors and around CPU socket pins, unlike liquid metal, which requires isolation and nickel-plated coldplates.
Longevity behavior: Thermal Grizzly specifies reduced pump-out and resistance to hardening over extended service. Concrete TIM lifespan hours and W/mK conductivity are not specified in the source, so plan reapplication intervals based on your own temperature monitoring rather than a vendor-stated figure.
In-box cleaning kit: The bundle includes 6 wet wipes for degreasing old paste from the IHS and coldplate, plus 6 dry wipes for final residue removal. Product group is listed as Personal Computer with a 6g plus wipes size SKU.
When it’s not fixable: what to replace
If the fan is dead and won’t spin on any header, replace it. Sometimes you can swap just the fan on an air cooler, since many use standard 120mm or 92mm fans held on with clips. That’s the cheapest fix. If the whole cooler is old, weak, or the heatsink is undersized for your chip, replace the entire unit and reapply fresh paste while you’re in there.
For a basic Intel socket, the Intel E97379-003 aluminum heatsink cooler at $15.99 is a low-cost stock replacement that gets an older machine running again. For anything modern or performance-minded, step up to a proper tower or AIO from our cooler guides. Whatever you install, use good thermal paste like the Thermal Grizzly Duronaut and confirm the fan is on the CPU_FAN header before you close the case. A working cooler plus fresh paste fixes both the spin and the temperatures.
Tools and parts needed
You won’t need much. A Phillips screwdriver to remove and remount a cooler, isopropyl alcohol and a cloth or the wipes included with a paste kit to clean old compound, and compressed air for dust. Keep a replacement fan or a full cooler on hand if yours has failed, plus a tube of thermal paste like the Thermal Grizzly Duronaut for any reinstall. That’s the whole kit for diagnosing and fixing a stationary cooler.
None of these parts cost much, and having them ready turns a scary “my PC is overheating” moment into a calm fifteen-minute repair. Keep them in a small bin with your build tools so you’re never caught scrambling.
A few more questions
Is it safe to run my PC if the CPU fan isn’t spinning?
Only very briefly, to diagnose. A modern CPU heats up fast with no airflow, and while most boards will throttle or shut down to protect the chip, you shouldn’t rely on that. If the fan stays dead and temperatures climb past normal, power off and fix the cause first. The exception is a semi-passive fan curve that intentionally stops the fan at idle, in which case it’ll spin up under load and the system stays safe.
Why does my CPU fan only spin sometimes?
That’s almost always a fan curve set to a quiet or zero-RPM profile. The board keeps the fan off at low temperatures for silence, then spins it up once the CPU warms under load. It’s a feature, not a fault. If you’d rather the fan always turn, go into the BIOS fan settings and raise the minimum duty cycle or pick a standard curve so it never fully stops.
Can I replace just the fan instead of the whole cooler?
Often, yes. Many air coolers use standard 120mm or 92mm fans clipped to the heatsink, so you can pop off the dead fan and clip on a new one for a few dollars. That saves you from replacing the whole heatsink and reapplying paste. If the fan is an odd size or built into an AIO pump unit, though, you’ll likely need to replace the full cooler instead. Check your cooler’s fan size first.






























Write Your Review
No reviews yet. Be the first to share your experience!