

You bought a variable refresh rate display, plugged it in, and now you’re staring at a game wondering if G-Sync is actually doing anything. That’s a fair question. A lot of PC owners assume the feature switches itself on the moment the cable clicks into place, but it doesn’t. G-Sync usually sits dormant until you flip a switch in NVIDIA’s driver and, on plenty of panels, a second switch inside the monitor’s own menu. If either one is off, you’re paying for smoothness you never receive.
This walkthrough shows you how to confirm G-Sync is running on your PC, from the driver settings down to a live on-screen check you can trust. We’ll cover both true G-Sync modules and the far more common G-Sync Compatible panels that run Adaptive-Sync under the hood. If you’re still shopping and want a display that handles this cleanly, our roundups of the best 1440p gaming monitor picks and the dedicated best 4K G-Sync monitor guide are good starting points. For everyone else, let’s make sure the panel you already own is earning its keep.
What you’ll need
The list is short. You need an NVIDIA GPU from the GTX 10-series or newer (G-Sync Compatible support arrived with driver 417.71 back in early 2019, so anything recent qualifies), a monitor that supports G-Sync or carries VESA Adaptive-Sync/FreeSync, a DisplayPort 1.2 or better cable, and the latest GeForce driver installed. HDMI works for G-Sync Compatible on many 2020-and-later panels, but DisplayPort remains the reliable path. If your monitor shipped without a DisplayPort cable, that’s the one accessory worth grabbing before anything else.
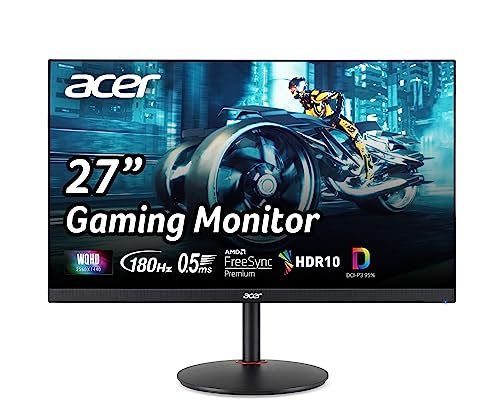
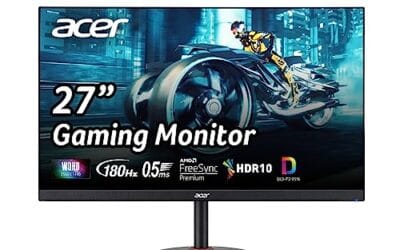
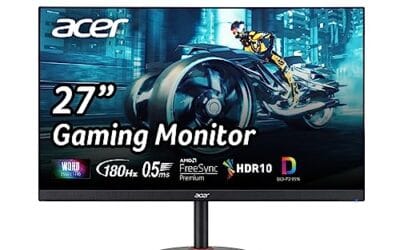
Not sure your current panel even supports variable refresh? A FreeSync monitor is the cheapest way in. Something like the Acer Nitro 27″ WQHD, a 2560 x 1440 IPS panel with AMD FreeSync Premium up to 180Hz, a 0.5ms response spec, 95% DCI-P3 coverage, and both DisplayPort 1.2 and dual HDMI 2.0 inputs, runs G-Sync Compatible mode perfectly well on an NVIDIA card. At $169.99 with a 4.8 rating, it’s an easy on-ramp, and it slots right into a mid-range build without draining the budget.
Pros
- 1440p 180Hz IPS panel via DisplayPort 1.2 hits the current price/perf sweet spot
- 95% DCI-P3 gamut is uncommon at this tier, useful for content viewing
- Full ergonomic stand: 4.7 inch height, 360 swivel, plus/minus 90 pivot, VESA 100
Cons
- Limited owner feedback at time of writing, long-term panel uniformity unverified
- HDMI 2.0 caps at 144Hz; only DisplayPort 1.2 unlocks the full 180Hz refresh
- No USB hub and 2W stereo speakers are strictly a bep-only backup at this tier
The Acer Nitro XV271U M3bmiiprx is a budget-oriented 27inch 1440p IPS gaming monitor targeting builders stepping up from 1080p high refresh. With 2560x1440 resolution, 180Hz over DisplayPort, and FreeSync Premium, it fits users pairing an RTX 4060,X 4060 Ti, or RX 7600 XT class GPU running competitive and AA titles at medium to high settings.
The defining feature is the 180Hz IPS panel with a claimed 0.5ms GtG response, paired with 95% DCI-P3 coverage. In practice, IPS panels at this tier typically deliver around 300to 350 nits SDR brightness and moderate contrast near 1000:1, so blacks will lift in dark rooms. FreeSync Premium adds low framerate compensation, useful when demanding titles drop below 60 FPS.
Trade-offs are typical for the segment. HDMI 2.0 bandwidth caps refresh at 144Hz, so consoles and older GPUs will not reach the full 180Hz ceiling. HDR tier, panel bit depth, and factory calibration are not specified in the listing, and there is no USB hub. The 2W speakers are functional only as a fallback.
Buy this if you want a 1440p 180Hz IPS panel with a full ergo stand and 95% DCI-P3 for mixed gaming and casual creative work. Skip this if you need verified HDR performance, USB-C daisy chaining, or OLED-level contrast for dark-room cinema use.
Panel and Resolution: 27 inch WQHD IPS at 2560x1440 gives a 0.233m pixel pitch, sharp enough that antialiasing needs drop versus 1080p 27 inch panels. IPS delivers wide viewing angles suited to desk sharing or off-axis reference monitors during editing sessions.
Refresh and Response: 180Hz refresh is available only through DisplayPort 1.2; HDMI 2.0 tops out at 144Hz due to bandwidth limits. Acer lists 1ms GtG typical and up to 0.5ms GtG at aggressive overdrive, though inverse ghosting is common at max overdrive on IPS panels in this bracket.
Color and HDR: 95% DCI-P3 coverage is the standout spec, wider than most sub-tier IPS panels that sit near 90% sRGB. HDR certification level, peak brightness, and local dimming are not specified in the source, so treat HDR as a compatibility mode rather than a true HDR experience.
Ports and Ergonomics: 1 DisplayPort 1.2, 2 HDMI 2.0, and audio out cover a PC plus one console. The stand offers minus 5 to 25 degree tilt, 4.7 inch height range, 360 degree swivel, and plus/minus 90 degree pivot, with 100x100 VESA for monitor arms. FreeSync Premium is confirmed, G-SYNC compatibility is not listed.
Step 1: Confirm your hardware qualifies
Before touching any settings, verify the two pieces that matter. First, the GPU. Open the NVIDIA Control Panel (right-click the desktop, or find it in the system tray) and check that your card is a GTX 10-series, GTX 16-series, or any RTX model. Older GTX 900-series cards can’t do G-Sync Compatible over Adaptive-Sync, so that’s your cutoff.
Second, the monitor. Look up the exact model and confirm it lists G-Sync, “G-Sync Compatible,” FreeSync, or plain VESA Adaptive-Sync. Three tiers exist: dedicated hardware modules (G-Sync Ultimate and standard G-Sync), NVIDIA-validated G-Sync Compatible panels, and FreeSync displays that aren’t officially validated but still work in practice. The last group is where most affordable displays land. A 27-inch 1440p panel is the popular size for this, and if you’re weighing options our best 27-inch 1440p monitor list breaks down which ones handle VRR without drama. Smaller desk? The best 24-inch monitor guide covers the compact end.
Why does the tier matter? A dedicated G-Sync module runs a chip inside the panel that manages variable refresh independently, so it works across the widest frame-rate range and handles low-framerate compensation cleanly. G-Sync Compatible and FreeSync panels lean on the VESA Adaptive-Sync standard baked into DisplayPort, which is why they cost less and why NVIDIA validates only a subset of them. For the vast majority of gamers, a good G-Sync Compatible display delivers the same tear-free result as a pricey module at a fraction of the cost. Knowing which tier you own tells you what to expect and where to look when something acts up later.
Step 2: Use the right cable and port
Cable choice trips up more people than anything else on this list. Plug the monitor into your GPU with DisplayPort whenever you can. DisplayPort 1.2 handles 1440p at 165Hz, and 1.4 pushes 4K at high refresh, so it covers the full variable refresh range without compromise. HDMI can work for G-Sync Compatible, but only on newer panels and often at reduced refresh caps, and some older HDMI ports simply won’t expose the Adaptive-Sync option at all.
Make sure the cable runs from the graphics card, not the motherboard’s video output. That sounds obvious, yet plenty of first-time builders route their display into the integrated port by mistake and then wonder why G-Sync never appears. If your motherboard’s HDMI or DisplayPort is lit up and the GPU’s outputs are dark, that’s your problem right there. Move the plug down to the graphics card.
Step 3: Enable G-Sync in the NVIDIA Control Panel
Here’s the core step. Open the NVIDIA Control Panel and, in the left sidebar under Display, click “Set up G-SYNC.” Check the box labeled “Enable G-SYNC, G-SYNC Compatible.” You’ll see two radio options: enable it for full screen mode only, or for both windowed and full screen. Choose windowed and full screen if you play borderless-window titles, which most modern games use by default.
If you run more than one display, pick the correct monitor from the preview at the top before applying. Then tick “Enable settings for the selected display model” and hit Apply. On a validated G-Sync Compatible panel the box appears automatically. On an unvalidated FreeSync display it still shows up, though NVIDIA hides it unless your driver is current, which is why keeping GeForce drivers updated matters so much. High-refresh gamers chasing a best 360Hz gaming monitor setup should double-check this panel every driver update, since fresh installs occasionally reset the toggle.
Step 4: Turn on Adaptive-Sync in the monitor menu
The driver switch is only half the job. Most panels ship with their own Adaptive-Sync or FreeSync option turned off in the on-screen display (OSD). Grab the physical buttons or joystick on the monitor, open the menu, and hunt for a setting called FreeSync, Adaptive-Sync, or VRR. It usually lives under a Gaming or Picture submenu. Switch it on.
Some displays offer “Standard” and “Ultimate” or “Extended” FreeSync ranges. Pick the wider range if it’s stable, since that lets variable refresh kick in at lower frame rates too. On the Acer Nitro mentioned earlier, this control sits in the OSD’s gaming section and needs to be active for the panel’s full 180Hz range to sync properly. Set your Windows refresh rate to the panel’s maximum as well: go to Settings, System, Display, Advanced display, and select the highest available Hz. A monitor stuck at 60Hz can’t show off variable refresh even when everything else is correct.
Step 5: Verify G-Sync is actually running
Now the payoff. There are three solid ways to confirm it’s live. The easiest: in the NVIDIA Control Panel, click the “Display” menu at the top and enable “G-SYNC Compatibility Indicator.” Launch a game, and NVIDIA overlays a small on-screen note when G-Sync engages. Turn it back off once you’ve confirmed things work.
The second method uses NVIDIA’s Pendulum demo, a free tool that swings a pendulum while you toggle V-Sync, no-sync, and G-Sync modes. With G-Sync active the motion stays glass-smooth with zero tearing across changing frame rates. Third, many monitors show their current refresh rate in the OSD info panel. Fire up a game with an uncapped frame rate and watch the Hz reading move up and down in real time. If that number dances with your frame rate instead of sitting locked at a fixed value, G-Sync is doing its job. That live, fluctuating number is the clearest proof you’ll get.
There’s also a fourth signal worth knowing about. Enable the frame-rate counter in your game or through the NVIDIA overlay, then push settings until frames dip below your refresh ceiling. On a working G-Sync setup you won’t see the harsh, torn horizontal line that shows up without variable refresh, and you won’t feel the stutter that V-Sync introduces when frames miss the refresh window. The image just stays coherent as the frame rate wanders. If you spot tearing anyway, back up to Step 4 and confirm the monitor’s own toggle is on. A driver switch with no matching OSD switch is the single most common reason a check like this fails.
Troubleshooting common issues
Even a clean setup hits snags. Here are the four that come up most often and how to clear them.
The “Set up G-SYNC” option is missing
If that page doesn’t appear in the Control Panel at all, your driver is outdated or the monitor isn’t sending an Adaptive-Sync signal. Update to the newest GeForce driver first. Then confirm you’re on DisplayPort and that Step 4’s OSD toggle is on, because the driver only reveals the G-Sync page once the panel advertises variable refresh support. A cable swap or a fresh driver reinstall clears this up most of the time.
The screen flickers in games or on the desktop
Flicker is common on FreeSync panels running at very low frame rates, especially on loading screens and menus. It’s the display struggling near the bottom of its refresh range. Try switching the monitor from its “Ultimate” FreeSync range to “Standard,” which narrows the window but stabilizes the image. Capping your in-game frame rate a few frames below the monitor’s max also helps by keeping the refresh rate inside the reliable band.
Refresh rate is stuck at 60Hz
This one’s almost always a Windows or cable issue. Head to Advanced display settings and manually select the higher refresh rate, since Windows defaults to 60Hz after some driver updates. If the higher rate isn’t listed, your cable or port can’t carry the bandwidth. A DisplayPort 1.2 cable is the fix for 1440p high-refresh panels. Bargain hunters browsing the best gaming monitor deals should confirm the bundled cable meets the panel’s spec, because sale units sometimes ship with a slower one.
G-Sync only works in full-screen games
If variable refresh dies the moment you alt-tab or open a borderless window, revisit Step 3 and select the “windowed and full screen” radio option rather than full-screen only. That single toggle is the difference between smooth borderless play and stutter. It won’t cost you anything in performance, so there’s no reason to leave it on the narrower setting.
Wrapping up
Checking G-Sync on your PC comes down to a chain of confirmations: qualifying hardware, a DisplayPort connection from the GPU, the driver toggle enabled for windowed and full screen, the monitor’s own Adaptive-Sync switch flipped on, and a live verification through the indicator, the Pendulum demo, or the OSD refresh readout. Miss any link and you’re back to tearing and stutter. Get all five right and the difference is immediate. Motion cleans up, input feels tighter, and fast pans stop smearing.
If your current panel can’t hold a stable variable refresh range no matter what you try, it might be aging out of the job. A modern 1440p or 4K display with validated support removes the guesswork entirely. Buyers on a tighter budget can find capable options in our best gaming monitor under 400 guide, and the payoff, once G-Sync is confirmed and running, is the smooth, tear-free image you paid for in the first place.




























Write Your Review
No reviews yet. Be the first to share your experience!