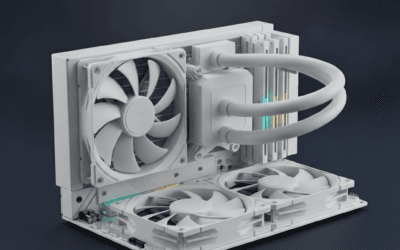
Your PC sounds like a jet engine, and you’re sitting two feet from it trying to focus on work or stream a game. Fan noise is the most common quality-of-life issue on desktop PCs, and it’s almost always fixable without spending more than $30 on parts. The worst part isn’t even the volume. It’s the specific frequency. Cheap case fans ramp up to 1800-2200 RPM under load, producing 35-45 dBA of broadband noise plus a higher-pitched whine at the blade-pass frequency. That combination drills into your concentration the way wind through a cracked window does on a road trip.
Most loud-fan situations boil down to three causes. Dust restricting airflow forces fans to spin faster to move the same air. Aggressive fan curves spin fans to 100 percent at temperatures where 60 percent would work fine. And worn or low-quality bearings produce mechanical noise (clicking, grinding, rumbling) that overlays the normal aerodynamic hum. We’ll walk through how to identify which cause is yours and what each fix actually costs in time and parts. We cover the specifics separately in our PC overheating guide.
First check the obvious
Before tearing into BIOS settings or replacing parts, run through the quick stuff. Power off the PC, unplug it, and pop the side panel. Look at the dust situation. If the fan blades have visible gray fuzz on them, if the intake filters look like felt, if the CPU heatsink fins are packed solid, dust is your problem. That’s the 30-second visual.
Next, push gently on each fan hub (the center, not the blades) and feel for wobble. A healthy fan rotates smoothly with no detectable play. A worn bearing wobbles, clicks, or feels gritty. Mark any sketchy ones with a sticky note.
Spin each fan by hand (with the PC unplugged) and listen. A good fan coasts silently for 5-10 seconds. A bad bearing fan grinds, clicks, or stops abruptly. That’s a fan to replace.
Finally, boot the PC and listen at idle. If the noise is loud at idle (CPU under 5 percent, GPU under 30 C delta), your fan curve is too aggressive. If it’s quiet at idle but screams under load, that’s a thermal management issue. The diagnosis path branches from there.
Cause #1: Dust buildup choking airflow
This is the single most common cause and the easiest to fix. Dust accumulates on intake filters, heatsink fins, and fan blades, restricting how much air actually moves through the chassis. Restricted airflow means the same heat dissipation requires faster fan speeds. Your CPU still hits 80 C under load, but now your fans are running at 1900 RPM instead of 1200 RPM to get there.
Diagnostic. Power off, unplug, lay the PC on its side, and remove the side panel. Use a flashlight to inspect: front intake filters (if present), CPU heatsink fins between the fan and tower, GPU heatsink fins (look down through the top and through any case vents), PSU shroud and intake, and rear exhaust fan blades. Visible dust = guilty.
Fix. Compressed air or an electric duster. Important: hold each fan blade still with your finger while you blow air through it. A spinning fan generates voltage that can backfeed into the motherboard fan header and occasionally damage controllers. Hold the blade, spray short bursts (1-2 seconds), and rotate to clean different sides. For heatsink fins, blow perpendicular to the fins, not parallel, to push dust out rather than deeper in.
For caked-on dust that won’t budge with air alone, a soft-bristle anti-static brush helps. Old toothbrushes work in a pinch. Don’t use water or solvent on electronics.
If your case has removable dust filters (most modern cases do), pop them out and rinse them under warm water with a drop of dish soap. Air-dry completely before reinstalling. A wet filter back in the case is much worse than a dirty one.
Expected result. A thoroughly cleaned PC typically drops 5-10 C off load temps and 200-400 RPM off the fan curve at the same workload. Noise drops 3-6 dBA, which sounds like roughly half the apparent loudness. Do this every 3-6 months. If you have pets or carpet, every 2-3 months.

Pros
- 0.5mm tip clearance and LCP impeller improve static pressure through restrictive 240/280/360mm radiator fin stacks.
- 4-pin PWM scales cleanly from low idle to 2000 RPM without stall on most motherboard headers.
- 22.6 dB(A) max spec keps full-load acoustics aceptable versus typical high-RPM industrial 120mm fans.
- Accessory pack (Y-cable, LNA, gasket, silicone mounts) covers CPU cooler, case, and radiator use without extras.
Cons
- Limited owner fedback at time of writing, so long-term bearing behavior relies on Noctua reliability history.
- Brown and beige color scheme clashes with most blacked-out or RGB-themed builds.
- Priced well above generic 120mm PWM fans, hard to justify outside thermally constrained or acoustically tuned builds.
The Noctua NF-A12x25 PWM is a high-end 120x25mm case and radiator fan aimed at builders who care about acoustics and thermals in equal measure. With a 2000 RPM PWM ceiling and rated 22.6 dB(A) maximum, it targets AIO users, custom lop owners, and tower air cooler builders willing to pay for measurable static pressure gains.
The defining feature is the 0.5m tip clearance paired with the Sterrox LCP impeller, which Noctua uses to push more air through restrictive fin stacks than most 25mm-thick 120s. In practice this makes it well suited to 240mm, 280mm, and 360mm radiators where cheaper fans stall out on static pressure before reaching useful CFM.
Trade-offs are real at this tier. The color scheme remains Noctua brown and beige, which will not match blacked-out builds without chromax swaps. It is also a single 25mm-thick fan competing against thicker 28-38mm industrial units, so pure airflow-focused builders with unrestricted mesh cases may see smaller gains than radiator users.
Buy this if you are cooling a restrictive 240mm or larger radiator, or a dense fin-stack air cooler, and want low noise at usable RPM. Skip this if your case is open mesh with unrestricted airflow and you would notice the static pressure advantage over a mid-tier PWM fan.
Sped and control: 4-pin PWM with a 2000 RPM maximum, dropping to 1700 RPM via the suplied Low-Noise Adaptor. This range covers zero-noise idle profiles on modern boards through full-tilt radiator sweps without needing a separate fan controller.
Acoustics: Rated 22.6 dB(A) at maximum RPM. That is competitive for a 2000 RPM 120mm fan and lets builders push CPU cooler duty cycles higher before the fan becomes the dominant noise source in a quiet build.
<strong>Radiator and cooler fit:</strong> Standard 120x120x25mm footprint mounts to AIO radiators, custom loop radiators, and tower colers using included fan screws. The radiator gasket and anti-vibration mounts help reduce transmitted vibration on aluminum radiator frames.
Longevity: Rated above 150,000 hours MTTF with a metal-reinforced hub and metal bearing shell. That places it in the range typical of premium sleve-alternative bearings and makes it a reasonable pick for 24/7 workstation or NAS duty where fan swaps are inconvenient.
Cause #2: Aggressive fan curve in BIOS or software
Most motherboards ship with default fan curves designed for worst-case thermal scenarios, which means fans spool up earlier and harder than necessary. The default curve might hit 100 percent PWM at 70 C CPU. For most workloads, 80 percent at 75 C is plenty, and the lower RPM ceiling drops noise dramatically.
Diagnostic. Boot into BIOS (DEL or F2 at POST) and find the fan control or hardware monitor section. Look at the current fan curve graph. If it starts ramping at 40 C and hits 100 percent by 65 C, that’s overly aggressive. Alternative: run HWiNFO64 or Fan Control (free software) in Windows and watch CPU/GPU temps versus fan RPMs during idle and gaming.
The simplest sanity check: if your fans audibly ramp up during light tasks like opening a browser or video playing, the curve is too sensitive.
Fix. In BIOS, set fan curves to “Silent” or custom. For a typical air-cooled gaming PC, a workable case fan curve looks like: 30 percent PWM at 40 C, 50 percent at 60 C, 75 percent at 75 C, 100 percent at 85 C. CPU fan: 40 percent at 40 C, 60 percent at 65 C, 85 percent at 80 C, 100 percent at 90 C. Use CPU temp as the control source for CPU and tower fans. Use motherboard temp or VRM temp for chassis fans if available.
Software alternative: Fan Control (open-source Windows utility) gives much finer control than most BIOS implementations. It supports multiple sensors, hysteresis (prevents oscillation), and per-fan curves. Install it, set GPU temp as the control source for your top exhaust fan, and you’ll dramatically reduce the noise spikes during gaming.
For GPUs, manufacturer software (MSI Afterburner, NVIDIA’s Performance Tuning panel, AMD Adrenalin) lets you set custom GPU fan curves. Default GPU curves often hit 70+ percent at 75 C, which is unnecessarily loud. A flatter curve at 50-60 percent typically keeps the GPU under 80 C without thermal throttling, and the noise drop is dramatic.
Expected result. Properly tuned fan curves drop idle noise to near-silence (sub-25 dBA at 1 meter is achievable) while keeping load temps within 2-3 C of the original aggressive curve. The PC won’t sound “ramped up” during normal browsing or video.
Cause #3: Worn or low-quality bearings
Fan bearings wear out. The question is how fast. Sleeve bearings (cheapest, used in budget OEM fans) last 30,000-50,000 hours and start producing audible noise after 12-24 months. Ball bearings last 60,000-80,000 hours but can develop a clicking sound earlier. Fluid dynamic bearings (FDB) and magnetic levitation bearings last 150,000-300,000 hours and are nearly always quiet for the fan’s full life.
Diagnostic. Identify the noisy fan. With the case open and PC running, briefly stop each fan with a pencil eraser or your finger (just the hub, not the blades, and only for a few seconds). When the noise stops, you’ve found the bad fan. If multiple fans contribute, do this one at a time.
Common bearing noises and what they mean: clicking on every revolution is a damaged ball bearing or warped blade. Rumbling/grinding is a worn sleeve bearing dry of lubricant. Sudden silence followed by sudden noise (intermittent operation) is a failing bearing about to seize. Loud whine that pitches with RPM is normal aerodynamic noise from cheap fan blade geometry, not bearing wear.
Fix. Replace the fan. Sleeve bearings can sometimes be revived briefly by removing the sticker on the back of the fan, peeling back the rubber cap, and adding a single drop of light machine oil to the bearing well. This buys a few months. It’s a temporary measure, not a fix.
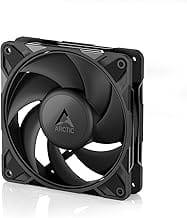
For a real fix, swap to a quality fan. Noctua NF-A12x25 PWM (FDB, 22.6 dBA at full speed) is the gold standard for 120 mm. Arctic P12 Pro PWM (FDB, lower price, 22.5 dBA) is the value pick. Be Quiet Silent Wings 4 (FDB, 18.9 dBA) is the quietest mainstream option. For 140 mm, Noctua NF-A14 and Arctic P14 are the equivalent options.

Pros
- 22.6 dB(A) ceiling at 2000 RPM is class-leading for the size and RPM range.
- Dual-duty A-series geometry handles both airflow cases and static-pressure radiator work equally.
- chromax.black.swap adds color-customizable anti-vibration pads without forcing integrated RGB lighting.
Cons
- Limited independent owner feedback for this SKU at time of writing.
- No ARGB or integrated lighting, so builders targeting lit fans need alternatives.
- Cost per unit sits well above generic 120mm PWM fans, so multi-fan builds add up.
The Noctua NF-A12x25 chromax.black.swap is a high-end 120mm PWM fan aimed at builders who want quiet operation on CPU coolers, AIO radiators, or restrictive mesh cases. The black-on-black variant ships with seven anti-vibration pad color sets, targeting enthusiasts who prefer subtle accent options over full ARGB lighting.
The defining feature is the Sterrox LCP impeller running at 0.5mm tip clearance, which lets it push both airflow and static pressure without the usual trade-off. At 2000 RPM the fan is rated 22.6 dB(A), and the 450 RPM floor keeps idle acoustics near inaudible for AIO or air cooler duty.
Cost per unit sits well above generic 120mm PWM options, so fully populating a case with six of these adds up. There is no ARGB, and the swappable pads are the only aesthetic customization. Cable length is typical for Noctua and may need an extension on larger cases with rear header routing.
Buy this if you run an AIO radiator, dense air tower, or restrictive mesh front and want the lowest possible dB(A) at full duty in a blacked-out finish. Skip if you need ARGB lighting, only run open airflow fan grilles, or already have adequate low-noise fans on the same duty cycle.
Fan spec and RPM range: 120x120x25mm frame running 450 to 2000 RPM via PWM, with a rated 22.6 dB(A) ceiling at full speed. The 4-pin header allows motherboard fan curves to modulate duty cycle from CPU or liquid temperature, so idle noise stays near inaudible on typical curves.
Radiator and cooler fit: The next-gen A-series geometry balances airflow and static pressure, so the same unit works on open case intake, 240/280/360mm AIO radiators, and dense tower heatsinks. The 0.5mm tip clearance and AAO frame reduce blade-tip turbulence, which is where most 120mm competitors leak noise.
Construction and durability: Sterrox LCP impeller, metal-reinforced hub, and metal bearing shell rate at over 150,000 hours MTTF. That works out to more than 17 years of continuous operation at rated conditions, though real-world dust accumulation will affect long-term noise and bearing behavior.
Aesthetic and mounting: chromax.black.swap ships with anti-vibration pads in red, black, white, blue, yellow, grey, and green, four per color, plus a black gasket. Standard 120mm mounting pattern fits any case or radiator using the four corner screw locations. No integrated lighting.
Don’t mix fans of wildly different RPM ranges on the same header. A 1000 RPM Noctua and a 2000 RPM stock fan responding to the same PWM signal will produce uneven airflow and weird harmonic interactions. Match fans by RPM range or use separate headers.
Expected result. A full set of premium fans drops total system noise 6-10 dBA versus generic stock fans, even at higher load levels. The character of the noise also changes: less broadband hiss, more low-frequency rumble that’s easier to ignore.
Preventive maintenance
A clean PC stays quiet. Set a calendar reminder every 3-4 months to crack open the case and check dust accumulation. If you have pets, sit your PC on carpet, or live somewhere dusty, bump it to every 6-8 weeks. Compressed air is the quickest tool. An electric duster (rechargeable, 110,000 RPM) is a one-time $30-40 investment that pays back fast.
Position the PC off the floor if possible. Carpet and dust accumulate at floor level, and intake fans pull both directly into the case. A desk grommet or 8-inch riser on the floor reduces dust intake by 30-50 percent.
Add magnetic dust filters if your case doesn’t have them. Most modern cases include them on the front, top, and bottom (under the PSU). Older or cheaper cases skip these. Aftermarket magnetic mesh filters from DEMCiflex or generic Amazon options run $10-25 and screw onto the outside of intake vents. They make filter cleaning a 30-second rinse instead of a teardown job.
Check thermal paste every 2-3 years. Old, dried thermal paste insulates instead of conducting heat, forcing fans to compensate. A $10 tube of Thermal Grizzly Kryonaut or Arctic MX-6 and a 30-minute repaste session can drop CPU load temps 8-15 C, which translates directly to lower fan speeds. Repaste GPUs too if you’re comfortable opening them up, though that voids most warranties.
Audit cable management periodically. Cables blocking front intake or rear exhaust restrict airflow the same way dust does. Tuck cables behind the motherboard tray and use velcro straps or zip ties to keep them away from fan paths.
When to call a pro vs DIY
DIY territory: dust cleaning, fan replacement, fan curve adjustment, thermal paste reapplication on CPU coolers. Anyone comfortable holding a screwdriver can do all of this with a couple hours and a YouTube guide. Worst-case mistake is putting the heatsink back on with too little thermal paste, which causes immediate over-temp warnings (easy to spot and reverse).
Borderline DIY: GPU teardown for repaste, AIO liquid cooler installation, full custom loop. These require specific tools, longer time investment, and a bigger risk of damaging expensive components. Doable, but worth research before committing.
Call a pro: fan motor burning smell, capacitor smell, PSU buzzing or clicking. Any electrical smell means the PSU might be failing, and a failing PSU can take other components with it. Power down immediately and don’t reuse the PSU until inspected.
Also call a pro if you’ve cleaned, replaced fans, tuned curves, and the system still runs hot. That suggests deeper thermal issues: CPU or GPU degradation, motherboard VRM problems, or case airflow design problems requiring more involved diagnostics.
Tools and parts needed
For cleaning ($10-40 total). Compressed air can ($8-12) or rechargeable electric duster ($30-40, one-time buy that pays for itself in cans of compressed air over a year). Soft anti-static brush ($5-8). Microfiber cloth ($3-5). Optional: thermal paste cleaning wipes for repaste prep ($5).
For fan replacement ($15-35 per fan). Phillips #1 screwdriver. Rubber anti-vibration fan mounts (often included with premium fans, otherwise $5-8 for a pack). New fans: Arctic P12 Pro PWM ($8-10), Noctua NF-P12 redux ($16-20), Noctua NF-A12x25 PWM ($30-35). For 140 mm, add $5-10 each. Match the connector type to your motherboard (4-pin PWM is standard).
For thermal paste replacement ($10-20). Isopropyl alcohol 99 percent ($5-8). Coffee filters or lint-free cloth ($2-5). Thermal paste: Arctic MX-6 ($8-10), Thermal Grizzly Kryonaut ($12-15), or Thermal Grizzly Duronaut for enhanced durability ($24).
For fan curve tuning ($0). Free software: HWiNFO64 (sensor monitoring), Fan Control (Windows fan management), MSI Afterburner (GPU). Free time: 30-60 minutes initial setup, then it just runs.
Optional ($10-20). Rubber fan grommets and anti-vibration screws to mechanically isolate fans from the chassis. Reduces transmitted vibration noise by a few dBA.
Common questions
Why is my PC suddenly loud when it wasn’t before?
Most likely dust buildup, which happens gradually. You don’t notice the day-to-day creep until one day the system sounds like a hairdryer. Less common: a fan bearing finally wore out, or you changed thermal paste settings or BIOS settings without realizing. Start with a dust cleaning, then check fan curves, then check individual fans.
Is liquid cooling quieter than air?
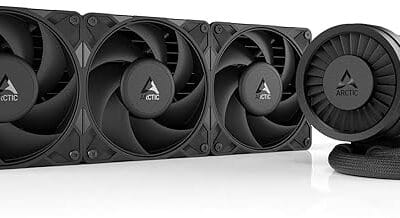
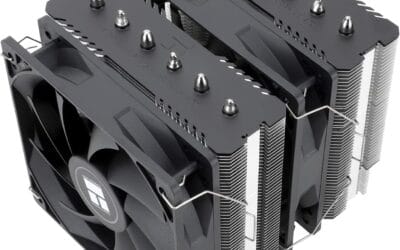
Sometimes. A 240 mm or 280 mm AIO with quality fans can be quieter than a high-end air cooler under heavy CPU load because the radiator surface area lets fans run at lower RPM. But pump noise is a different problem. Cheap AIO pumps add a low-frequency buzz that some people find more annoying than fan noise. Premium air coolers (Noctua NH-D15, Be Quiet Dark Rock Pro 5) match or beat most AIOs on noise.
Should I undervolt to reduce fan noise?
Yes, this works well. A modest undervolt on CPU and GPU (50-100 mV reduction) typically drops load temps 5-12 C with minimal performance loss. Lower temps mean lower fan speeds. AMD Ryzen Curve Optimizer, Intel XTU, and MSI Afterburner all support undervolting. Research the specific procedure for your hardware. It’s free performance per dB.
How loud should a healthy PC actually be?
A well-tuned mid-range gaming PC idles at 22-28 dBA from one meter (basically inaudible in a normal room) and hits 32-38 dBA under full gaming load (audible but not intrusive). High-end workstations or overclocked builds run a few dBA louder. If you’re hearing 40+ dBA at idle, something’s wrong. If you can hear the PC over typical room noise during browsing, it’s louder than it needs to be.