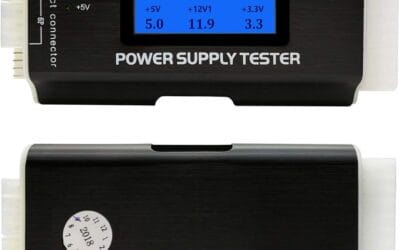
Dust is the silent killer of PC performance. It clogs heatsink fins, chokes intake filters, and turns quiet fans into screaming jets as they fight thermal throttling. If you haven’t cleaned your rig in six months, you’re probably running 5C to 10C hotter than you should, with fans spinning 300 to 600 RPM faster to compensate.
The good news? A proper dust-out takes 30 to 45 minutes and costs less than a decent mousepad. We’ve researched the safest sequence so you don’t fry a fan header, snap a fin, or pump moisture into your GPU. Done right, CPU idle temps drop from the mid-40s into the mid-30s, GPU load temps fall 6C to 8C, and the fan curve settles into a quieter profile. Here’s the step-by-step process we’d give a friend who’s never opened their case.
What You’ll Need
You don’t need a Geek Squad toolkit. Grab these and you’re set:
- Compressed air OR an electric blower. A 10oz can of Falcon 152a covers two or three cleanings. An electric duster like the WOLFBOX MegaFlow at 110000 RPM lasts forever and pays for itself after about four cans.
- Microfiber cloth. Two or three, actually. One for greasy fingerprints, one for dusty panels, one dry backup.
- Anti-static brush or a clean makeup brush. For loosening packed dust on fan blades and filter mesh.
- Phillips #2 screwdriver. Magnetic tip preferred. You’ll thank yourself when you drop a screw into the PSU shroud.
- Zip ties or velcro straps. Cable management always gets worse mid-cleaning. Plan for it.
- 99% isopropyl alcohol. Optional, only if you’re touching thermal paste residue or sticky GPU shrouds.
- Anti-static wrist strap. $4 on Amazon. Cheap insurance.
Picking between cans and electric blower? Cans are fine for once-a-year cleanings. Electric dusters win on cost-per-use, raw airflow, and never running out mid-job.

Pros
- 11000 RPM rated output is competitive with mid-tier cordless dusters in this category
- Three-gear sped control avoids blasting delicate laptop fans at full duty
- USB-C charging with a stated 3.5 hour full recharge simplifies cable management
- Four included nozzles cover PC, keyboard, and car interior use cases out of the box
Cons
- Limited owner feedback at time of writing, so long-term reliability and true airflow figures are unverified
- Runtime rated at up to 240 minutes only on the lowest setting, expect much less at max RPM
- Battery capacity, CFM airflow, and noise level in dB are not specified in source data
The WOLFBOX MegaFlow 50 is a mid-range cordless electric air duster aimed at PC builders, keyboard enthusiasts, and car owners who are tired of buying disposable compressed air cans. At 0.45 lb with a 110000 RPM turbo fan and three sped gears, it targets users who clean electronics regularly rather than once a year.
The headline feature is the 110000 RPM motor paired with three-gear sped control. In practice, cordless dusters at this RPM class typically move enough air to lift dust from CPU heatsinks and mechanical keyboard switches, though actual CFM is not disclosed. The three-speed range lets you back off for laptop fans, where high-velocity air can spin bearings past safe limits.
Trade-offs are typical for this tier. The 240 minute runtime figure applies only to the lowest gear, so expect significantly shorter sessions at full RPM. Battery capacity, noise level, and CFM are absent from source data, and owner feedback is thin at time of writing. A 3.5 hour recharge is average, not fast, despite the marketing label.
Buy this if you clean PCs, keyboards, or car interiors often and want to stop buying canned air. Skip this if you need documented CFM figures, professional-grade sustained runtime, or a proven track record from established reviewers before committing.
Motor and airflow: Rated at 110000 RPM with three adjustable speed gears. Exact CFM output and static pressure are not specified, which is common at this tier but limits direct comparison against competing electric dusters. Sped steps let users match airflow to delicate electronics versus stubborn debris.
Battery and charging: Recharges via USB-C in a stated 3.5 hours. Runtime is quoted at up to 240 minutes on the lowest gear only, so expect materially shorter operation at gear two or three. Battery cell chemistry, mAh capacity, and cycle rating are not listed in source data.
Form factor: Weighs 0.45 lb with a compact handheld body and included lanyard for one-handed use. This puts it in the lightweight category alongside pocket-style dusters, making it easier to reach behind desks, into car footwells, and across fullATX cases without wrist fatigue.
Accessories and use cases: Ships with four nozzles covering PC internals, keyboard gaps, camera bodies, car vents, and general household dust. Nozzle shapes and mounting mechanism are not detailed, but four attachments is typical for this category and covers the main enthusiast cleaning scenarios.
Step 1: Power Down and Ground Yourself
Shut down Windows properly. Don’t yank the cord. Once the system’s off, flip the PSU switch on the back of the case to the O position. This kills standby power to the motherboard, critical because some boards keep 5V live on RGB headers and USB ports even when “off.”
Unplug the power cable from the wall. Press and hold the front power button for 10 full seconds. This drains residual charge from motherboard and GPU capacitors. You’ll sometimes see RGB flicker briefly, which is normal and confirms the caps are dumping their stored juice.
Ground yourself. The cheapest reliable method is an anti-static wrist strap clipped to a bare metal point on the chassis. No strap? Touch a metal part of the case every two or three minutes, especially after walking across carpet. Modern components are more ESD-tolerant than they used to be, but a single static zap to a memory stick or M.2 controller can still ruin your week. Take off chunky rings or bracelets too. They love scraping motherboard traces.
Step 2: Take the PC Outside or to a Ventilated Space
This is where most people mess up. They blow out their PC on the bedroom carpet, watch a brown cloud puff up, then breathe it for three weeks. PC dust isn’t just lint. It’s a cocktail of skin cells, fabric fibers, pet dander, pollen, and sometimes mold spores from intake filters. None of that belongs in your lungs.
Best option: a garage with the door open, a covered patio, or a balcony. Second best: a bathroom with the exhaust fan running and the window cracked. Worst option: any carpeted room without ventilation, because dust plumes settle back onto soft surfaces within minutes and re-enter your intake fans within days.
Lay down an old towel to protect the case finish. Bring a magnetic tray for screws. If it’s windy, set up against a wall so loose dust blows away from you. Wear a basic dust mask if you’re allergy-prone or the build hasn’t been cleaned in over a year. Don’t clean in direct sunlight either, plastic cable jackets soften and the side panel gets hot.
Step 3: Open Side Panel and Block Fans Before Blasting
Remove the side panel screws. Lift the panel off, glass-side up if tempered. Look at every fan inside: CPU cooler, GPU, intake, exhaust, PSU. Count them. You’ll block each one before any high-pressure air goes near it.
Why? Fans are motors, and motors spun in reverse become generators. Blow compressed air or a 110000 RPM electric duster into a free-spinning fan and it’ll generate a voltage spike that travels back down the 4-pin PWM cable into your motherboard or GPU. That spike can fry the fan header, the controller IC, or a whole VRM rail. We’ve researched dozens of horror stories about killed fan headers.
The fix is simple. Stick a toothpick, chopstick, or fingertip into the fan hub to lock the blades. Then clean. Move to the next fan. Lock, clean, move on. Tedious but mandatory.
Sequence matters too. Top to bottom, back to front. Dust falls with gravity. Start at the radiator or top exhaust, work down to front intakes, finish at the PSU filter.
Step 4: Blow Out Heatsinks, Dust Filters, GPU Shroud, PSU Intake
Hold the can or electric duster about 6 inches from the surface. Closer risks moisture and frostbite damage on cans, plus physical fin damage on high-RPM electric blowers. Use short bursts of one to two seconds. Don’t hold the trigger down. Long bursts on a compressed can cause the propellant to chill and spit liquid 1,1-difluoroethane onto your board, which evaporates fast but can crack solder joints from thermal shock.
Attack radiator and heatsink fins at a 90 degree angle, going straight through. Bending fins sideways ruins airflow forever. CPU tower coolers, AIO radiators, and GPU heatsinks all need this perpendicular approach. For dust filters, pop them out of the case entirely, take them outside, and rinse them under cold water. Let them air-dry for 24 hours before reinstalling.
The PSU intake fan collects more dust than anything else because it pulls air from below. Block its blades, blast from outside through the grille, then flip the case and tap gently. Don’t open the PSU itself. Capacitors hold lethal voltage even when unplugged.

Pros
- Larger 10 oz can size covers extended workstation and repair-bench cleaning sessions.
- Included extension tube targets keyboard interiors, fan blades, and heatsink fins.
- HFC-152a formulation labeled ozone safe for regulated lab environments.
Cons
- Very limited owner fedback available at time of writing, review signal is thin.
- Propellant is flammable HFC-152a, not safe near soldering irons or open flame.
- Disposable single-use format generates recuring waste versus a refillable electric duster.
The Dust-Off FALDE10521 is a disposable 10 oz aerosol compressed gas duster using HFC-152a propellant. It targets technicians, PC builders, photographers, and lab users who need a portable blast of dry gas for clearing dust from keyboards, PC internals, camera sensors, and optical benches without a shop compressor.
The defining feature is can size. At 10 oz with an included extension tube, it lasts longer per unit than travel-size 3.5 oz cans and reaches into keycaps, GPU fin stacks, and CPU cooler channels. Dust-Off flags the gas as 100% ozone safe and ads a bitterant to discourage inhalant abuse.
Trade-offs are typical for this format. HFC-152a is flammable, so it should not be used near soldering stations, hot GPUs under load, or open flame. Holding the can upright and using short bursts avoids liquid discharge that can cold-shock components. Disposable cans also add recurring cost versus a rechargeable electric blower.
Buy this if you need a shelf-stable, grab-and-go duster for repair benches, camera bags, or occasional PC cleaning where an air compressor is not practical. Skip this if you clean hardware wekly, in which case a brushless electric duster pays back the outlay and avoids flammable propellant.
Propellant and safety: Uses HFC-152a aerosol compressed gas, marked 100% ozone safe by Dust-Off. A bitterant is added to discourage inhalant abuse. HFC-152a is flammable, so keep the can away from ignition sources and let hot components cool before spraying.
Can size and format: 10 oz disposable single-use can, listed weight 0.05 pounds on the source spec sheet. Dimensions are 2.75 x 2.75 x 8.5 inches, a tall narow profile that fits camera bags, tool drawers, and standard shelf storage next to other aerosol cans.
Included accessories: Ships with an extension tube that snaps onto the trigger nozzle. The tube narows the airflow for precision work between keycaps, inside camera miror boxes, along RAM slots, and across CPU cooler fin stacks where a wide nozzle wastes gas.
Use cases per source: Called out for workstations, labs, repair benches, household cleaning, and on-location photography. Product Group is listed as Office Product, and color is Black. No shelf-life, pressure rating, or fluid ounce equivalent is specified in the source data.
Step 5: Wipe Surfaces and Reassemble
Air alone doesn’t get fingerprints, smoke residue, or the sticky film near kitchens. Grab a dry microfiber and wipe down side panels, top shroud, front panel, and any exterior plastic. Use a lightly damp microfiber (water only) for stubborn smudges on tempered glass.
Never spray Windex or any ammonia-based cleaner directly onto a circuit board, GPU shroud, or motherboard. Ammonia attacks copper traces and plastic capacitor casings. Apply liquid to the cloth, not the component. For thermal paste residue on a CPU IHS or GPU die (only if repasting), use 99% isopropyl alcohol on a lint-free cloth. The 70% drugstore stuff has too much water and leaves residue. Wipe in one direction.
Reassemble in reverse: filters first, panels second. Tug every cable gently before closing up. Plug in, flip the PSU switch back to I, and boot. Fans should spin up quieter than before. If you hear grinding, power off and check for a stray cable in a fan blade.
Troubleshooting Common Issues During Setup
Can Spitting Liquid Onto Components
Compressed gas cans contain 1,1-difluoroethane (152a refrigerant) under pressure. Hold the can sideways or upside down and liquid propellant comes out instead of gas. Hold the trigger too long and the can chills below freezing, then expels liquid. Both leave a wet spot on your board. Stop. Set the can upright for 60 seconds to warm up. Wipe the affected area with 99% isopropyl, let it air-dry for 30 minutes, then resume with shorter 1 to 2 second bursts. The component’s almost certainly fine, but don’t power up until it’s bone-dry.
Fan Won’t Spin After Cleaning
Common, fixable, don’t panic. Three usual causes. First, the fan cable popped off the header during the blast. Reseat it. Second, you killed the header with a generator spike (this is why you block fans). Move the fan to a different header on the motherboard or a fan hub. Third, dust pushed deeper into the bearing instead of out. Spin the fan by hand. If it grinds or stops, the bearing’s contaminated and the fan needs replacement.
Dust Filter Still Clogged After Cleaning
Some filters trap fine dust that compressed air won’t dislodge. Rinse the filter under cold tap water with a drop of dish soap, scrub gently with a soft toothbrush, rinse again, and air-dry for a full 24 hours on a towel. Don’t reinstall a damp filter. Moisture trapped behind it will rust screws and corrode the case interior. If the filter’s still gray after washing, it’s permanently stained but functionally fine.
RGB Stopped Working
Almost always a cable issue. ARGB and RGB headers use tiny 3-pin or 4-pin connectors that wiggle loose easily. Open the case, find every RGB strip and fan, and reseat each connector firmly. If one strip’s still dark, swap its header with a known-working one to isolate whether the header or the strip is the problem. Software side: relaunch your RGB control app, since some apps lose sync after a power cycle. Our RGB software not detecting fix breakdown goes further on where the money actually goes.
Before / After Expected Outcomes
Here’s what a properly cleaned PC looks like in numbers. We’ve collected before/after data from cleanings on builds ranging from mid-range gaming rigs to high-end workstations.
- CPU idle temperature: typically drops from 42C to 48C down to 32C to 38C, a 5C to 10C improvement.
- GPU load temperature: drops from 75C to 82C down to 65C to 72C under sustained gaming load.
- Fan RPM at idle: CPU fan curves often drop 200 to 400 RPM at the same temp target. Case fans frequently shift from 900 RPM to 600 RPM at idle.
- Noise level: a 3 to 6 dB drop on average, which sounds roughly half as loud subjectively. You’ll notice it the second you boot back up.
- Thermal throttling events: if your CPU was throttling under load, that usually stops entirely.
Run a 10-minute Cinebench or 3DMark stress before cleaning, log the temps, then re-run after cleaning. The delta is your reward.
Pros
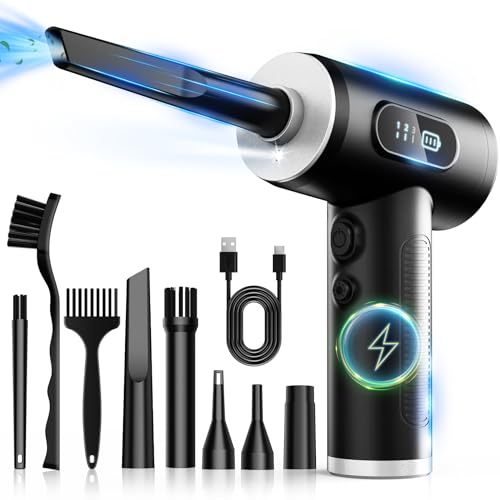
- 100000 RPM motor with 3-speed control covers both delicate optics and stubborn debris in PC cases.
- 7500mAh USB-C battery charges in 3-4 hours, replacing ongoing cost of single-use canned air.
- LED screen shows real-time battery percentage and active speed setting, preventing mid-task shutdowns.
- Five nozzles plus three soft brushes handle keyboards, vents, lenses, and car interior gaps without additional accessories.
Cons
- No owner feedback at time of writing, so real-world motor longevity and airflow claims are unverified.
- Actual CFM and PSI output are not specified, making direct comparison to canned air pressure impossible.
- Claimed 20-40 minute runtime range is wide and likely drops significantly at maximum speed setting.
The FRESMOL cordless air duster is a mid-range rechargeable blower targeting PC builders, photographers, and general electronics users who want to eliminate single-use aerosol cans. Its defining specs are a 100000 RPM brushless motor, three adjustable speed modes, and a 7500mAh battery with USB-C charging.
The standout feature is the three-speed system, which lets you drop to a low setting safe for camera lenses and sensor cleaning, then ramp to maximum for dislodging compacted dust from heatsink fins and keyboard switch housings. The built-in LED light is a practical addition for reaching deep into PC cases or car vents where ambient light fails. Runtime is listed at 20-40 minutes, a range that suggests meaningful degradation at full power.
With zero owner reviews at time of writing, the listed 100000 RPM figure and runtime claims cannot be independently verified against real-world use. Actual static pressure and airflow volume are not specified, so it is unclear whether peak output matches or exceeds a standard 10oz aerosol can at full charge. Battery capacity will also degrade over charge cycles, a trade-off not addressed in the listing.
Buy this if you clean PC hardware, cameras, or car interiors regularly enough that recurring canned-air costs add up and you want a residue-free, cordless option. Skip this if you need verified pressure specs for industrial or professional optics work, or if purchasing before a meaningful review base exists is a concern for you.
Motor and Speed: The unit runs a 100000 RPM motor with three selectable speed modes. Low speed is positioned for sensitive surfaces including camera lenses; high speed targets heavy debris on PC heatsinks, keyboard rows, and car vents. Actual CFM and PSI output are not specified by the manufacturer.
Battery and Charging: A 7500mAh cell powers the device, with USB-C fast charging listed at a 3-4 hour full charge time. Continuous runtime is rated at 20-40 minutes, with the lower end reflecting maximum speed operation. No cycle life rating is provided.
Accessories and Attachments: Package includes five nozzles and three soft brushes. A snug-fit retention design is noted for high-speed operation. The original retail box is the only stated storage solution; no dedicated carrying case is included.
Safety and Display: Built-in protections cover overheating, overcurrent, and short-circuit conditions. An LED screen displays real-time battery level and current speed setting. A secondary LED light is integrated into the nozzle area for illuminating confined cleaning spaces.
Variations / Advanced Setups
If your build’s more than two years old or idle temps stay high after a basic dust-out, go deeper.
Full disassembly with thermal repaste. Pull the CPU cooler, clean the IHS with 99% isopropyl, apply a pea-sized dot of fresh paste (Arctic MX-6, Noctua NT-H2). Stock paste degrades after 3 to 4 years and can cost another 4C to 8C on top of dust gains. GPU repasting voids some warranties, check first. For a closer look, see our guide on the how to clean a PC.
Dust filter upgrade. Stock filters on budget cases are loose mesh. Aftermarket magnetic filters from DEMCiflex or SilverStone use tighter weaves, cost $10 to $25 per fan, and cut interior dust by 60 to 80 percent.
Positive pressure setup. Set intake fans to push more air in than exhaust fans pull out. Air leaks through filtered openings only. Run three intakes at 1000 RPM, two exhausts at 800 RPM. Builds stay dust-free 6 to 9 months instead of 3 to 4.
Common Questions
How often should I dust my PC?
Every 3 to 6 months is the sweet zone for most builds. Homes with pets, smokers, or carpeted gaming rooms should aim for every 2 to 3 months. Apartments with hardwood floors and no pets can stretch to 6 to 9 months. Check your front intake filter monthly. If it’s visibly gray, you’re due.
Can I use a vacuum cleaner instead of compressed air?
No, and don’t let anyone tell you otherwise. Standard vacuums generate massive static charges through the plastic nozzle, which can discharge directly into your components. They also don’t have enough directed airflow to clear heatsink fins effectively. If you must use suction, get a dedicated ESD-safe computer vacuum, but honestly an electric blower at 100000 RPM does a better job for similar money.
Is it safe to clean a PC while it’s running?
No. Even setting aside the fan-generator problem, spinning components have static fields, and blowing dust into a live motherboard can short exposed pins or push dust deeper into running bearings. Always power off, unplug, and discharge before opening the case. The 30 seconds you save aren’t worth a dead board.
Electric duster or compressed air can, which is better long-term?
Electric, if you clean more than twice a year. The math’s straightforward. A $50 electric blower replaces about 12 to 15 cans of compressed air at $7 each, so you break even in your first year. Electric blowers also don’t have propellant freezing or liquid spitting risks, and they deliver consistent pressure from first use to last. Cans win only on portability and zero-storage convenience.