

Buying a prebuilt PC gets you gaming fast, but factory configs cut corners to hit a price: a slow boot drive, a stock cooler, half the RAM you’ll eventually want. The good news is that most prebuilts are just standard parts in a standard case, so upgrading one is far less scary than it looks. This walkthrough covers the safe order of operations, from the two-minute wins to the parts that need more planning, so you can stretch the life of the machine you already own. If your current tower is beyond saving, our picks for the best budget prebuilt PC 2026 and the best AMD prebuilt gaming PC give you a fresh base to start from instead.
What you’ll need
The toolkit is short. A #2 Phillips screwdriver handles nearly every screw in a modern case. Add an anti-static wrist strap or the habit of touching bare metal before you handle components, a small flashlight, and a couple of zip ties for cable cleanup. Keep the case manual and your prebuilt’s spec sheet handy, since you’ll need to know the motherboard’s form factor, RAM type, and power supply wattage before you buy anything. If you’re starting from a bare, budget-friendly base like the abytespark Intel Core i7 tower at $499.99, rated 4.4 stars, it’s the kind of Core i7 office-and-gaming box that leaves plenty of headroom for the exact upgrades below.
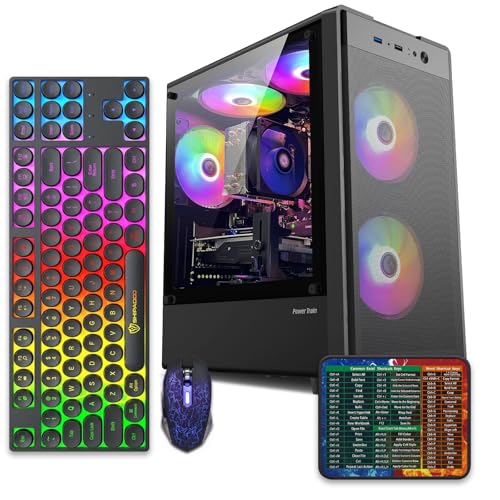
Pros
- 512GB SSD bot drive avoids the HDD bottleneck common in budget prebuilts
- RX 590 8GB VRAM buffer handles 1080p textures better than 4GB budget cards
- Complete bundle with RGB peripherals means no extra spend to start using
- Genuine Windows 11 Home 64-bit preinstalled, no activation hassle out of box
Cons
- Limited owner feedback at time of writing, verify seller reputation before purchase
- Core i7-4770 is Haswell era LGA150, no upgrade path and weak IPC versus modern CPUs
- Windows 11 on 4th-gen Intel is unsupported by Microsoft and may miss feature updates
- No CD/DVD-ROM support and RAM/GPU generation limits future workload headroom
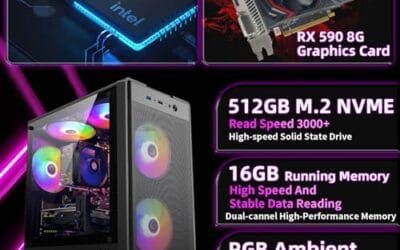
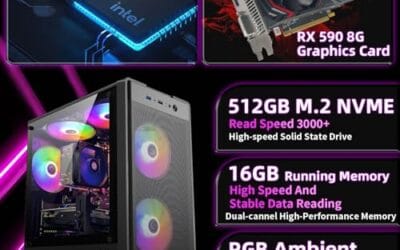
This is an entry-tier prebuilt tower built around an Intel Core i7-4770 Haswell CPU, 16GB RAM, a 512GB SSD, and an AMD Radeon RX 590 8GB GDDR5 GPU. It targets budget buyers who need a working office and light gaming PC with peripherals bundled, not enthusiasts chasing current-gen performance.
The defining feature is the RX 590 8GB paired with a 512GB SSD, an uncommon combo at this price band. Cards in this class typically handle 1080p esports titles at 60+ FPS on medium to high, matching the vendor claim for CS:GO, League of Legends, Apex, and Overwatch. Newer AA titles will need lowered settings.
Trade-offs are significant. The i7-4770 launched in 2013, so IPC, single-thread performance, and platform features like NVMe bot, PCIe Gen4, and modern USB are limited. Windows 11 runs here but sits outside Microsoft's official supported CPU list. There is no realistic CPU or socket upgrade path on LGA1150.
Buy this if you need a plug-and-play 1080p esports and office tower with keyboard, mouse, and RGB included at a low outlay. Skip this if you want current-gen platform support, sustained AA 1440p gaming, or a build with a meaningful upgrade runway.
GPU class: The AMD Radeon RX 590 8GB GDDR5 is a Polaris-refresh card roughly equivalent to a GTX 1060 6GB tier. Expect 1080p 60+ FPS in esports titles like CS:GO, Overwatch, Apex, League, and Fortnite on medium settings, matching the listing's claims.
AAA and modern titles: The vendor lists GTA V, Warzone, Hogwarts Legacy, and The Division 2. Realistically, these run at 1080p low to medium with FSR upscaling where suported.Ray tracing is unsupported on RX 590. No DLSS, no frame gen, no AV1 encode.
CPU bottleneck: The Core i7-4770 quad-core with 8threads at up to 3.9GHz will bottleneck the RX 590 in CPU-heavy titles like Warzone and Escape from Tarkov. Expect frame time inconsistency in large team fights even when average FPS looks aceptable.
Storage and RAM fit: 512GB SSD holds Windows plus 3 to 5 modern game installs before space pressure. 16GB DR3-era RAM is adequate for current esports but leaves no headroom for heavy streaming, browser tabs, and OBS NVENC alongside a game session.
Step 1: Audit your system and check for bottlenecks
Before you spend a cent, find out what’s actually holding you back. Open Task Manager while gaming and watch which component pins at 100 percent. If the GPU sits maxed and the CPU coasts, you’re GPU-limited and a graphics card is your money’s best use. If it’s the reverse, the processor is the choke point. Slow loading and general sluggishness usually point at a mechanical hard drive or a weak SSD.
Document your parts too. Note the motherboard model, which tells you the socket, the RAM generation (DDR4 versus DDR5), and how many slots you have free. Check the power supply label for wattage and the connectors it offers. This five-minute audit stops you from buying a card your PSU can’t feed or memory your board won’t accept. Measure twice, buy once. A free tool like HWiNFO or CPU-Z reads all of this without you opening the case, which is handy when the manufacturer buried the specs on a spec sheet you’ve long since lost.
Set a budget and a goal at the same time. Chasing 1080p at high frame rates is a different shopping list than pushing 1440p or 4K, and knowing the target keeps you from overspending on a card the rest of the machine can’t feed. Write down the two parts limiting you most, then attack them in order of impact per dollar. That short list is your whole upgrade plan.
Step 2: Add RAM and a faster SSD
These are the cheapest, highest-impact upgrades, and they’re the friendliest for a first-timer. If your prebuilt shipped with 8GB, jumping to 16GB, or 32GB for heavier multitaskers, smooths out stutter in modern games and lets you keep a browser open without swapping to disk. Match the existing RAM’s generation and, ideally, its speed, then seat the sticks firmly until both clips snap shut. Enable the XMP or EXPO profile in BIOS afterward, or the memory runs at a slower default speed.
Storage is the upgrade people feel the most. Swapping a hard drive or a SATA SSD for an NVMe M.2 drive cuts boot and load times dramatically. Locate the M.2 slot on the motherboard, remove the tiny standoff screw, slide the drive in at a slight angle, then press it flat and secure it. Clone your old drive or do a clean Windows install, and the whole machine feels years newer. It’s the closest thing to a free speed boost. Keep the old drive as secondary storage for games and media, since you paid for the capacity and there’s no reason to waste it. For build ideas at different resolutions, a well-matched RAM and SSD pairing scales cleanly from 1080p up to 1440p without a CPU swap.
One caution on RAM: prebuilts from major brands sometimes lock the BIOS so you can’t enable a memory profile at all, leaving fast sticks stuck at base speed. Check whether your board exposes XMP or EXPO before you pay for a high-speed kit, because on a locked board you’re better off buying cheaper modules and pocketing the difference. Two matched sticks in dual-channel also beat a single large stick, so buy memory in pairs when the slots allow it.
Step 3: Check the power supply before the GPU
This is the step people skip, and it’s the one that bites them. Prebuilts, especially from big-box brands, often ship with a power supply sized exactly for the stock parts and not a watt more. Some even use proprietary connectors or non-standard sizes that make swapping a chore. Before you order a graphics card, add up the wattage your target GPU wants plus headroom for the rest of the system.
A modern midrange card generally wants a quality 650W to 750W unit with the right PCIe power connectors, and newer cards may need a 12VHPWR plug your old PSU lacks. If your prebuilt’s supply falls short or uses an oddball form factor, budget for a standard ATX replacement first. Confirm it physically fits the case and reaches every connector before you commit. Underpowering a new card causes crashes that look like a dead GPU but aren’t. Watch for proprietary motherboard power layouts too, since a few big-brand prebuilts wire the 24-pin differently, and a standard PSU can fry that board. When in doubt, look up your exact model before you swap the supply.
Step 4: Install a new graphics card
The GPU is the single biggest lever for gaming performance, and installing one is straightforward once the power situation is sorted. Power down, unplug the wall cord, and press the case power button to drain residual charge. Remove the screws holding the old card’s bracket, release the PCIe slot latch, and lift the card straight out. Seat the new card firmly into the top PCIe x16 slot until the latch clicks, then screw the bracket down.
Plug in the PCIe power cables fully; a half-seated connector is a common cause of no-boot panic. Boot into Windows, use a driver-cleanup utility to wipe the old drivers, then install the fresh set from AMD or Nvidia. Confirm the card runs at full PCIe speed in GPU-Z. Check physical clearance before you buy, since long triple-fan cards foul drive cages and short cases, and a card that won’t fit is a frustrating return.
Step 5: Improve cooling and finish up
New parts run hotter, and stock prebuilt cooling is usually the bare minimum. If your CPU thermal-throttles under load, swap the stock cooler for a larger air tower or a 240mm liquid unit, and add a case fan or two to improve airflow. Fresh thermal paste on an older CPU can drop temperatures several degrees on its own. Set a simple front-intake, rear-and-top-exhaust fan layout so cool air flows across the components and out. Check clearance again here, because tall air coolers can hit the side panel or the top RAM slot on a compact prebuilt case.
Airflow beats raw fan count, so don’t just cram in spinners. Two intakes pulling cool air across the GPU and one strong exhaust usually outperform a case stuffed with fans fighting each other. If the prebuilt shipped with a solid front panel that chokes intake, popping in a mesh front or drilling the existing one out can shave several degrees for free. Small changes here compound, and a cooler machine holds its boost clocks longer, which is free performance you already paid for.
Then tidy up. Route cables behind the motherboard tray, secure them with zip ties, and make sure nothing rests against a spinning fan. Close the case, reconnect everything, and stress the system with a monitoring tool open to confirm temperatures stay in a safe range under load. Clean cabling isn’t just for looks; it keeps airflow paths clear and makes the next upgrade painless. Run a 30-minute load with a monitoring app and watch that the CPU and GPU settle below their throttle points, since a stable idle means nothing if the machine cooks under a real workload.
If something goes wrong
The PC won’t turn on after the upgrade
Nine times out of ten it’s a loose connection. Reseat the 24-pin motherboard cable, the CPU power plug, and any PCIe power leads on the new card. Confirm the RAM sticks are fully clipped in and the GPU is seated until the latch clicks. If it’s still dead, unplug the new part and boot on the old config to isolate which upgrade caused it. Also clear CMOS by pulling the coin battery for a minute, since a new part sometimes needs the BIOS reset before it posts.
New RAM isn’t running at full speed
By default, memory runs at a conservative JEDEC speed, not the rated number on the box. Enter BIOS at startup, enable the XMP profile for Intel boards or EXPO for AMD, save, and reboot. If the system won’t post afterward, the kit may exceed what your prebuilt’s board supports, so drop to the next profile down. Some locked prebuilt boards hide the profile toggle entirely, and on those you’re stuck at the base speed no matter what.
The system crashes only under gaming load
Load crashes after a GPU swap almost always trace to power or drivers. Verify the PSU has enough wattage and that every PCIe connector is fully seated. Then do a clean driver install with a removal tool first, since leftover files from the old card cause conflicts. Watch temperatures too; a card starved of airflow will crash to protect itself. If it still drops out, roll back to the previous driver version, because a fresh release occasionally ships with a bug that a point update fixes a week later.
Wrapping up
Upgrading a prebuilt is a game of order and patience. Start with the cheap, high-impact moves, RAM and an NVMe SSD, then verify your power supply before the GPU, and finish with cooling so the new parts stay happy. Audit first, buy parts that match your board and PSU, and reseat every connection if something acts up. Do one upgrade at a time and boot between each, so if a problem shows up you know exactly which part caused it. Done in that sequence, you’ll wring years of extra life out of a machine that shipped as a compromise. And if the numbers say a fresh box beats piecemeal upgrades, the best budget prebuilt PC for 1080p gaming picks are a solid place to compare. Happy building.



























Write Your Review
No reviews yet. Be the first to share your experience!