

Building inside an ITX case is one of those projects that looks intimidating and turns out to be deeply satisfying. You’re cramming a full gaming PC into a chassis barely bigger than a shoebox, so every cable and every screw has to earn its spot. The payoff is a machine that hides under a desk or rides in a backpack to a LAN night. This walkthrough covers the whole process in order, from parts prep to first boot, with the small habits that keep a small-form-factor build from becoming a frustrating puzzle. If you’ve built in a mid tower before, you already know 80 percent of this. The rest is patience.
What you’ll need
Gather everything before you start, because there’s no room to improvise once you’re elbow-deep in a tiny case. You’ll want a Mini-ITX motherboard, an SFX or SFX-L power supply (a standard ATX unit usually won’t fit), low-profile or liquid-cooled CPU cooling rated for your chip, and modular or short cables to fight the clutter. A magnetic Phillips #2 screwdriver, a small flashlight, and a few zip ties round out the kit. Choosing the right chassis matters more here than anywhere else, so it’s worth studying options like the ones in our guide to the best ITX cases for 2026 before you commit. Airflow-focused designs make cooling far easier, which our airflow-first ITX case picks break down in detail.
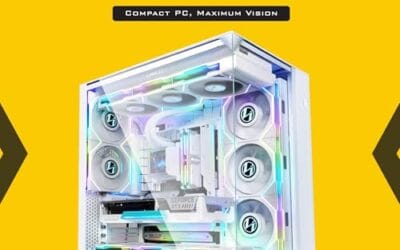
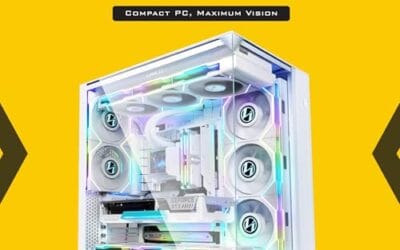
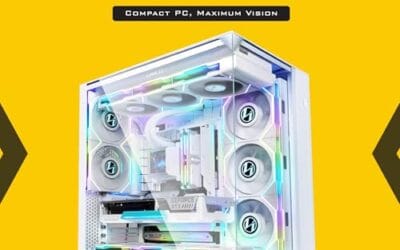
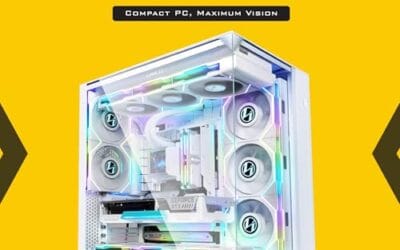
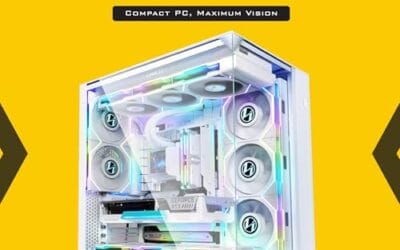
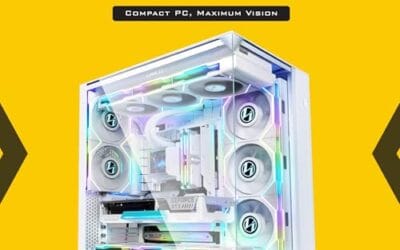
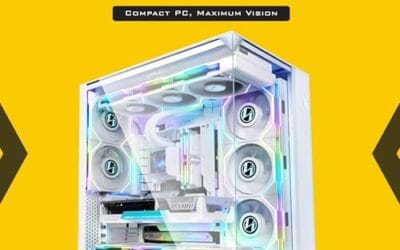
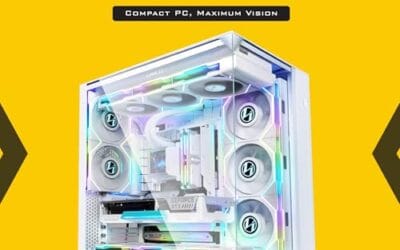
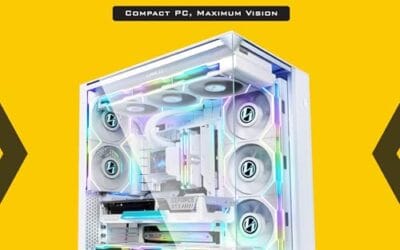
If you want a well-built reference for how a premium chassis handles glass, cable routing, and back-connect layouts, the Lian Li O11Vision Compact is a useful example to study. It runs around $124.99 with a 4.4 rating, and its steel-and-tempered-glass construction with back-connect support shows the kind of clean cable management you’re aiming to replicate on a smaller scale. Back-connect designs route the ugly cables behind the tray entirely, which is exactly the trick that makes a compact build look effortless through the glass.

Pros
- Patented three-panel tempered glass exposes front, top, and left views of the build.
- Native back-connect motherboard support for hiden 24-pin, EPS, and PCIe cabling.
- Second chamber hides side-mounted AIO tubing for a cleaner primary compartment.
- Swappable top mesh panel suports a 360mm AIO when thermals take priority over glass.
Cons
- Limited owner feedback at time of writing makes long-term reliability signal thin.
- Full specs (GPU length, cooler height, fan count) not published in source data.
- Back-connect layout requires a compatible motherboard, narowing part selection.
The Lian Li O11Vision Compact is a mid-range ATX mid-tower positioned as a smaller sibling to the O11 Dynamic line, developed in collaboration with the PCMasterRace community. It targets showcase builders who want a dual-chamber layout, tempered glass on three sides, and native support for back-connect motherboards in a tighter footprint.
The defining feature is the patented three-panel tempered glass design covering the front, top, and left side. Paired with the second-chamber cable routing and back-connect motherboard compatibility, the front compartment stays visually clean. Builders wanting a 360mm AIO can swap in the included top mesh panel, trading a glass top for airflow.
Trade-offs are typical at this tier. Back-connect support only pays off if you buy a compatible board from ASUS, MSI, GIGABYTE, or similar, which narrows part selection and can raise motherboard cost. Concrete specs like GPU clearance, CPU cooler height, radiator sites, and included fan count are not specified in the source data, so verify against the official manual before finalizing parts.
Buy this if you want O11-family aesthetics with hidden cabling via a back-connect board and a side or top 360mm AIO. Skip this if you need a documented GPU length ceiling, bundled fans, or a traditional cable-visible motherboard build.
Motherboard support: The chassis accepts standard ATX boards and ads native routing for back-connect variants such as ASUS BTF, MSI Project Zero, and GIGABYTE Project Stealth. Cable cutouts on the tray align with rear-side connectors, keping the 24-pin, EPS, and PCIe cables out of the main chamber view.
Radiator and AIO: A swappable top mesh panel is included specifically to enable a 360mm AIO in the rof. When the AIO is mounted on the side instead, the dual-chamber layout routes the tubing into the second compartment, keeping the front-facing glass view unobstructed. Exact side radiator thickness limits are not specified.
Glass and panel layout: Three tempered glass panels cover the front, top, and left side. The top glass panel is the one you swap out when a 360mm radiator is installed, so builders choosing air cooling or a bottom-mounted AIO retain the full three-panel glass look.
Not specified in source: GPU length clearance, CPU cooler height, drive bay count, included fan count, front I/O (USB-C, USB-A), PSU length, and case dimensions are not listed in the provided data. Confirm these against the Lian Li O11VPW official spec sheet before finalizing parts.
Step 1: Prep the motherboard outside the case
Do as much as you can before the board ever goes into the chassis. On a flat surface, ideally on top of the motherboard box, seat the CPU by lining up the corner triangle and lowering it in with zero force. Clamp the retention arm. Install the M.2 SSD into its slot at a 30-degree angle, then press it flat and secure the tiny screw. Snap the RAM sticks into their slots until both clips click. Doing this in the open means you’re not fighting the case walls while you apply pressure, and you’ll catch a bent pin or a half-seated stick before it costs you a boot.
This prep stage is where most small-form-factor headaches get avoided. There’s simply no elbow room to install RAM once the board is mounted an inch from a glass panel. Get it all done now.
One habit worth building: keep the motherboard manual open beside you the whole time. ITX boards pack their headers into a tight cluster, and the labels are printed in text so small you’ll squint. Knowing exactly where the front-panel pins, the fan headers, and the M.2 screw live before you start means you’re not hunting for them later with a flashlight in a cramped case. A couple of minutes reading now saves twenty minutes of frustration at first boot.
Step 2: Mount the cooler and plan your clearances
Cooling is the make-or-break decision in ITX. Check your case spec sheet for the maximum CPU cooler height, then confirm your cooler falls under it with a couple of millimeters to spare. Apply a pea-sized dot of thermal paste to the center of the CPU, then mount the cooler evenly, tightening the screws in a diagonal cross pattern so pressure stays balanced. If you’re running an all-in-one liquid cooler, mount the radiator to the case first and route the tubing so it won’t kink against a panel.
Think about airflow direction while you’re here. In a tight box, you want at least one clear intake feeding the cooler and one exhaust pulling hot air out. Owner reports show that a well-planned two-fan layout in a small case can hold temperatures within a few degrees of a much larger build. It’s all about the path the air takes.
Cooler choice deserves a second look too. Big tower air coolers that dominate mid-tower builds often won’t clear an ITX side panel, so many small builders lean on a 240mm all-in-one or a purpose-made low-profile heatsink. If you’re running a hot chip, a liquid loop moves the heat away from that dense cluster of components and out through a radiator, which keeps the ambient temperature inside the case lower for everything else. Match the cooler to both the chip’s power draw and the case’s clearance spec, and don’t assume a cooler that fit your last build will fit this one. The numbers on the box are the ones that matter.
Step 3: Install the motherboard and power supply
Now the board goes in. Line up the rear I/O with the shield, drop the board onto the standoffs, and drive the screws in gently, snug but not cranked. Then handle the power supply. SFX units are compact, but they still need room for their cables to bend, so mount the PSU and immediately connect the 24-pin and the 8-pin CPU cable while you can still reach the headers. In ITX, the order you plug things in genuinely matters, because a cable you skip now might be buried behind the GPU later.
Double-check the standoffs before the board goes down. A stray standoff in the wrong position can short the underside of the motherboard, and in a cramped case it’s easy to miss one hiding under the tray. Count them, match them to the mounting holes on your Mini-ITX board, and remove any extras. It’s a thirty-second check that prevents the single scariest first-boot failure, a board that won’t post because it’s grounding out against metal it shouldn’t touch.
Feed each cable toward its destination before tightening anything down. A little foresight here saves you from pulling half the build apart because you forgot the CPU power connector. Trust me on that one.
If your power supply is modular, only attach the cables you’ll actually use and leave the rest in the box. Every unused cable in an ITX case is dead weight that blocks airflow and eats space you don’t have. Short custom-length cables or the flat ribbon-style cables that ship with some SFX units make a visible difference in how tidy the finished build looks through the glass. It’s one of those upgrades that costs a little but pays off every time you see the machine.
Step 4: Route cables and manage the clutter
This is the step that separates a clean ITX build from a bird’s nest. Tuck excess cable length into any dead space the case gives you, often behind the motherboard tray or beside the PSU. Use the small pass-through channels and tie-down points, and keep runs flat rather than bunched. Front-panel connectors (power switch, USB, audio) are fiddly, so use your flashlight and the motherboard manual to place each tiny header correctly. A single misplaced power-switch lead is the classic reason a first boot does nothing.
Good routing isn’t just cosmetic in a small case. Loose cables block airflow and can foul a fan blade, so every wire you tame improves both looks and cooling. Zip ties are cheap. Use plenty.
Step 5: Install the GPU and close it up
The graphics card usually goes in last because it eats the most space. Confirm the card’s length fits your case limit, then seat it firmly into the PCIe slot until the latch clicks and screw the bracket to the case. Many ITX chassis use a riser cable to mount the GPU vertically, so route that cable with a gentle curve and never a sharp fold. Connect the PCIe power leads, double-check that nothing is pressing on a fan, and do one last visual sweep for loose screws or unplugged connectors.
Before you slide the panels on, give it a bench boot. Plug in a monitor and power, hit the button, and confirm you reach the BIOS. Catching a problem now, with everything still accessible, beats discovering it after you’ve buttoned up the glass. Once it posts, close the case and enjoy the build.
Take a minute in the BIOS on that first boot to confirm the RAM is running at its rated speed, since kits often default to a slower JEDEC profile until you enable the XMP or EXPO setting. Check that all your storage drives show up and that the CPU temperature reads sane at idle. Getting these basics sorted before Windows goes on means you won’t be tearing the case back open a week later. A clean first boot is the reward for all that careful prep, and in a small build it feels earned.
Troubleshooting common issues
The PC won’t power on at all
Nine times out of ten it’s the front-panel power-switch header plugged into the wrong pins, or the 8-pin CPU cable left disconnected behind the board. Re-check both against the manual. If the fans twitch and stop, that’s often a RAM stick that isn’t fully clicked into place. Reseat it and try again.
Temperatures are higher than expected
In a small case this usually traces back to airflow, not a bad cooler. Make sure your intake and exhaust aren’t fighting each other, that no cable is choking a fan, and that the cooler is making full contact. A quick fan-curve adjustment in the BIOS often drops load temperatures by several degrees.
The GPU riser cable isn’t detecting the card
Riser cables are sensitive. If the GPU doesn’t show up, reseat both ends of the cable and confirm any PCIe generation switch on the board or riser matches your card. A cable folded too tightly can drop the connection, so relax the bend and route it with a smooth curve. If problems persist, force the slot to a lower PCIe generation in the BIOS as a diagnostic, since a marginal riser will often run stable one generation down.
Wrapping up
An ITX build rewards planning more than muscle. Prep the board in the open, respect your clearance numbers, plug cables in the right order, and boot on the bench before you seal it. Do those four things and you’ll end up with a compact machine that punches well above its footprint. If you’re still weighing chassis choices, our roundups of the quietest ITX cases are a solid next read. Small builds have a learning curve, sure, but the first time you carry a full gaming rig with one hand, you’ll get why people love them. Take your time, keep the manual close, and don’t rush the last few connectors. The finished result is worth every careful minute.

























Write Your Review
No reviews yet. Be the first to share your experience!