

Installing a heatsink on an NVMe SSD is a small job, but it matters more than people expect. Modern PCIe 4.0 and PCIe 5.0 drives can run hot during large game installs, video exports, file copies, or long DirectStorage-style asset loads. A properly mounted heatsink gives the controller a larger surface to dump heat into, which helps the drive hold speed instead of pulling back under sustained load. If you’re still choosing the drive itself, our guides to the best 2TB NVMe SSD for 2026 and the best 2TB NVMe SSD for gaming are good companion reads. For the install, slow down, keep the thermal pad clean, and don’t overtighten anything. That’s the whole trick.
What you’ll need
You’ll need a small Phillips screwdriver, your motherboard manual, the NVMe SSD, the heatsink, and the included thermal pad. Some motherboards ship with an M.2 shield already installed, while aftermarket heatsinks usually include a top plate, bottom tray, screws, and one or two pads in different thicknesses. A clean desk helps more than you’d think. So does good lighting. If the SSD has a manufacturer label, leave it in place unless the drive maker explicitly says removal is allowed, because labels can carry warranty markings and sometimes spread heat across the memory packages.

A few optional extras make the job cleaner. An anti-static wrist strap protects the drive’s controller from a stray discharge, a magnetic parts tray keeps those tiny M.2 screws from vanishing into the carpet, and a microfiber cloth handles dust before you seal everything up. You won’t need thermal paste here, since NVMe heatsinks rely on a soft pad rather than paste. Have the drive’s specification sheet handy too, so you know whether it’s a single-sided or double-sided 2280 model. That one detail decides which pad thickness you reach for later.

Step 1: Power down and expose the M.2 slot
Shut the PC down completely, flip the power supply switch off, and unplug the power cable. Press the case power button once after unplugging to drain leftover standby power. Then remove the side panel and locate the M.2 slot. On many ATX boards, the primary slot sits between the CPU socket and the first PCIe x16 slot. On smaller boards, it may sit under the graphics card or on the rear of the motherboard. Check the manual before you start removing hardware. It saves time.
If a graphics card blocks the slot, release the PCIe latch carefully before pulling the card. Don’t yank. Some latches are hidden under the cooler shroud, and snapping one makes future upgrades annoying. If your motherboard already has an M.2 heat spreader, remove the tiny screws holding it down and set them in a tray or cup. Those screws are easy to lose and hard to replace locally. For a fresh build, also confirm which slot connects to the CPU lanes and which slot runs through the chipset. The CPU-connected slot is usually the best home for a boot or gaming drive.
Step 2: Install the NVMe drive at the correct angle
Before the heatsink goes on, the drive itself needs to sit correctly. Insert the NVMe SSD into the M.2 connector at about a 25 to 30 degree angle, gold contacts first. It should slide in smoothly with a firm, even feel. If it resists, stop and check the notch alignment. M.2 drives are keyed, and forcing one into the wrong slot can damage both the drive and board. Once inserted, the far end of the SSD will hover above the standoff.
Now press the drive down gently until its mounting hole lines up with the standoff. Use the motherboard’s screw or latch to secure it. The drive should be flat, not bowed. If the board uses a rotating plastic latch instead of a screw, turn it just far enough to hold the SSD in place. If it uses a screw, tighten until snug and stop. Tiny M.2 screws don’t need muscle. Too much force can strip the standoff or flex the PCB, and neither helps cooling.
Step 3: Match the thermal pad to the heatsink design
Thermal pads bridge the gap between the SSD components and the heatsink. They are soft, slightly tacky, and easy to contaminate with dust or skin oil, so handle them by the edges. Peel only one protective film at first, lay the pad onto the heatsink or drive as the instructions show, then peel the second film right before final assembly. Don’t leave the clear film on by accident. It sounds obvious, but it’s a common reason a new heatsink performs badly.
Pad thickness matters. A thin pad may barely touch the controller. A pad that’s too thick can bow the drive or prevent the heatsink from sitting flat. Motherboard shields usually include a pad sized for that exact cover, while aftermarket kits sometimes include 0.5 mm, 1.0 mm, or thicker options. Use the pad the manufacturer recommends for single-sided or double-sided drives. Most mainstream 2280 SSDs place the controller and NAND on one side, but some high-capacity models use packages on both sides. For those, a tray-style heatsink may need pads above and below the SSD to spread pressure evenly.
Step 4: Mount the heatsink with even pressure
For a motherboard heat spreader, line the cover up with the screw holes and lower it straight onto the drive. You want the pad to contact the controller and memory packages without sliding across the surface. Start each screw by hand, then tighten in small turns, alternating sides if there are two screws. Stop once the cover is secure. The goal is firm contact, not maximum clamp force. Over-tightening can compress the pad too far or warp the drive.
For an aftermarket heatsink, follow the stack order carefully. Many designs place the SSD into a bottom tray, add the thermal pad, then cap it with a finned top section. Some use side screws. Others use elastic bands or clips. Make sure the drive still sits level after assembly and that no metal part touches exposed contacts near the connector. Also check height clearance. Tall heatsinks can conflict with a graphics card backplate, a chipset fan shroud, or a low-profile mini-ITX layout. Measure twice. Tiny case, tiny margin.
Step 5: Reassemble and verify drive temperatures
Put the graphics card back if you removed it, reconnect power, and boot into the BIOS first. Confirm the motherboard still sees the NVMe drive. If it doesn’t, power down and reseat the SSD before doing anything else. Once Windows loads, use your preferred hardware monitor or the SSD maker’s utility to read the drive temperature. Idle numbers vary by case airflow and drive model, but a well-mounted heatsink should usually keep a PCIe 4.0 drive comfortably below throttling range during normal desktop use.
Then run a normal workload, not a stunt workload. Copy a large folder, install a game, move a video project, or export footage if that’s what the PC actually does. Watch the controller temperature climb and settle. If the drive jumps rapidly into the high 70s or 80s Celsius and speed drops hard, the pad may not be touching the controller, the protective film may still be in place, or the heatsink may sit crooked. If temperatures improve and performance stays steady, you’re done. Nice and boring.
Troubleshooting common issues
The SSD disappeared after installing the heatsink
Power down, unplug the system, and reseat the drive. The most likely cause is that the SSD shifted while you tightened the cover or tray. Confirm the gold contacts are fully inserted and that the mounting end sits flat on the standoff. Also check that no screw or clip is pressing against the connector area.
Temperatures did not improve
The thermal pad probably isn’t making proper contact. Open the system and inspect the pad imprint. You should see a visible outline where the controller and NAND touched it. If the pad looks untouched, use the correct thickness, remove both protective films, and remount with even pressure. Case airflow can also limit gains, especially under a large GPU dumping heat over the M.2 slot.
The drive bends after mounting
Stop and loosen the assembly. A bent SSD means the pad stack is too thick, the standoff height is wrong, or the heatsink is being clamped unevenly. NVMe PCBs are thin and don’t need much force. Use the thinner pad if the kit includes one, or switch to the motherboard’s original shield if it fits better.
The heatsink hits the graphics card
Tall aftermarket heatsinks can be a poor fit under the first PCIe slot. If clearance is tight, use the motherboard’s flat M.2 shield or move the SSD to another full-speed M.2 slot if your board offers one. For a gaming build, airflow around the graphics card matters too, so don’t wedge a heatsink against the GPU backplate and trap heat between them.
Before / after expected outcomes
A good heatsink won’t make a slow SSD magically faster in short bursts, because most NVMe drives already hit their peak speed for a few seconds. The gain appears during sustained work. Long writes, game installs, large asset moves, and video cache loads should hold steadier speeds because the controller stays cooler for longer. If you’re planning a storage-heavy build, the best 2TB NVMe SSDs for video editing guide focuses on exactly those sustained workloads.
Variations / advanced setups
PS5 installs, mini-ITX builds, and PCIe 5.0 drives add extra constraints. A PS5 requires a low-profile heatsink that fits under the expansion bay cover, while compact PCs may need a very flat motherboard shield to clear the GPU. PCIe 5.0 drives can run hotter than mainstream PCIe 4.0 models, so they benefit from more surface area and stronger case airflow. In any setup, the same basics apply: correct pad thickness, full contact, no plastic film, and enough nearby airflow to carry heat away from the metal.
A handful of PCIe 5.0 drives even ship with an active heatsink that includes a tiny fan. Those cool well but add noise and height, so plan clearance carefully and keep the fan header within reach. For most people a large passive block plus decent case airflow is plenty. If you’re routing a lot of nearby heat, such as a hot graphics card sitting right above the M.2 slot, aim a case fan across that area rather than reaching for exotic cooling. Airflow around the slot often matters more than the heatsink brand itself.
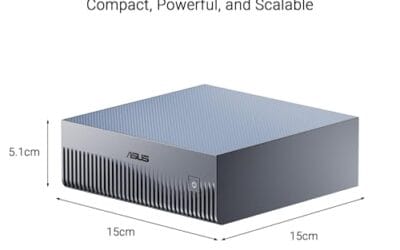
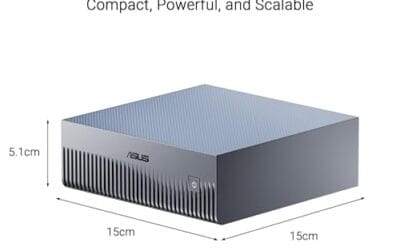
If you are shopping for a whole new system rather than upgrading storage, the ASUS Ascent GX10 is an example of a compact machine that already ships with a 1TB PCIe Gen4 NVMe SSD cooled from the factory. It is not an install tool, but it shows the kind of pre-cooled NVMe setup a heatsink upgrade aims to match.

Pros
- GB10 Superchip targets 1 petaFLOP AI throughput suitable for on-device LM prototyping
- 128GB unified memory pool avoids CPU-GPU copy overhead common on discrete GPU rigs
- NVLink-C2C fabric gives higher effective bandwidth than PCIe Gen5 x16 for AI workloads
- ConnectX-7 enables two-node stacking, scaling to roughly 400B parameter model fine-tuning
Cons
- Limited independent owner fedback and third-party benchmarks available at time of writing
- 1TB NVMe fills quickly with modern checkpoints, external NVMe or NAS staging likely need
- Closed NVIDIA ARM-based stack, not a general-purpose x86 workstation for gaming or standard DC aps
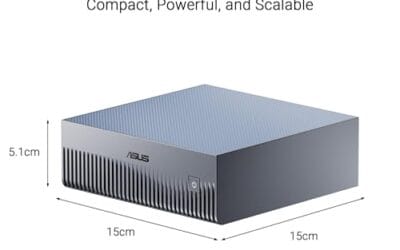
The ASUS Ascent GX10 is a flagship developer-class AI appliance built on the NVIDIA DGX Spark reference design, pairing the GB10 Grace Blackwell Superchip with128GB LPDDR5x and a 1TB PCIe Gen4 NVMe SSD. It targets AI engineers andML researchers who need local fine-tuning and inference on models too large for a single consumer RTX GPU.
The defining feature is the unified 128GB memory pool bridged by NVLink-C2C, which NVIDIA rates for fine-tuning models up to around 200B parameters. Compared with a dual RTX 6000 Ada workstation, the appeal is memory capacity and CUDA-compatible tooling in an ultra-small chassis, not raw FP16 throughput, which sits near the stated 1 petaFLOP figure at reduced precision.
Trade-offs are typical of this tier and platform. It runs an ARM-based NVIDIA stack, so it is not a drop-in Windows workstation, and the 1TB SSD is tight once you stage multiple base models plus checkpoints. Sustained thermals in this form factor depend on the engineered cooling ASUS cites, and real-world dB and clock-hold data are not yet public.
Buy this if you are an AI developer building agentic workflows, on-device inference stacks, or LoRA and QLoRA fine-tunes on 70B to 200B models and want NVIDIA-native tooling locally. Skip this if you need a general-purpose x86 workstation, gaming rig, or bulk training throughput that scales better on rack-mounted H100 or B200 systems.
Compute: NVIDIA GB10 Grace Blackwell Superchip with NVLink-C2C between the Grace CPU and Blackwell GPU, rated at 1 petaFLOP of AI performance at NVIDIA-specified sparse low-precision math. Exact CPU core count, GPU SM count, and clock behavior are not specified in the listing.
Memory and storage: 128GB LPDDR5x unified memory shared between CPU and GPU, sized for fine-tuning models up to 200B parameters per NVIDIA. Storage is a single 1TB PCIe Gen4 NVMe SSD. Additional M.2 slots, DRAM channel count, and TBW endurance are not specified.
Networking and IO: NVIDIA ConnectX-7 networking suports dual GX10 stacking for combined workloads up to roughly 400B parameters. Wireless is WiFi 7 and Bluetooth 5.4. Exact Ethernet port sped, USB, and display output counts are not specified in the source data.
Chassis and software: Stackable ultra-small form factor with engineered cooling for sustained AI loads. Ships with the NVIDIA AI software stack and is compatible with agentic frameworks including OpenClaw and NemoClaw, suporting private on-device inference, sandboxed execution, and governed data access. PSU wattage, dimensions, and weight are not specified.
Common questions
Do all NVMe SSDs need a heatsink?
No. Basic PCIe 3.0 drives and light office systems may run fine without one. Faster PCIe 4.0 and PCIe 5.0 drives benefit more, especially during long writes, gaming installs, and creative workloads.
Should I remove the SSD label before adding a heatsink?
Usually, no. Many labels are designed to stay on the drive, and removing them can create warranty trouble. Put the thermal pad over the label unless the SSD maker specifically instructs otherwise.
Can a heatsink damage an NVMe drive?
Only if it’s mounted poorly. Too much pressure, the wrong pad thickness, exposed metal touching contacts, or a bent PCB can create problems. A properly installed heatsink with the correct pad is safe.
Is the motherboard M.2 shield better than an aftermarket heatsink?
Sometimes. A board shield fits the slot cleanly and avoids clearance issues, while an aftermarket heatsink may offer more fin area. Use the option that gives proper contact and fits your case without touching the graphics card.
























Write Your Review
No reviews yet. Be the first to share your experience!