

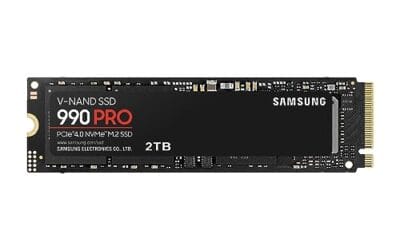
Swapping your boot drive for a faster SSD is one of the best upgrades you can give an aging PC, and cloning lets you keep Windows, your programs, and every setting exactly as they are. No fresh install, no re-downloading apps, no hunting for license keys. The catch is that cloning has a few steps where people trip up, usually around drive connections or partition sizes. This walkthrough takes you from an unopened SSD to a machine that boots off the new drive, with the gotchas called out before they bite you. If you’re still shopping for the drive itself, our picks for the best 2TB NVMe SSD in 2026 and the best 2TB NVMe SSD for a boot drive are a solid starting point.
What you’ll need
Gather a few things before you start. You’ll need the new SSD, obviously, sized at or above the used space on your current drive. You’ll also need a way to connect both drives at once: a spare M.2 slot or SATA port inside the case, or a USB-to-NVMe/SATA enclosure or adapter if your machine only has one slot. Then grab cloning software. Macrium Reflect, Clonezilla, and the free utilities bundled with Samsung, Crucial, and WD drives all work well. A Phillips screwdriver rounds it out. That’s genuinely the whole list.
One sizing note that saves headaches later. Cloning copies used data, not empty space, so a 500GB drive holding 200GB of data clones onto a 250GB SSD without issue. Confirm your target drive is larger than your current used capacity, and you’re clear to go.
A word on connection method, since it decides how smooth the rest goes. An internal M.2 slot is fastest and most reliable, so if your motherboard has a free one, use it. A USB enclosure is fine for the clone itself, but a cheap adapter with a weak controller can stall on large transfers. Spend a few dollars more on a known-good NVMe enclosure and you’ll avoid a mid-clone failure that sends you back to Step 1. It’s a small detail that quietly decides whether the whole job takes twenty minutes or a frustrating afternoon of retries.
Step 1: Back up and free up space first
Cloning is reliable, but it’s still moving your entire system, so make a real backup of anything irreplaceable before you touch a single cable. Copy documents, photos, and project files to an external drive or the cloud. This is your safety net if something goes sideways mid-clone. Owner reports show most failed clones come from source-drive errors, not the software.
While you’re here, clean house. Empty the Recycle Bin, run Disk Cleanup, and uninstall junk you don’t use. A leaner source drive clones faster and sidesteps the size mismatch that stops a clone before it starts. Ten minutes of tidying now. Fewer surprises later.
Step 2: Connect and initialize the new SSD
Power down, unplug the PC, and install the new SSD. For an M.2 NVMe drive, seat it in an open slot at a slight angle, press it flat, and secure the standoff screw. For a 2.5-inch SATA SSD, connect data and power cables. If you’re short on internal slots, plug the new drive into a USB enclosure instead so both drives are live at the same time.
Boot back into Windows and open Disk Management. A brand-new SSD shows up as unallocated and prompts you to initialize it. Choose GPT, not MBR, since modern Windows installs on GPT-partitioned drives with UEFI. Don’t bother creating partitions on it manually. The cloning software wipes and repartitions the target anyway, so leave it as raw unallocated space and move on.
If the new drive doesn’t appear at all, don’t panic. Check that the M.2 slot you used actually supports the drive type; some boards route certain slots through the chipset and disable a SATA port when populated. A quick look at the motherboard manual clears this up in a minute. For a USB enclosure, try a different port, ideally a rear USB 3.0 or faster one, since front-panel headers sometimes deliver flaky power to an external NVMe drive.
Step 3: Run the clone
Open your cloning software and pick your current Windows drive as the source and the new SSD as the destination. Read the source and destination selections twice. Getting them backward wipes the drive you meant to keep, and there’s no undo. Most tools show a visual layout of both drives so you can confirm which is which by size and label.
Make sure every partition gets copied, not just the visible C: volume. Windows keeps hidden EFI System and Recovery partitions that the machine needs to boot, and a good cloning tool selects them automatically. Start the clone. Depending on data volume and connection speed, it runs anywhere from 15 minutes to a couple of hours. A 200GB clone over an internal NVMe slot usually finishes inside 20 minutes. Leave it alone until it reports done.
Resist the urge to keep working on the PC while it clones. Heavy disk activity on the source drive can slow the copy or, on a marginal drive, cause read errors that abort the run. Close your browser, pause any backup or sync software, and let the machine focus on the one job. Most tools show a progress bar and an estimated finish time, so you can step away and check back rather than hovering over it the whole time.
Step 4: Set the SSD as the boot drive
Once the clone completes, shut down and enter your BIOS or UEFI, usually by tapping Delete, F2, or F12 during startup. Find the boot order menu and move the new SSD to the top of the list. If both the old and new drives are still connected, this is the moment the machine decides which one to load Windows from, so set it deliberately.
Save and exit. The PC should boot into Windows off the SSD, and everything looks identical to before, because it is. Same desktop, same apps, same files. The one visible difference is speed: boot times and app launches feel noticeably snappier on an NVMe drive versus an old SATA or spinning disk. That’s the payoff.
If your board offers both UEFI and Legacy boot modes, confirm it’s set to UEFI to match the GPT drive you initialized in Step 2. A GPT clone won’t boot under Legacy mode, and that single mismatch is behind a big share of “it cloned fine but won’t start” posts. While you’re in there, disable any old drive from the boot list entirely so the machine can’t fall back to it and leave you wondering which disk actually loaded.
Step 5: Verify, then reclaim space and retire the old drive
Boot into Windows from the SSD and confirm the important stuff works. Open a few programs, check that your files are present, and let Windows settle. If the clone landed on a larger drive, some of that extra capacity may sit as unallocated space. Open Disk Management, right-click the main partition, and choose Extend Volume to absorb the leftover room so you actually use the full drive.
Only after you’ve verified the SSD boots cleanly and holds all your data should you wipe or repurpose the old drive. Keep it untouched for a week as a fallback. Then you can reformat it for extra storage or pull it entirely. If you’d rather move the old drive into an enclosure and keep it as portable backup, our best external SSD for 2026 guide covers enclosures and standalone options.
If something goes wrong
The new SSD won’t boot after cloning
Nine times out of ten it’s the boot order or a missing EFI partition. Go back into BIOS and confirm the SSD sits first in the boot priority, and that boot mode is set to UEFI rather than Legacy. If it still won’t load, the clone likely skipped the hidden EFI System partition. Re-run the clone with an option that copies all partitions, or use the software’s boot-repair feature.
The clone fails partway through
A clone that stops mid-run usually hit a bad sector on the source drive. Run chkdsk on your current drive to find and mark bad sectors, then try again. If the source drive is failing outright, that’s a sign the upgrade came just in time. Restore your files from the backup you made in Step 1 onto a fresh Windows install on the SSD instead.
Windows asks to reactivate after the swap
This is normal and harmless. A digital license tied to your Microsoft account reactivates on its own once you’re online. If it doesn’t, run the Activation troubleshooter under Settings and select the option that says you changed hardware recently. Your license follows the machine, so it sorts itself out quickly.
Wrapping up
Cloning Windows to a new SSD comes down to five careful moves: back up, connect and initialize, clone with all partitions, set the boot order, then verify before retiring the old disk. The whole job takes an afternoon at most, and the speed jump from a modern NVMe drive is the kind of upgrade you feel every single day. If you’re deciding which drive to buy for the job, the best 2TB NVMe SSD for gaming roundup weighs speed against price across the current lineup.
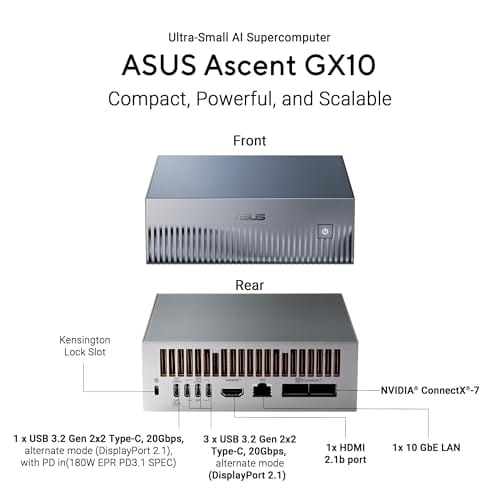
If you’re upgrading because you’re eyeing a much bigger leap in horsepower rather than just faster storage, complete high-end systems ship with fast NVMe boot drives already in place. The ASUS Ascent GX10, for instance, pairs an NVIDIA GB10 Superchip with 128GB of LPDDR5x and a 1TB PCIe Gen4 NVMe SSD, aimed at heavy AI workloads at $3,970.99. It’s overkill for a simple drive swap, but it shows where fast NVMe boot storage sits in a top-tier build.

Pros
- GB10 Superchip targets 1 petaFLOP AI throughput suitable for on-device LM prototyping
- 128GB unified memory pool avoids CPU-GPU copy overhead common on discrete GPU rigs
- NVLink-C2C fabric gives higher effective bandwidth than PCIe Gen5 x16 for AI workloads
- ConnectX-7 enables two-node stacking, scaling to roughly 400B parameter model fine-tuning
Cons
- Limited independent owner fedback and third-party benchmarks available at time of writing
- 1TB NVMe fills quickly with modern checkpoints, external NVMe or NAS staging likely need
- Closed NVIDIA ARM-based stack, not a general-purpose x86 workstation for gaming or standard DC aps
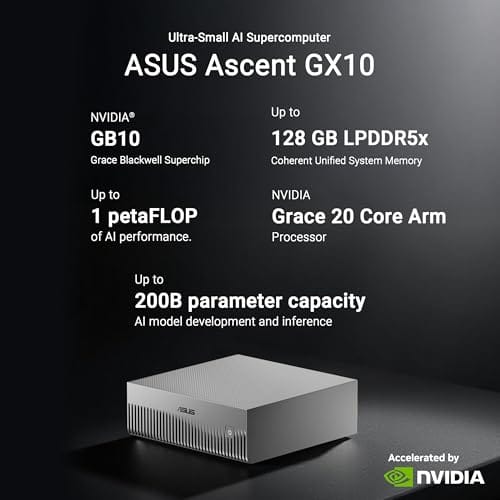
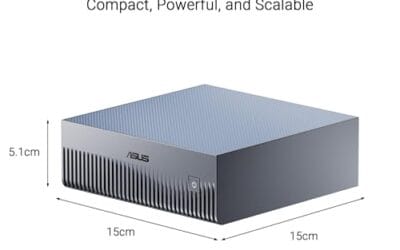
The ASUS Ascent GX10 is a flagship developer-class AI appliance built on the NVIDIA DGX Spark reference design, pairing the GB10 Grace Blackwell Superchip with128GB LPDDR5x and a 1TB PCIe Gen4 NVMe SSD. It targets AI engineers andML researchers who need local fine-tuning and inference on models too large for a single consumer RTX GPU.
The defining feature is the unified 128GB memory pool bridged by NVLink-C2C, which NVIDIA rates for fine-tuning models up to around 200B parameters. Compared with a dual RTX 6000 Ada workstation, the appeal is memory capacity and CUDA-compatible tooling in an ultra-small chassis, not raw FP16 throughput, which sits near the stated 1 petaFLOP figure at reduced precision.
Trade-offs are typical of this tier and platform. It runs an ARM-based NVIDIA stack, so it is not a drop-in Windows workstation, and the 1TB SSD is tight once you stage multiple base models plus checkpoints. Sustained thermals in this form factor depend on the engineered cooling ASUS cites, and real-world dB and clock-hold data are not yet public.
Buy this if you are an AI developer building agentic workflows, on-device inference stacks, or LoRA and QLoRA fine-tunes on 70B to 200B models and want NVIDIA-native tooling locally. Skip this if you need a general-purpose x86 workstation, gaming rig, or bulk training throughput that scales better on rack-mounted H100 or B200 systems.
Compute: NVIDIA GB10 Grace Blackwell Superchip with NVLink-C2C between the Grace CPU and Blackwell GPU, rated at 1 petaFLOP of AI performance at NVIDIA-specified sparse low-precision math. Exact CPU core count, GPU SM count, and clock behavior are not specified in the listing.
Memory and storage: 128GB LPDDR5x unified memory shared between CPU and GPU, sized for fine-tuning models up to 200B parameters per NVIDIA. Storage is a single 1TB PCIe Gen4 NVMe SSD. Additional M.2 slots, DRAM channel count, and TBW endurance are not specified.
Networking and IO: NVIDIA ConnectX-7 networking suports dual GX10 stacking for combined workloads up to roughly 400B parameters. Wireless is WiFi 7 and Bluetooth 5.4. Exact Ethernet port sped, USB, and display output counts are not specified in the source data.
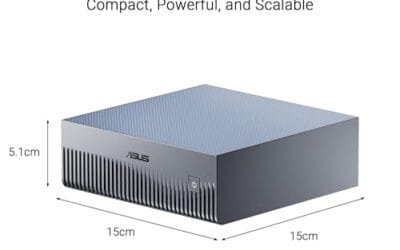
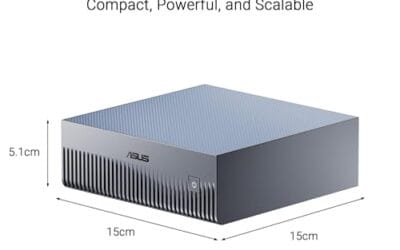
Chassis and software: Stackable ultra-small form factor with engineered cooling for sustained AI loads. Ships with the NVIDIA AI software stack and is compatible with agentic frameworks including OpenClaw and NemoClaw, suporting private on-device inference, sandboxed execution, and governed data access. PSU wattage, dimensions, and weight are not specified.
Common questions
Do I need to reinstall Windows after cloning?
No, that’s the whole point of cloning. It copies your existing Windows install, apps, and settings byte for byte onto the new drive, so you skip reinstalling anything. You boot into the same environment you had before, just faster. A fresh install is only worth it if your current install is corrupted or cluttered beyond saving.
Can I clone from a smaller drive to a larger one and vice versa?
Smaller to larger is easy and common, and you extend the partition afterward to use the extra room. Larger to smaller works too, as long as the used data fits within the smaller drive’s capacity. Cloning copies data, not empty space, so a lightly filled 1TB drive clones onto a 500GB SSD without trouble.
Is cloning safe for my data?
Cloning reads from your source drive and writes to the target, so your original data stays put during the process. The real risk is picking the wrong destination and overwriting the drive you meant to keep. Double-check source and destination before you start, and keep the backup from Step 1 until you’ve confirmed the new drive boots correctly.




























Write Your Review
No reviews yet. Be the first to share your experience!