Overclocking a CPU is the process of asking your processor to run faster than its default boost behavior, then keeping that extra speed stable without letting voltage or heat get silly. The goal isn’t a screenshot-worthy number you’ll never use again. It’s a daily profile that gives you a little more performance in games, exports, code builds, or simulation work while staying inside sensible thermal and voltage limits.
Modern Ryzen and Intel chips boost aggressively, so a safe CPU overclock is about careful tuning. You’ll need to know your cooler, BIOS, and tolerance for fan noise. If your cooling is marginal, start with our best CPU cooler 2026 guide or refresh the mount with our thermal paste walkthrough before changing clocks. Small changes. Notes matter.
Related buying guides: CPU coolers, air coolers, 7800X3D coolers, gaming CPUs, and 1000W PSUs.
What you’ll need
You don’t need a drawer full of specialty gear. For most desktop CPUs, the requirements are a motherboard with tuning controls, a cooler that handles sustained load, decent airflow, and a power supply that isn’t stretched. AMD Ryzen users should have a board with Precision Boost Overdrive and Curve Optimizer options. Intel users need an unlocked K-series CPU for traditional multiplier overclocking, plus a chipset that allows CPU ratio control.
You’ll also want a few utilities installed before you touch BIOS. Use a hardware monitor that shows CPU package temperature, per-core clocks, CPU voltage, and power draw. Keep your motherboard manual open on another device, because vendors put the same controls under different names. A notebook or spreadsheet helps too. Write down every setting you change, the temperature you saw, and whether the machine behaved normally afterward. Boring? Yes. Useful? Absolutely.
Back up important files before you begin. A bad CPU overclock usually shows up as a reboot, a frozen desktop, or a failed workload, not a destroyed drive, but any unstable system can corrupt open files. Close background updaters, save your work, and avoid tuning during a deadline. If your BIOS is very old, read the release notes and consider our BIOS update guide, especially on newer Ryzen platforms where memory training and boost behavior improved across updates.
Step 1: baseline settings and cooling headroom
Start at stock settings. Load BIOS defaults, enable only the memory profile you normally use, then boot into Windows or Linux and record the baseline. Note idle temperature, typical gaming temperature, and sustained all-core temperature during a heavy CPU workload. You aren’t chasing a pass-or-fail badge here. You’re learning what the system does before tuning.
For a daily overclock, thermal headroom matters more than a single peak clock number. As a practical guideline, many current desktop CPUs are comfortable in the 70s Celsius under heavy use, acceptable in the low-to-mid 80s, and worth rethinking if they sit near thermal limits for long stretches. Ryzen 7000 and 9000 chips may intentionally run near high temperatures under default boosting, while Intel high-end parts can pull very high wattage if motherboard limits are unlocked. Context counts.
Check fan behavior too. If the CPU jumps to 88 C but the cooler fans are still quiet, a fan curve adjustment may give you more room. If temperatures spike instantly, the cooler mount or paste spread may be weak. If the case temperature climbs over time, you may have an airflow problem rather than a CPU problem. Fix cooling first, tune second.
Write down your baseline single-core and all-core clocks. Modern boost algorithms already push one or two cores high when power and temperature allow, so a manual all-core overclock can sometimes reduce lightly threaded performance. That’s why Ryzen users often get better daily results from PBO and Curve Optimizer than from locking every core to one frequency.
Step 2: enter BIOS/UEFI
Restart the PC and enter BIOS or UEFI, usually by pressing Delete or F2 during startup. Switch to the advanced view if your board opens in easy mode. Before changing anything, find the save-profile feature. Most ASUS, MSI, Gigabyte, and ASRock boards let you store several BIOS profiles, and you should save a known-good stock profile before experimenting.
Next, locate the CPU tuning area. Common names include AMD Overclocking, Precision Boost Overdrive, OC Tweaker, AI Tweaker, Extreme Tweaker, Advanced CPU Configuration, or CPU Ratio. Don’t change five things at once. BIOS menus can look intimidating, but the safe path is simple: adjust one control, save, boot, check behavior, then return.
Disable any auto-overclock preset that promises a large one-click gain with vague voltage behavior. Some motherboard presets apply more voltage than a careful daily tune needs. They can work, but they’re not the best way to learn what your specific chip and cooler can handle. Leave memory alone for now except for your normal EXPO or XMP profile. CPU and RAM instability can look similar, and tuning both at once makes troubleshooting messy. If memory tuning is your separate goal, use a dedicated process like our RAM overclocking guide.
Step 3: Ryzen PBO/Curve Optimizer or Intel multiplier
On Ryzen, start with Precision Boost Overdrive rather than a fixed manual clock. PBO lets the CPU boost higher or longer when temperature, current, and power limits allow. Set PBO to Advanced or Enabled, then choose conservative motherboard limits or manual limits that match your cooling. For many midrange towers and 240 mm liquid coolers, modest PPT, TDC, and EDC increases are more sensible than maxing every field.
Curve Optimizer is where Ryzen tuning gets interesting. A negative curve tells the CPU it can use slightly less voltage at a given frequency, which can reduce heat and allow higher boost clocks. Start small, such as negative 5 on all cores. If the system behaves normally, try negative 10. Many chips won’t handle the same offset on every core, so a per-core curve is better once you’ve found the rough range. The best cores may need less aggressive values than weaker cores.
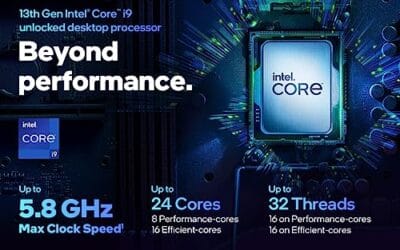
On Intel K-series CPUs, the classic route is the CPU multiplier. If the base clock is 100 MHz, a 52x ratio means 5.2 GHz. Start near what your CPU already sustains under all-core load, then raise the ratio one step at a time. For example, if it regularly holds 5.1 GHz on performance cores, try 5.2 GHz before aiming higher. Leave efficiency-core ratios conservative at first, because pushing P-cores, E-cores, cache, and memory together adds too many variables.
Don’t assume every chip of the same model behaves identically. Two processors with the same retail name can need different voltage for the same frequency. That’s normal silicon variation. Your job is to find your chip’s daily balance, not copy a forum screenshot with a different cooler, board, BIOS version, and room temperature.
Step 4: voltage/LLC/thermal limits
Voltage is the part that deserves patience. More voltage can stabilize higher clocks, but it also raises heat and long-term stress. For daily use, avoid large jumps. If you’re tuning Intel manually, use adaptive voltage if your board supports it, because the CPU can still reduce voltage at idle. Increase in tiny steps, such as 0.01 V to 0.025 V, only when a clock setting is close but not reliable.
Ryzen users working through PBO and Curve Optimizer often don’t need to add CPU core voltage at all. In fact, reducing effective voltage with a negative curve can improve boost behavior because the chip has more thermal and power headroom. If you do touch scalar, boost override, or platform power limits, be conservative. A +100 MHz boost override with a mild negative curve is a more reasonable daily experiment than max scalar and unrestricted board power.
Load-line calibration, or LLC, controls how much voltage droops under load. Some droop is normal and protective. Too little LLC can cause the voltage to sag and crash during heavy work. Too much LLC can overshoot when load changes. Middle settings are usually safer for daily systems than the most aggressive level. Vendor numbering varies, so read the board manual instead of assuming Level 1 means low or high.
Set thermal limits with intent. If your BIOS lets you define a maximum CPU temperature or platform thermal target, choose a value you’re comfortable seeing during long workloads. Many builders prefer a daily ceiling around the mid-80s Celsius, accepting that brief spikes can happen. If the cooler screams or the CPU throttles immediately, back down. A quieter 5.1 GHz profile you’ll actually keep is better than a loud 5.3 GHz profile you disable after two days.
Step 5: stability check and daily-use settings
After each small change, boot into the operating system and run a stability check that resembles your real workload. If you mostly game, run a demanding game, a shader compilation sequence, and a few background apps. If you render, compile, or encode video, use those workloads for a sustained period. Synthetic stress tools can reveal problems quickly, but daily behavior matters most.
Watch for warning signs: sudden reboots, application crashes, WHEA hardware errors in Windows Event Viewer, audio crackling, USB dropouts, or clocks that fall below your baseline because the CPU is thermal-throttling. A setting that survives five minutes but crashes after an hour isn’t a daily setting. Neither is a profile that only works with the side panel removed.
Once you find a promising setting, use the PC normally for a few days before pushing harder. Save the BIOS profile with a clear name, such as “Ryzen PBO CO -10 stable” or “Intel 52x adaptive 1.25V daily.” Keep your original stock profile too. If temperatures are good and the machine behaves normally across sleep, wake, gaming, browsing, and heavy work, you’ve found something worth keeping.
For many people, the best result won’t be the highest possible clock. A mild overclock with an undervolt, lower temperatures, and the same or better boost behavior is often the daily win. Efficient tuning still counts.
If something goes wrong
The PC won’t boot
Power off, wait a few seconds, and try again. Many boards recover from a failed setting after one or two boot attempts. If it still won’t POST, use the Clear CMOS button or jumper according to the motherboard manual. This resets BIOS settings, so you’ll need to re-enable your normal memory profile afterward.
Windows loads, then crashes
Back down the last change. On Intel, reduce the multiplier by one step or add a tiny amount of adaptive voltage if temperatures are still controlled. On Ryzen, reduce the negative Curve Optimizer value, for example from -20 to -15, or tune the weakest cores less aggressively. Don’t stack multiple fixes at once.
Temperatures are too high
Lower power limits, reduce voltage, or improve cooling. Check the cooler mount, fan curve, radiator dust, and case airflow. If the CPU is only faster on paper because it throttles under real work, the overclock isn’t helping. Less heat, more consistency.
Performance got worse
This happens more often than new tuners expect. A fixed all-core clock can reduce single-core boost, and excessive heat can lower sustained frequency. Compare against your baseline notes. If stock or mild PBO is faster in the apps you use, keep the better setting and ignore the bigger number.
Wrapping up
Overclocking a CPU safely is mostly about restraint. Establish a baseline, change one setting at a time, watch voltage and temperature, then keep the profile that behaves well in the work you actually do. Ryzen owners should usually start with PBO and Curve Optimizer. Intel K-series owners can work through multiplier and adaptive voltage slowly. In both cases, your cooler and motherboard power behavior set the limits.
If your CPU already boosts near its ceiling, a careful undervolt or power-limit tune may be the smarter move. Either way, save profiles, keep notes, and don’t chase someone else’s number. Your daily PC should feel faster, not fragile.
Further reading: Building Your Own Gaming PC Made Easy covers choosing, building, overclocking, and optimizing a high-performance gaming desktop, and the listed copy is $33.99 with a 5-star rating from 1 owner review.

Pros
- Hardcover build at 8.49 by 11.24 inches props open next to a motherboard box.
- Scope covers selection, assembly, overclocking, and optimization inside a single printed volume.
- Offline print reference remains functional when a fresh PC has no OS or drivers installed.
Cons
- Limited owner feedback at time of writing, so instructional accuracy and depth remain unverified.
- Page count, author credentials, edition year, and ISBN are not specified in the source data.
- Printed hardware guides age fast against current AM5 AGESA, DR5 EXPO tuning, and 12V-2x6 GPU guidance.
This is a hardcover DIY reference book aimed at first-time gaming PC builders, covering component selection, physical assembly, overclocking, and system optimization. Trim size lands near 8.49 by 11.24 inches with a 0.57 inch spine, pointing to a moderate page count. Target reader is a beginner who prefers printed instructions over scattered video tutorials.
The defining trait is scope: one volume tries to bridge parts research, bench assembly, and tuning under a single cover. For a first build, that sequence matches how new builders actually work, spec a list, assemble on the bench, then chase stability and clocks. Books in this format typically run 150 to 250 pages.
Trade-offs are real. Printed hardware guides age quickly against current AM5 AGESA revisions, DDR5 EXPO tuning quirks, and 12V-2x6 connector guidance for RTX 50 series cards. Source data does not specify edition year, author background, or coverage of specific chipsets, so buyers cannot verify how current the overclocking sections are.
Buy this if you want a physical, gift-friendly primer for a teenager or adult attempting a first gaming PC assembly and value having an offline reference. Skip this if you already lean on r/buildapc, Gamers Nexus, or Hardware Unboxed, or if you need current coverage of the latest CPU sockets and GPU generations.
Format: Hardcover binding, categorized under the Book product group. Hardcover construction suits a title that gets handled mid-build, resisting spine fatigue when propped open next to a case or motherboard box. Softcover printings of comparable build guides tend to lose shape after repeated reference sessions.
Dimensions: Trim measures 8.49 by 11.24 inches with a 0.57 inch spine. That footprint is closer to a technical manual than a mass-market paperback, giving room for wiring diagrams and BIOS screenshots. Spine depth suggests a page count in the 150 to 250 range, though exact pagination is not specified.
Scope: Title claims four phases of coverage, part selection, assembly, overclocking, and optimization. That maps to a realistic first-build workflow, but source data does not list chapter breakdown, targeted CPU sockets like AM5 or LGA1851, GPU generations such as RTX 40 or 50 series, or whether tuning covers PBO Curve Optimizer versus manual voltage.
Not specified: Author name, publication year, edition, page count, ISBN, and language are absent from source data. Buyers needing current AGESA, DR5 EXPO, or 12V-2x6 guidance should verify edition date on the retail listing before ordering, since printed references date faster than online sources.