Setting up a NAS the first time can feel like wading into enterprise IT territory. RAID levels, IP reservations, SMB shares, port forwarding, encrypted volumes. It’s actually not that bad if you go in order and resist the urge to enable every feature on day one. We’ll walk through the path that gets a Synology, QNAP, UGREEN, or similar two-bay box from sealed in the box to “I can stream movies and back up my laptops over WiFi” in about ninety minutes.
The skills transfer between brands. Menus differ but the steps are nearly identical, and the order matters more than the specific UI.
What you’ll need
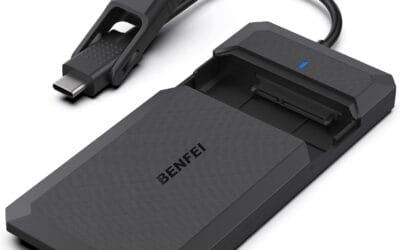
Your NAS unit, two or more matching hard drives (NAS-rated drives like WD Red or Seagate IronWolf, not generic desktop drives), a Cat 6 Ethernet cable, and access to your router. A PC or Mac on the same network for the initial setup wizard. If your router has free LAN ports, plug the NAS directly into it instead of a switch. Cleaner connection, fewer variables to debug.
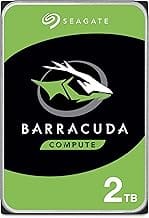
Match drive capacity. Two 4TB drives is fine. One 4TB and one 8TB wastes 4TB because RAID 1 mirrors at the smaller size. Same logic for RAID 5 with three drives.
Optional but useful: a UPS with USB connection so the NAS can shut down gracefully during power outages. Worth the 80 bucks if you live somewhere with flaky utility power.
Step 1: Install the drives
Most modern NAS units use tool-less drive trays. Pull a tray out of the bay, snap the side rails off, lay the drive in, and snap the rails back to lock it. The pins on the rails fit into the screw holes on the side of a 3.5 inch drive. For 2.5 inch SSDs, use the included screws and the marked holes on the tray bottom.
Slide the trays back into the NAS until they click. Don’t force them. They should glide smoothly and seat with a soft click as the SATA connector engages.
Connect the power adapter, plug the Ethernet cable into your router, and press the power button. The boot LED should come on within ten seconds. Initial boot takes about two to three minutes while the NAS detects drives and initializes.
Step 2: Run the first-time setup wizard
On your PC, open a browser and go to the manufacturer’s discovery URL. Synology uses find.synology.com. QNAP has qfinder.qnap.com or their Qfinder Pro app. UGREEN has its own client. The wizard finds your NAS on the local network and gives you a button to click into the setup screens.
Create an admin account. Skip the obvious passwords. NAS units are popular targets for ransomware crews scanning the public internet, and a weak admin password is how they get in. Use a 16-character random password and save it to a password manager. Don’t use “admin” as the username either. Pick something unique.
The wizard will install the operating system to the drives. DSM, QTS, UGOS, whatever your vendor calls it. This takes 10 to 20 minutes. The NAS reboots when finished and you’ll log in to the main dashboard.
Step 3: Create your storage pool and volume
Open the Storage Manager (named slightly differently across brands but always there in the main menu). Click Create Storage Pool. You’ll pick a RAID level here, and this matters.
For a two-bay NAS, choose RAID 1. Both drives mirror each other. You lose half your raw capacity, but if one drive fails, your data is safe on the other and you can swap the dead drive without downtime. Don’t pick RAID 0 unless you have separate backups elsewhere. RAID 0 stripes data across drives for speed, and a single drive failure destroys everything.
For four bays, RAID 5 or SHR (Synology’s flexible variant) gives you better capacity-to-redundancy balance. Three usable drives worth of space, one drive worth of parity. Survives one drive failure.
Once the pool is created, create a Volume on top. Pick Btrfs if available (Synology, some QNAP models). Btrfs supports snapshots and self-healing on bit rot. Fall back to ext4 if Btrfs isn’t offered.
Volume creation finishes in a couple minutes. Background parity sync (RAID consistency build) runs for hours afterward but doesn’t block normal use.
Step 4: Set up shared folders and users
Go to Control Panel, Shared Folders, and create folders for the categories you care about. Common ones: Media (movies, music), Documents, Photos, Backups. Don’t pile everything into one giant share. Separate folders let you set different permissions per family member or device.
Then create a user account for each person who’ll access the NAS. Give each user only the shares they need. Your roommate doesn’t need write access to your Documents folder, and your laptop’s backup account doesn’t need to see the Media share.
Enable SMB (also called CIFS or Windows file sharing) in Control Panel under File Services. This lets Windows, Mac, and Linux clients all see the NAS as a regular network drive. On Windows, you’ll find it under Network in File Explorer. On Mac, Finder shows it under Locations.
Skip AFP unless you specifically need it for older Macs. SMB3 works fine for everything modern.
Step 5: Configure backups and remote access
Now the part that makes a NAS worth owning. On each PC, install the vendor’s backup client (Synology Drive, QNAP NetBak, etc.) and point it at the share you created. Pick continuous backup for active documents, scheduled nightly for full system images.
For Macs, point Time Machine at the NAS share. Most modern NAS units support Time Machine over SMB natively. Set a quota on the share to keep Time Machine from eating all your storage with old snapshots.
For remote access (getting to your files from outside the house), use the vendor’s tunneling service. Synology QuickConnect, QNAP myQNAPcloud, UGREEN’s equivalent. These give you a URL like yourname.quickconnect.to that works without port forwarding or DDNS. Safer than opening ports on your router.
Skip direct port forwarding to the NAS. It’s been the cause of countless ransomware infections. The tunneled remote access services are slower but vastly more secure.
Finally, enable two-factor authentication on the admin account. Settings, User, Advanced, 2FA. Use an authenticator app. Don’t rely on SMS.
Verify it worked
From your PC, copy a 1GB file to the NAS share. You should see transfer speeds around 100 MB/s on gigabit Ethernet. If you’re getting 10 to 20 MB/s, check that you’re not connected via WiFi 5GHz to a router that’s bottlenecking the NAS link.
Open Storage Manager and confirm the volume shows Healthy status. Both drives should report green health indicators. The parity sync will continue in the background for several hours on first setup, which is normal.
From your phone, sign into the remote access app over cellular (not WiFi). You should see your shares appear. If they don’t, recheck the QuickConnect or equivalent setting and make sure UPnP is enabled on your router.
Common questions
Do I really need NAS-rated drives, or will regular drives work?
They’ll work, but NAS-rated drives (WD Red, Seagate IronWolf, Toshiba N300) are tuned for 24/7 operation and vibration tolerance in multi-drive enclosures. They cost a small premium and last longer. Worth it.
Should I encrypt my volumes?
For sensitive data, yes. Just remember encrypted volumes won’t auto-mount after a reboot or power loss unless you save the key on the NAS (which kind of defeats the point). Most home users skip encryption and rely on physical security.
Can I add more drives later?
Yes, but capabilities vary. Synology’s SHR allows adding drives of different sizes incrementally. Traditional RAID 5 needs identical drives added at once. Plan your expansion path before you commit to a RAID level.
What if a drive fails?
In RAID 1 or RAID 5, you’ll get an alert in the dashboard. Buy a matching replacement, pull the failed tray, swap the drive, slide it back in. The NAS rebuilds the array automatically over several hours. Don’t pull the wrong drive. Check the LED carefully before yanking.