Building a streaming PC isn’t just buying a GPU and clicking Start Streaming in OBS. The wrong encoder choice tanks quality. Bad audio routing leaks game sounds into your mic. And a single-PC setup that wasn’t tuned right will throttle frame rates mid-broadcast. Here’s the path we’d walk a friend through to get from boxed parts to a clean live stream in one afternoon.
What you’ll need
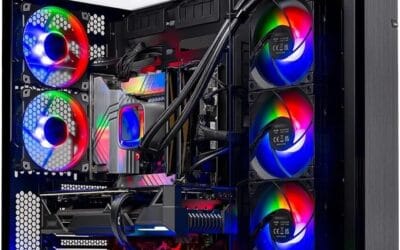
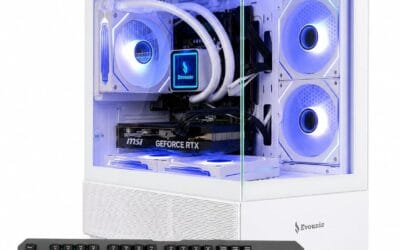
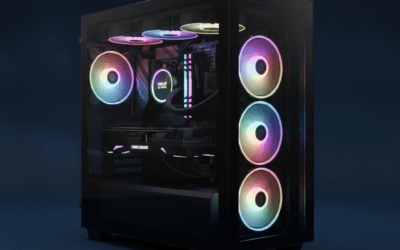
Hardware-wise: a CPU with 8 cores or more (Ryzen 7 7700X or Core Ultra 7 are the floor for single-PC streaming at 1080p60), 32GB DDR5, an Nvidia RTX 40-series or 50-series GPU for NVENC, a 1TB Gen 4 NVMe for OS plus a second drive for clip captures, and at least a 750W 80+ Gold PSU. A two-PC setup adds a cheap capture PC plus an Elgato 4K X capture card – overkill for most people in 2026 since NVENC AV1 handles 1080p60 with zero gaming hit.
Software: latest OBS Studio (32-bit FP for AV1), Streamlabs or Stream Deck for overlays, VoiceMeeter Banana for audio routing, and the Nvidia Broadcast app for noise removal. Bookmark your platform’s ingest server URL too. Twitch wants RTMPS to your nearest pop, YouTube uses RTMP to a/x.rtmp.youtube.com.
Step 1: Install Windows clean and set power profile
Fresh Windows 11 install if you can. Skip the bloat, sign in with a local account if you want fewer telemetry hooks. Once at the desktop, head to Control Panel → Power Options and switch to High Performance (or Ultimate Performance via the powercfg command). Sleep timers off. The last thing you want is your PC dimming the screen mid-stream because OBS doesn’t register as user activity.
Update GPU drivers from Nvidia or AMD directly. Use the Studio driver branch if you also create video – it’s more stable for OBS than the Game Ready branch, with no measurable frame-rate loss in modern titles.
Step 2: Wire up audio inputs cleanly
This is where most streams go wrong. You want chat sounds separate from game sounds separate from mic. VoiceMeeter Banana creates virtual audio cables for free, and OBS can pull each as its own track.
Set Discord output to “VoiceMeeter Input.” Set game audio to “VoiceMeeter Aux Input.” Set your mic to record into VoiceMeeter Banana’s hardware input 1. In OBS, add three separate audio sources mapped to those buses. Now you can mute Discord on your stream without muting it for yourself – useful when a friend says something they wouldn’t want broadcast.

Pros
- Dual USB/XLR output gives a clear upgrade path to an audio interface without replacing the mic.
- Cardioid dynamic pattern handles untreated rooms better than condenser mics at this price tier.
- Hardware mute is software-independent, reliable during live streams where OS audio panels can lag.
- Headphone jack with monitoring volume control provides real-time feedback, useful for catching gain issues mid-session.
Cons
- RGB lighting and all front-panel controls are inactive over XLR, limiting hardware convenience once you upgrade your chain.
- 50Hz-16kHz frequency ceiling is narrower than condenser alternatives; vocalists needing extended high-frequency air will notice the roll-off.
The FIFINE AmpliGame AM8 is a mid-range desktop dynamic microphone targeting beginner-to-intermediate PC streamers, podcasters, and home recording vocalists who want a single mic that works via USB today and scales to XLR with an audio interface later. Its cardioid dynamic capsule and 50Hz-16kHz response position it for voice-primary use rather than instrument recording.
The standout feature is genuine dual-connection utility. USB mode activates all onboard controls including gain knob, tap-to-mute, headphone monitoring, and RGB, making setup frictionless for OBS or Discord users. XLR mode hands full control to the downstream interface or mixer, which is the correct architecture for anyone serious about signal chain quality. Based on owner reports, USB audio quality holds up well for streaming and podcast work at typical recording distances of two to six inches.
The 50Hz-16kHz frequency response is the honest ceiling here. Dynamic mics in this tier trade extended frequency range for noise rejection, which suits streaming rooms that are not acoustically treated. Condenser mics at a comparable price will capture more air and presence, but they will also capture every keyboard click, HVAC hum, and mouse movement in the process. RGB lighting and all function keys go dark over XLR, so you lose hardware mute convenience the moment you upgrade your chain.
Buy this if you are a new streamer or podcaster working in an untreated room who wants USB simplicity now and a credible XLR path later. Skip this if you record vocals for music production where extended high-frequency response and condenser detail matter more than ambient noise rejection.
Connectivity: The AM8 outputs via USB or XLR, with only one connection active at a time. USB connects directly to PC, Mac, or the rear USB-A port of a PS5. XLR requires a separate cable and audio interface or mixer, neither of which are included. All onboard controls are inactive over XLR.
Acoustic Performance: The dynamic capsule covers 50Hz-16kHz at a cardioid polar pattern. This range captures the full vocal fundamental and most upper harmonics for speech, but rolls off before the 20kHz ceiling of condenser mics. Recommended recording distance is two to six inches from the top of the mic for best signal-to-noise.
Onboard Controls (USB only): Controls include a mic gain knob, tap-to-mute button with LED indicator, headphone monitoring jack with independent volume knob, and an RGB button cycling three lighting modes across more than ten color options. The mic stores the last RGB state in memory and restores it on power-up.
Mounting: The desktop stand is included. The mic body incorporates both 3/8-inch and 5/8-inch threaded inserts, providing direct compatibility with most standard boom arms and mic stands without a separate adapter. A foam windscreen is included for reducing plosives and electrical hum.
Step 3: Configure OBS encoder and bitrate
Open OBS Settings → Output → switch to Advanced mode. Encoder: NVENC HEVC if you’re on YouTube, NVENC H.264 if Twitch (Twitch still doesn’t fully support HEVC for everyone), or NVENC AV1 if you have a 40-series or 50-series card and your viewers’ devices support AV1 decode.
Bitrate: 6000 Kbps for 1080p60 on Twitch (their cap unless you have Partner), 8000–12000 Kbps for YouTube 1080p60, or 15000 Kbps for 1440p60 on YouTube. Rate Control: CBR. Keyframe interval: 2 seconds (mandatory on most platforms). Preset: P5 (Slow) for best quality, P4 (Medium) if you see encoder lag in Stats.
Output resolution should match your downscale. If your monitor is 1440p and you stream 1080p, set Base (Canvas) to 2560×1440 and Output (Scaled) to 1920×1080, with Lanczos as the downscale filter.
Step 4: Build scenes and sources
At minimum: Starting Soon, Live (Game), Live (Just Chatting), BRB, and Ending. Each scene gets its own composition. Game Capture is more reliable than Display Capture for fullscreen games – Display Capture sometimes shows a black screen on Nvidia Optimus laptops or with HDR enabled.
Add your webcam as a Video Capture Device, set it to MJPEG or NV12 (NV12 is lighter on CPU), and apply a chroma key only if you’ve got proper lighting. Otherwise crop to a circle with the Crop/Pad filter and skip the green screen drama.
Step 5: Set up alerts, chat, and overlays
Streamlabs or StreamElements both give you a Browser Source URL for follow/sub/donation alerts. Add it as a Browser source at the top of every Live scene, 1920×1080, transparent background. Mute the OBS-level alert audio and let the browser source handle sound, otherwise you’ll get double alerts.
For chat, Restream Chat or Chatterino on a second monitor beats embedding chat in OBS. You want chat readable to you, not blocking the game for viewers. If you do put chat on stream, keep it in a small corner with a semi-transparent background.
Step 6: Tune the encoder load
Hit Start Streaming and play your most demanding game for 15 minutes. Open OBS Stats (View menu → Stats). Watch three numbers: Encoding lag (should stay below 1%), Rendering lag (below 1%), and Dropped frames (zero, ideally).
If encoding lag climbs, drop the preset from P5 to P4. If rendering lag climbs, your GPU is saturated – cap game frame rate to 120 or 144 fps to leave headroom, or lower in-game settings one notch. If dropped frames appear without lag, that’s your network. Switch to wired Ethernet, drop bitrate, or change ingest server.

Pros
- 10Gbps USB-C data ports support fast external NVMe enclosures and high-bandwidth peripherals without a separate dock.
- 4K@60Hz HDMI output covers most productivity and streaming monitor use cases from a single compact dongle.
- 100W PD input with 90W output handles even high-TDP MacBook Pro charging, accounting for hub overhead.
- Simultaneous SD and microSD access lets photographers offload two cards at once without a separate reader.
Cons
- USB-C data port and USB-A ports do not support charging or video output, limiting flexibility compared to some rivals.
- DP Alt Mode requirement excludes a wide range of Android phones and older USB-C devices lacking DisplayPort support.
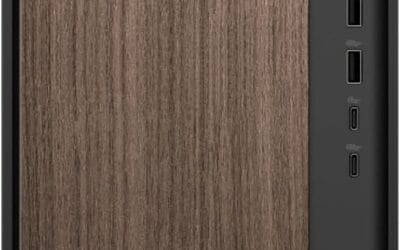
This is a bus-powered 8-in-1 USB-C dongle hub targeting MacBook Pro, MacBook Air, iPad Pro, and Windows ultrabook users who need a single-cable solution for display output, fast data transfer, and charging. It sits at the budget-to-mid tier for USB-C hubs, trading advanced features like Ethernet for a cleaner port selection at a lower price point.
The standout feature is the 10Gbps USB-C 3.2 Gen 2 data port pair. At that bandwidth ceiling, an external NVMe enclosure will transfer a 10GB video file in roughly 8 seconds versus 16 seconds on a 5Gbps USB-A port. The 4K@60Hz HDMI output covers 3840x2160 at full refresh for productivity workflows and media consumption, provided the host's USB-C port supports DP Alt Mode.
Trade-offs are real. The rightmost USB-C port is charge-only and the middle USB-C port is data-only, meaning neither substitutes for the dedicated 100W PD input port. USB-A ports top out at 5Gbps, not 10Gbps. The hub draws roughly 5W during operation, so the advertised 100W PD input delivers approximately 90W to the host, which matters for 140W-capable MacBook Pros under sustained load.
Buy this if you use a MacBook or DP Alt Mode laptop and need 4K HDMI, fast USB-C data ports, and solid pass-through charging from one small dongle. Skip this if your USB-C port lacks DP Alt Mode support, if you need Ethernet, or if your MacBook requires the full 140W charging spec under peak CPU and GPU load.
Video Output: Single HDMI port supports 4K at 60Hz, requiring the host USB-C port to carry DP Alt Mode. USB-C 3.1 and Thunderbolt 3 or 4 interfaces are confirmed compatible. Devices without DP Alt Mode will not produce a display signal regardless of cable or adapter quality.
Data Transfer: Two USB-C ports operate at USB 3.2 Gen 2 with a 10Gbps ceiling. Two USB-A ports run at USB 3.0 with a 5Gbps ceiling. SD and microSD card slots are rated at 104Mbps maximum, which covers UHS-I cards but will bottleneck UHS-II cards capable of 312Mbps.
Power Delivery: The dedicated PD port accepts up to 100W input and passes approximately 90W to the host after approximately 5W hub overhead. The PD port does not support data transfer. Using a charger rated below 100W will reduce available host charging wattage proportionally.
Compatibility Limits: Lightning-port iPhones and iPads are not supported. Samsung Galaxy A-series, most Motorola, LG Stylo, OnePlus through 6T, Huawei, and Xiaomi devices lack the required DP Alt Mode support and will not output video through this hub.
Step 7: Lighting and mic placement
Camera and mic make a stream feel professional more than any overlay does. A $50 key light at 45 degrees to your face fixes 80% of webcam complaints. Mic should sit 6–8 inches from your mouth, slightly off-axis to reduce plosives. A pop filter helps. So does a desk mount with shock isolation – typing transmits through cheap stands and sounds like distant thunder on the broadcast.
Run a Nvidia Broadcast noise removal at 60–75% intensity on the mic input. Higher than 80% and your voice starts sounding underwater. Lower than 50% and keyboard click leaks through.
Step 8: Do a private dry run
Before going public, stream Unlisted on YouTube or use Twitch’s Stream Manager preview mode. Watch the playback on your phone over cellular. You’re checking three things: audio sync (lip-sync should drift no more than 50ms), color (HDR-to-SDR tone mapping issues show up here), and overall sharpness. Adjust output resolution or bitrate based on what you see.
Save your settings profile in OBS. Export it via Profile menu → Export. Drop it on a USB or OneDrive so you can restore quickly after Windows reinstalls.
Common questions
Single PC or dual PC in 2026?
Single, unless you’re streaming at 4K60 or doing competitive multiplayer where every frame matters. NVENC AV1 on a 4070 or 5070 costs roughly 1–2% GPU load. Two PCs add cost, complexity, and another point of failure.
What’s the right webcam height?
Eye level. A monitor-clip webcam usually sits 2–3 inches above eye level – fine. Anything below chin level looks bad on stream and shows nostrils. Use a small tripod if your monitor stand is too low.
Why does my stream look soft compared to other streamers?
Three causes. Bitrate too low for the resolution. Encoder preset too fast. Or you’re scaling weird non-integer resolutions. Match Output Scaled to 1920×1080 or 2560×1440 exactly, use Lanczos downscaling, and push bitrate to platform max.
Do I need a capture card for console streaming?
Yes. PS5 and Xbox Series X don’t stream directly to Twitch with the quality OBS gives you. A 4K60 capture card like the Elgato 4K X passes HDMI 2.1 through to your TV and sends a clean signal to OBS. Worth the investment if console is your main platform.