

Installing an M.2 SSD is one of the cleanest PC upgrades you can do: no data cable, no power cable, and usually only one tiny screw or latch. The tricky parts are choosing the right slot, handling the drive without flexing it, and making sure the firmware and operating system see it afterward. This walkthrough focuses on desktop motherboards and small PCs, but the same ideas apply to many laptops. If you’re still picking a drive, compare current options in our best 2TB NVMe SSD guide before you open the case.
What you’ll need
You’ll need a Phillips #0 or #1 screwdriver, your M.2 SSD, the motherboard or laptop manual, good lighting, and a small cup for screws. If the slot has a heatsink, you’ll also need to peel the protective film from its thermal pad before reinstalling it. For this task, the available ASUS Ascent GX10 system is not a genuine installation tool or bare M.2 part, so it isn’t a relevant shortcode fit here. Keep the workspace dry, keep drinks away from the table, and avoid magnetic trays unless you’re sure they’re weak parts trays made for PC work.
Step 1: Shut down, unplug, and discharge the PC
Shut Windows down fully, flip the power supply switch off, and unplug the wall cable. Press the case power button for about five seconds after unplugging to drain standby power. Move the case to a table where you can see the motherboard clearly. If you’re working on a laptop, remove the charger and follow the manual’s battery-disconnect guidance before touching internal parts. Some notebooks hide the M.2 slot under the keyboard or under a full bottom cover, so don’t pry blindly.
Static discharge is rare but real, so ground yourself before handling the drive. Touch the bare metal case frame, or use an anti-static wrist strap clipped to the chassis. Hold the SSD by its edges. Don’t press on the NAND packages, don’t drag your fingers across the gold contacts, and don’t set the drive on carpet. Tiny part. Big consequences. If the PC has a glass side panel, place it flat on a towel after removal instead of leaning it against the desk.
Step 2: Find the right M.2 slot
Look for a narrow connector labeled M.2, M2_1, M2_2, or SSD near the CPU socket, chipset heatsink, or graphics card slot. Desktop boards often have two to five M.2 slots, and they aren’t always equal. The top slot near the CPU is commonly wired for the fastest NVMe connection, while lower slots may share lanes with SATA ports or a PCIe slot. Your manual matters here because a drive can fit physically and still run slower than expected.
Check the length marking too. Most consumer drives are 2280, meaning 22mm wide and 80mm long. Some compact systems use 2230 or 2242 drives. Move the standoff to the correct hole before inserting the SSD. If the screw is already installed at 2280, remove it and set it aside. Don’t force a 2280 drive into a 2230-only space. It won’t end well. Also confirm whether the slot supports NVMe, SATA M.2, or both, because older boards sometimes split those standards by slot.
Step 3: Remove the heatsink or retention latch
Many newer motherboards hide the M.2 slot under a metal heatsink. Remove its screw, lift it gently, and look for a plastic film on the thermal pad. If you’re installing a drive under that heatsink, peel the film before the heatsink goes back on. Leaving the film in place traps heat and can make a fast NVMe drive throttle during large file copies or game installs. If the thermal pad is dusty, torn, or folded over, replace it rather than pressing a bad pad onto the new drive.

Some boards no longer use a tiny screw for the SSD itself. They use a rotating latch, sliding clip, or hinged tab. Open the latch before inserting the drive. If your board does use a screw, use light downward pressure only after the SSD is fully seated in the connector. The screw should hold the drive flat; it shouldn’t bend it. Snug is enough. If the screw drops into the case, find it before powering on, because a loose screw can short contacts under the motherboard.
Step 4: Insert and secure the M.2 SSD
Insert the SSD at roughly a 25 to 30 degree angle, with the notch aligned to the connector key. It should slide in with a firm, even feel. If it stops halfway, pull it back out and check the angle rather than pushing harder. Once the gold contacts are mostly hidden inside the slot, press the free end of the drive down toward the standoff. The drive will naturally spring upward until it’s secured, so don’t mistake that for a bad fit.
Secure the drive with the screw or latch. If you’re using a motherboard heatsink, reinstall it straight down so the thermal pad contacts the controller and memory packages. Don’t overtighten the heatsink screws because thin SSD PCBs can flex. For a PS5-style drive or a gaming storage build, heatsink clearance can be just as important as speed, which is why our 2TB NVMe SSD for gaming coverage pays attention to thermals and fit. In a cramped case, check that the GPU backplate, Wi-Fi card, or chipset fan isn’t touching the heatsink.
Step 5: Boot, check BIOS, and initialize the drive
Reconnect power and boot into BIOS or UEFI, usually by pressing Delete or F2 during startup. Look for an NVMe, storage, or M.2 section. If the drive appears there, the hardware installation worked. Save and boot into Windows. For a new secondary drive, open Disk Management, initialize it as GPT, create a simple volume, assign a drive letter, and format it as NTFS. Most users should leave allocation size at default.
If you’re cloning a boot drive, install the new SSD first, clone from the old drive with reputable software, then change boot priority in BIOS. Keep the old drive untouched until you’ve booted from the new one several times and confirmed your files are present. For a fresh Windows install, use the Windows installer, choose the new NVMe drive, and delete only the partitions you’re certain belong to the target drive. Slow down here. One wrong click can wipe the wrong disk. If BitLocker is enabled, save the recovery key before changing boot storage.
Troubleshooting common issues
Most M.2 installation problems trace back to seating, slot support, firmware, or Windows not preparing a blank disk yet. Work through the checks in that order instead of changing five things at once. If the drive is new, don’t assume it’s faulty until you’ve reseated it and checked the motherboard manual. If the drive contains important data, don’t initialize or format anything until you have another copy of that data. Seriously. Make the backup first.
The SSD doesn’t show up in BIOS
Power down and reseat the drive. Check that it’s fully inserted and secured at the correct standoff length. Then read the manual for lane-sharing notes; on some boards, using certain SATA ports or PCIe slots can disable an M.2 socket. Updating BIOS can also improve NVMe detection on older platforms. If the drive is SATA M.2 and the slot is NVMe-only, it simply won’t appear.
The SSD appears in BIOS but not Windows
Open Disk Management and look for an unallocated disk. New drives usually need initialization before they appear in File Explorer. Choose GPT unless you have a very old legacy boot requirement, then create a volume and format it. If Windows asks to convert a disk that already has data, stop and verify you’re selecting the new drive. Don’t format a cloned drive until the clone has booted correctly.
The drive runs slower than advertised
Speed depends on both the SSD and the slot. A PCIe 4.0 drive in a PCIe 3.0 slot will run at PCIe 3.0 speeds, and some lower motherboard slots use fewer lanes. Heat can also reduce sustained performance. Confirm the slot wiring in the manual, reinstall the heatsink correctly, and check that the thermal pad film is gone. Also make sure the drive isn’t nearly full, since many SSDs slow down when free space gets tight.
A screw is stripped or missing
Don’t run the drive loose. Many motherboard boxes include spare M.2 screws, and replacements are cheap, but thread sizes vary. If the standoff itself is missing, buy a motherboard M.2 screw and standoff kit rather than improvising with a case screw. Improvising can crack the PCB or short the board. If the screw head is stripped, use a properly sized bit and steady downward pressure before it gets worse.
Wrapping up
Once the drive is recognized, formatted, and showing normal capacity, close the case and run a few real-world checks: copy a large folder, install a game, or move your photo library. Watch temperatures with a reputable hardware monitor during a long transfer. If the drive is meant for mass storage rather than a boot drive, our 2TB NVMe SSD for mass storage guide can help you think through capacity and endurance. That’s it. No cable clutter, no drive cage, just fast storage locked into the board.
Keep the motherboard manual PDF saved after the install, especially if you use more than one M.2 slot later. Lane sharing, boot order, and heatsink placement can change as the build grows. You’ll thank yourself the next time a GPU upgrade or second drive makes the storage layout less obvious.
If the M.2 SSD is replacing an older 2.5-inch SATA drive, leave the SATA drive installed until the new setup has survived a few restarts. Then you can wipe it, repurpose it for backups, or remove it to improve cable airflow. If it’s replacing a tiny boot drive in a prebuilt, take a photo of the original BIOS storage screen first. That gives you a reference for boot mode, drive order, and any vendor recovery partition you may want to preserve.
For desktops with several M.2 slots, label the drive in Windows after formatting. A name like Games NVMe or Boot NVMe is easier to recognize later than New Volume. You can also check firmware tools from the SSD maker, but don’t update firmware during a storm, on a low laptop battery, or while the system is unstable. Boring precautions. Fewer headaches.
One last habit helps if you build often: keep the spare standoffs, M.2 screws, and heatsink screws in a labeled bag inside the motherboard box. Those pieces are tiny, and losing one can turn a ten-minute storage upgrade into an online parts hunt. If you plan to add another drive later, note which slot you used today and which SATA ports, if any, the manual says may be disabled. Future-you won’t remember the lane map. Future-you will appreciate the note.
If you are replacing the whole machine rather than adding storage, the ASUS Ascent GX10 is an example of a system that already ships with a 1TB PCIe Gen4 NVMe SSD. It is not an install tool, but it shows the kind of NVMe storage baseline many modern compact systems now include.

Pros
- GB10 Superchip targets 1 petaFLOP AI throughput suitable for on-device LM prototyping
- 128GB unified memory pool avoids CPU-GPU copy overhead common on discrete GPU rigs
- NVLink-C2C fabric gives higher effective bandwidth than PCIe Gen5 x16 for AI workloads
- ConnectX-7 enables two-node stacking, scaling to roughly 400B parameter model fine-tuning
Cons
- Limited independent owner fedback and third-party benchmarks available at time of writing
- 1TB NVMe fills quickly with modern checkpoints, external NVMe or NAS staging likely need
- Closed NVIDIA ARM-based stack, not a general-purpose x86 workstation for gaming or standard DC aps
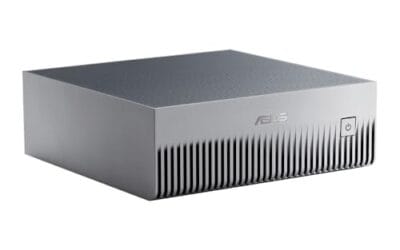
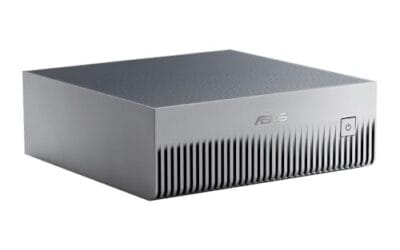
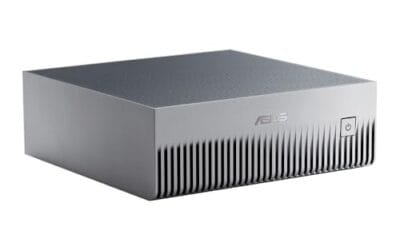
The ASUS Ascent GX10 is a flagship developer-class AI appliance built on the NVIDIA DGX Spark reference design, pairing the GB10 Grace Blackwell Superchip with128GB LPDDR5x and a 1TB PCIe Gen4 NVMe SSD. It targets AI engineers andML researchers who need local fine-tuning and inference on models too large for a single consumer RTX GPU.
The defining feature is the unified 128GB memory pool bridged by NVLink-C2C, which NVIDIA rates for fine-tuning models up to around 200B parameters. Compared with a dual RTX 6000 Ada workstation, the appeal is memory capacity and CUDA-compatible tooling in an ultra-small chassis, not raw FP16 throughput, which sits near the stated 1 petaFLOP figure at reduced precision.
Trade-offs are typical of this tier and platform. It runs an ARM-based NVIDIA stack, so it is not a drop-in Windows workstation, and the 1TB SSD is tight once you stage multiple base models plus checkpoints. Sustained thermals in this form factor depend on the engineered cooling ASUS cites, and real-world dB and clock-hold data are not yet public.
Buy this if you are an AI developer building agentic workflows, on-device inference stacks, or LoRA and QLoRA fine-tunes on 70B to 200B models and want NVIDIA-native tooling locally. Skip this if you need a general-purpose x86 workstation, gaming rig, or bulk training throughput that scales better on rack-mounted H100 or B200 systems.
Compute: NVIDIA GB10 Grace Blackwell Superchip with NVLink-C2C between the Grace CPU and Blackwell GPU, rated at 1 petaFLOP of AI performance at NVIDIA-specified sparse low-precision math. Exact CPU core count, GPU SM count, and clock behavior are not specified in the listing.
Memory and storage: 128GB LPDDR5x unified memory shared between CPU and GPU, sized for fine-tuning models up to 200B parameters per NVIDIA. Storage is a single 1TB PCIe Gen4 NVMe SSD. Additional M.2 slots, DRAM channel count, and TBW endurance are not specified.
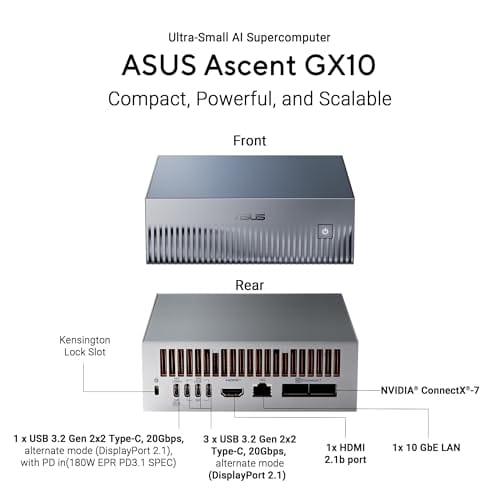
Networking and IO: NVIDIA ConnectX-7 networking suports dual GX10 stacking for combined workloads up to roughly 400B parameters. Wireless is WiFi 7 and Bluetooth 5.4. Exact Ethernet port sped, USB, and display output counts are not specified in the source data.
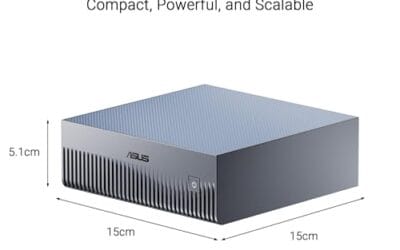
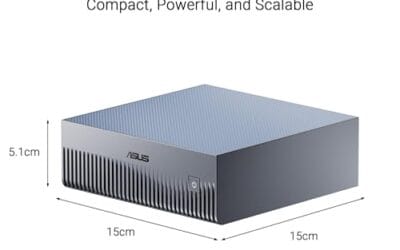
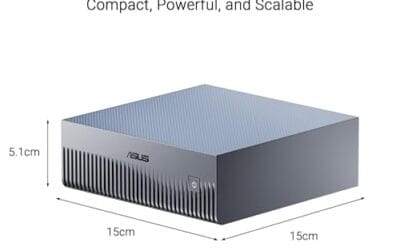
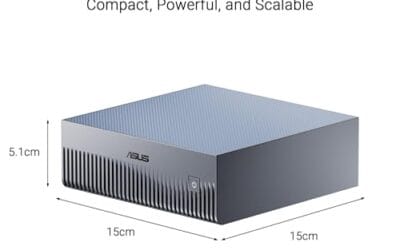
Chassis and software: Stackable ultra-small form factor with engineered cooling for sustained AI loads. Ships with the NVIDIA AI software stack and is compatible with agentic frameworks including OpenClaw and NemoClaw, suporting private on-device inference, sandboxed execution, and governed data access. PSU wattage, dimensions, and weight are not specified.
























Write Your Review
No reviews yet. Be the first to share your experience!