DDR5 kits ship rated at 6000, 6400, or 7200 MT/s but boot at JEDEC default speeds around 4800 MT/s. That’s a 20-30% performance hit you didn’t pay for. Flipping XMP or EXPO in BIOS unlocks the rated speed in one click. Manual tuning – tightening timings, dialing voltage, raising the fabric clock – squeezes another 5-10% on top, but it requires patience and a stability run between each change. Here’s the safe path for DDR5 in 2026, whether you’re on Intel Z890 or AMD AM5.
What you’ll need
Hardware: a motherboard with XMP 3.0 or EXPO support (any Z690/Z790/Z890 Intel board, any AM5 board), and a DDR5 kit with the right profile baked in. The kit’s spec sheet will say “Intel XMP 3.0” or “AMD EXPO”. Look at the heat-spreader sticker for confirmation.
Software: HWiNFO64 for monitoring memory frequency, voltage, and timings live. CPU-Z’s Memory tab for confirming the kit is running in dual-channel and reporting the right speed. MemTest86 or TestMem5 for stability runs after every change. Cinebench R23 or y-cruncher VST for thermal load checks. Aida64 Cache & Memory benchmark to measure bandwidth gains.
Set aside 2-3 hours. Plan it for an evening when you don’t need the machine for anything critical. Back up your BIOS configuration first – most boards let you save profiles. If a setting fails to POST, you’ll need to clear CMOS, and that’s painless if you’ve saved a known-good profile.
Step 1: Enter BIOS and confirm baseline
Reboot and hit Del (most boards) or F2 (some Gigabyte boards) during POST to enter BIOS. You’ll land in EZ Mode on ASUS and MSI, or a similar simplified view on Gigabyte and ASRock. Find your current memory speed – it’ll show as DDR5-4800 or DDR5-5600 depending on what your CPU’s memory controller defaults to. Note this baseline.
Switch to Advanced Mode (F7 on ASUS, F6 on MSI, similar elsewhere). Navigate to the AI Tweaker or OC menu. You’re looking for the XMP/EXPO selector – usually labeled “Ai Overclock Tuner” on ASUS, “Extreme Memory Profile” on MSI, “DDR5 XMP Profile” on Gigabyte. Confirm your kit’s rated speed matches what the BIOS reports as available profiles. If it doesn’t, your BIOS may be out of date – flash to the latest stable release before going further.

Pros
- Covers four RAM form factors, DDR3, DDR4, DDR5 UDIMM, and DDR5 RDIMM, in a single card.
- LED-to-pin mapping lets a multimeter follow up directly on the flagged contact number.
- USB Type-C power input means any USB charger or power bank runs the device in the field.
- No host system required, tests slot continuity and gold finger contact without a bootable board.
Cons
- Very limited owner feedback at time of writing makes reliability and accuracy difficult to verify independently.
- Tests only passive continuity and short or open circuit conditions, not signal integrity, timing, or data errors.
- LIR2032 battery not included and is a less common rechargeable cell, harder to source than CR2032.
The Hopoint 4-in-1 is a passive LED continuity tester for DDR3, DDR4, DDR5 UDIMM, and DDR5 RDIMM memory slots. It sits in the budget tier of RAM diagnostic tools and targets bench technicians, PC repair shops, and advanced DIY builders who need to verify slot or module integrity without relying on POST codes or a functioning system.
The standout feature is the LED indicator array mapped to individual pin positions. Press the test switch and consistent brightness across all LEDs confirms no open or short circuits. A flashing LED points to poor gold finger contact, an unlit LED signals an open circuit, and a brighter-than-normal LED indicates a short. This lets you immediately cross-reference pin numbers on a datasheet and probe with a multimeter.
The core trade-off here is scope. This tool confirms physical continuity only. It does not test signal integrity, CAS latency compliance, voltage rail behavior, or data pattern errors. It will not catch a RAM module that passes physical contact checks but fails under load. For full memory validation, tools like MemTest86 running on a live system remain necessary. The limited owner feedback pool at this tier makes long-term accuracy claims difficult to confirm.
Buy this if you repair motherboards or diagnose dead-slot failures and need a quick, no-boot continuity check across multiple DDR generations. Skip this if you need actual data-layer diagnostics, as this tool cannot replace software-based memory testing for stability or error-rate analysis.
Supported Formats: Compatible with DDR3, DDR4, DDR5 UDIMM, and DDR5 RDIMM slot types. DDR5 RDIMM support extends use to server and workstation board diagnostics, which typically require separate tooling at this price tier.
Power Input: Two modes are available: USB Type-C (cable included) or LIR2032 rechargeable battery (not included). A physical switch on the board selects the active power source. The charging indicator displays red while charging and green when fully charged.
Fault Detection Method: LED indicators correspond to individual pin positions. Consistent brightness across all LEDs confirms a healthy circuit. Flashing LEDs indicate poor contact at the gold finger. Unlit LEDs signal an open circuit. LEDs that are noticeably brighter than the rest indicate a short circuit condition.
Construction: PCB-based assembly with patch construction. No moving parts beyond the test switch and power selector. No software, drivers, or operating system required to operate. Dimensions and weight are not specified by the manufacturer.
Step 2: Enable XMP or EXPO profile 1
Set the profile to XMP I (Intel) or EXPO I (AMD). Save and exit with F10. The system reboots, and if it POSTs first try, you’re 80% done. Boot into Windows, open CPU-Z, and confirm the Memory tab shows your rated speed – for a DDR5-6000 kit that’s 3000 MHz (DDR doubles, so the displayed rate is half). Voltage will jump from 1.10V baseline to 1.35-1.40V depending on your kit’s profile.
If the system fails to POST or throws a memory training error, don’t panic. Most boards retry training automatically 2-3 times. If it boots into a recovery menu, choose “load defaults” and try XMP profile II (a more conservative version on most kits). On AM5, you may need to bump SOC voltage manually – find it in the same OC menu, set 1.20V if it’s lower, and try again. Don’t exceed 1.30V SOC on Ryzen 7000 or 9000 chips, ever. Voltage spikes above that have killed CPUs.
Step 3: Run a stability check
XMP/EXPO profiles are factory-tuned but not always 100% stable on every CPU and board combo. Run MemTest86 from a USB stick for at least one full pass – that’s about 90 minutes for 32 GB. Zero errors means the profile is solid. Any errors mean the kit and board aren’t happy at that speed, and you’ll need to either drop to a slower profile or bump voltage manually.
Alternatively, run TestMem5 with the “1usmus_v3” config for 30 minutes inside Windows. It catches errors faster than MemTest86 but won’t find every edge case. For real-world confidence, run Cinebench R23 for 30 minutes (multi-core loop) and y-cruncher’s VST evaluation for another 30. If both finish without error or BSOD, the profile is stable for daily use.

Pros
- 10 individually addressable LEDs per module match Vengeance RGB DDR5 aesthetics closely
- Aluminum heatspreader and logos align with existing CORSAIR DDR5 modules for visual consistency
- Plugs directly into DDR5 slot with no extra wiring, straightforward installation
- iCUE integration allows sync with other CORSAIR RGB peripherals and components in one software layer
Cons
- Contains no physical memory; zero performance benefit, purely cosmetic hardware
- iCUE software dependency means lighting control requires CORSAIR's software stack to be running
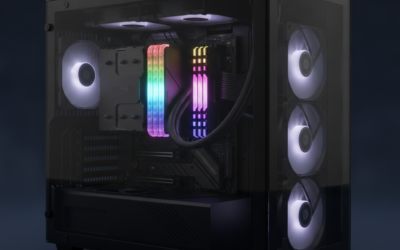
The CORSAIR Vengeance RGB DDR5 Light Enhancement Kit is a cosmetic accessory designed to fill empty DDR5 DIMM slots in builds where only one or two RAM sticks are installed. It targets builders who prioritize a clean, uniform lighting aesthetic and already run CORSAIR Vengeance RGB DDR5 memory alongside an iCUE-managed system.
The standout feature is the 10 individually addressable RGB LEDs per module, which is the same count as the functional Vengeance RGB DDR5 modules. Combined with a matching aluminum heatspreader and identical lightbar geometry, the filler modules are visually indistinguishable from real RAM when seated in a build with a windowed panel.
The honest trade-off here is narrow: these modules do nothing for system performance. Builders who populate all four slots with functional DDR5 have no use case at all. Additionally, full lighting control requires the iCUE software stack, which carries a background resource overhead typical of RGB ecosystem tools. The product is also priced at the higher end for what is essentially a decorative insert.
Buy this if you are running a two-stick DDR5 configuration on a four-slot board and want the empty slots to match your existing Vengeance RGB DDR5 modules under iCUE control. Skip this if your board is fully populated with functional RAM or if you are not already invested in the CORSAIR iCUE ecosystem.
LED Configuration: Each module carries 10 individually addressable RGB LEDs arranged along the lightbar, matching the LED count and spacing of functional CORSAIR Vengeance RGB DDR5 sticks. This ensures lighting pattern continuity across all populated and filler slots without visual gaps.
Physical Interface: Modules seat into standard DDR5 DIMM slots and draw power directly from the slot pins. No auxiliary power cables or RGB headers are required. Compatibility is listed as broad across Intel and AMD DDR5 motherboards, though specific QVL data is not provided by the manufacturer.
Software Control: Lighting is managed entirely through CORSAIR iCUE software. Users can select from dozens of preset lighting profiles or build custom effects. iCUE also enables synchronization with other iCUE-compatible devices across the full CORSAIR peripheral and component lineup.
Heatspreader: The module shell uses an aluminum heatspreader with the same profile, logo placement, and lightbar design as the Vengeance RGB DDR5 memory line. No thermal function is present since there is no DRAM or controller IC generating heat inside the module.
Step 4: Manual tuning (optional)
If you want more performance, manual tuning is where it lives. The easiest gains: tighten primary timings. A DDR5-6000 kit at CL36-38-38-76 can often run CL30-36-36-68 with a 0.05V bump. Drop tCL by 2, save, boot, run TestMem5 for 15 minutes. Stable? Drop another 2. Crash? Bump VDD by 0.025V or revert.
On AM5, the sweet zone for daily-driver tuning is DDR5-6000 CL30 with FCLK at 2000 MHz (1:1 ratio with memory). Going above DDR5-6400 forces a 1:2 ratio and actually loses performance in gaming. Intel chips don’t have this restriction – DDR5-7200 with tight timings beats DDR5-6000 for both productivity and games. Keep VDD/VDDQ at or below 1.45V for 24/7 use. Above that you’re racing degradation over months.
Step 5: Verify gains
Re-run Aida64’s Cache & Memory benchmark and compare to your JEDEC baseline. A DDR5-4800 to DDR5-6000 jump should show read bandwidth climbing from ~62 GB/s to ~85 GB/s, and latency dropping from ~95 ns to ~70 ns. Game-side, the 1% lows climb noticeably in CPU-bound titles – CS2, Valorant, and Hogwarts Legacy show the biggest gains.
Save your working profile to one of the BIOS slots (most boards have 8 slots). Name it descriptively like “6000-CL30-stable”. If you ever flash BIOS or clear CMOS, you can reload the profile instead of rebuilding from scratch.
Common mistakes
Don’t enable XMP and EXPO at the same time – they’re mutually exclusive, and trying to apply both can corrupt the training table. Don’t trust “auto” voltages on aggressive timings. The board often overshoots, pushing 1.50V+ into kits rated for 1.40V. Don’t run all four DIMM slots populated and expect rated speeds. 4-DIMM configs on AM5 cap around DDR5-5200, regardless of kit rating – that’s a memory controller limit, not a board fault.
Don’t change five settings at once. Change one, boot, verify, run TestMem5, repeat. It’s tedious but it’s the only way to know which setting broke stability when something fails. And don’t push voltage past 1.45V VDD for daily use. Benchmark records get set at 1.55V+, but those rigs see weeks of use, not years.
Common questions
Will overclocking RAM void my warranty?
XMP and EXPO are technically overclocking by JEDEC’s definition, but every memory maker honors warranties on their advertised profiles. Corsair, G.Skill, Kingston, and Crucial all confirm this in writing. CPU makers are pickier – Intel says XMP voids warranty in the fine print, but they’ve never enforced it. AMD officially supports EXPO on Ryzen 7000 and newer.
Is DDR5-8000 worth it?
On Intel Core Ultra and 14th gen, yes – if your board’s QVL confirms support and you’re tuning manually. On AM5, no. The 1:1 FCLK ratio caps around DDR5-6400, and anything faster forces a 1:2 mode that hurts latency more than it helps bandwidth. Stick with DDR5-6000 CL30 for Ryzen.
How do I know if I’m RAM bottlenecked?
Run a game at 1080p Low with a recent GPU and watch frame times. If CPU usage is under 60% but frame times are spiky, RAM speed or timings are likely the cap. Switch on XMP and re-run. A clear smoothness improvement confirms the bottleneck was memory.
What’s the difference between XMP and EXPO?
Both are stored on the DIMM as an OC profile. XMP is Intel’s spec, EXPO is AMD’s. They’re nearly identical in function, but EXPO also stores SOC voltage hints specific to Ryzen, which improves first-boot success rate. Most modern kits ship with both profiles on the same module.