

You hit the power button, the PC starts to boot, then it halts with a blunt message: “CPU Fan Error, press F1 to continue.” Annoying, and a little alarming, because it sounds like your processor is about to cook. Take a breath. This error is the motherboard being cautious, and in the vast majority of cases it’s a simple fix, not a dead CPU. We researched the common causes and the fixes that actually resolve it, from a fan plugged into the wrong header to a BIOS setting that’s just being overzealous. If you end up rebuilding or upgrading, our guides to the best CPUs for gaming and the best gaming CPUs are good next stops.
First check the obvious
Before you tear anything apart, do the 30-second look. Open the side panel and find your CPU cooler’s fan. Is it spinning at all when you power on? And, critically, is its cable plugged into the header labeled “CPU_FAN” on the motherboard, not “CPU_OPT” or a “SYS_FAN” header? The single most common cause of this error is a cooler fan plugged into the wrong header, or not plugged in at all, so the board sees zero RPM on the header it monitors and stops to warn you.

While the panel is off, confirm the fan connector is fully seated, not sitting one pin off, and that no cable is jamming the blades. If the fan spins freely and the plug is in the CPU_FAN header, you’ve ruled out the easy stuff. If the fan isn’t spinning or the cable’s in the wrong spot, you may have just found and fixed your problem in under a minute. Most of the time, that’s genuinely all it is. Recently move the PC, add a fan, or bump the cooler while installing something? That’s often the exact moment a cable works loose.
It helps to know what the error actually is before you chase it. At boot, the motherboard reads the RPM signal from the CPU_FAN header and expects a number above a minimum threshold. If it reads zero, or a value too low to count, it halts and warns you rather than letting a possibly-uncooled CPU run. So the message isn’t a verdict that anything is broken. It’s the board refusing to proceed until it sees proof the CPU cooler is turning. That framing tells you exactly what to verify.
Cause #1: Fan in the wrong header or unplugged
This is the headline cause, so it’s worth spelling out. Motherboards have several fan headers, and only the one marked CPU_FAN is monitored for the boot check. If your cooler’s fan is plugged into CPU_OPT, a system fan header, or a fan controller hub, the board reads no RPM on CPU_FAN and throws the error even though the fan is spinning fine. The fix is to move the cooler’s main fan cable to the CPU_FAN header and reboot. That alone clears the error for a huge share of builders.
A related version is a fan that isn’t connected at all, or a connector pushed on crooked so a pin misses. Reseat it firmly, making sure all pins line up. If you’re running an AIO liquid cooler, plug the pump into the CPU_FAN or a dedicated pump header per the manual, and put a radiator fan on CPU_OPT so the board still sees an RPM signal where it expects one. Get the right cable in the right header and the warning usually vanishes.
Cause #2: A failing or stalled cooler fan
If the fan is in the correct header but the error persists, the fan itself may be failing. Dust-clogged bearings, a worn sleeve bearing, or a fan spinning too slowly to register can all trip the check. Look closely at power-on. Does the fan try to spin, stutter, and stop? Does it spin so slowly the board reads it as stopped? A fan caked in dust often can’t overcome friction to reach the minimum RPM the motherboard expects, which reads as a failure even if it’s technically alive.
Clean it first. With the system off and unplugged, blow compressed air through the fan and heatsink fins, holding the blade still so you don’t spin it. Then power on and watch. If it spins up healthy, you’re done. If the fan is truly dead or the bearing is shot, replace the cooler fan, since a stalled cooler risks real overheating. Don’t just disable the warning and ignore a fan that won’t spin, because that’s how a CPU actually overheats.
Cause #3: BIOS fan speed threshold set too high
Sometimes the fan is perfectly healthy and the error is the BIOS being fussy. Many low-noise coolers, and quiet-oriented setups, spin the CPU fan slowly at idle to stay silent, sometimes below the minimum RPM the motherboard’s monitor expects. The board sees that low reading at boot and cries fan error even though cooling is fine. This is common with large tower coolers, quiet fans, or fan curves tuned for silence. The hardware’s fine, the threshold’s just too aggressive.
The fix lives in the BIOS. Enter setup, find the fan monitoring or hardware monitor section, and lower the CPU fan speed low-limit or minimum RPM threshold, often you can set it to “ignore” or the lowest value. That tells the board to stop panicking over a slow-but-spinning fan. On AIO builds, this setting also helps when the pump reports differently than a fan. Adjust it only after you’ve confirmed the fan genuinely spins, since this setting silences the warning either way, and you don’t want to silence a real problem.
Preventive maintenance
Most CPU fan errors are avoidable with a little care. When you build or reseat a cooler, always plug the main fan into the CPU_FAN header and double-check it before closing the case. Keep the cooler clean, since dust is the enemy of both fan speed and CPU temperatures, and a quick compressed-air cleaning every few months keeps the fan spinning at full RPM. Good case airflow helps too, so the whole system runs cooler and the fan doesn’t have to fight heat and grime at once.
If you tune a quiet fan curve, set a sensible minimum RPM rather than letting the fan drop so low the board flags it at boot. And when you upgrade a CPU, reseat the cooler properly with fresh thermal paste and confirm the fan header before first boot. A few good habits at build time prevent nearly every version of this error from ever showing up again.
It also pays to label or remember your header layout. On a busy board with six or more fan connectors, it’s easy to lose track of which one drives the cooler, especially after adding case fans or an AIO later. Snap a photo of the header area during your build, or note which plug goes where, so a future upgrade doesn’t accidentally move the cooler fan off CPU_FAN. That small step turns a puzzling error months down the road into a two-second check against your own notes.
When it’s not fixable: what to replace
Occasionally the error signals a genuinely dead cooler fan, and the fix is a new fan or cooler, which is cheap and simple. Far more rarely, persistent boot problems paired with instability point past the cooler to the CPU or motherboard, and if you’re already planning an upgrade, a fan error during troubleshooting can be the nudge to modernize the platform. That’s when a new processor enters the picture, and it’s worth choosing one that fits your gaming or productivity goals.
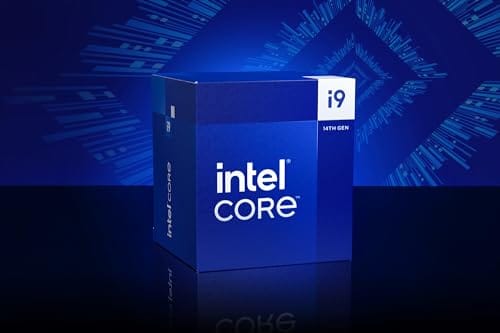
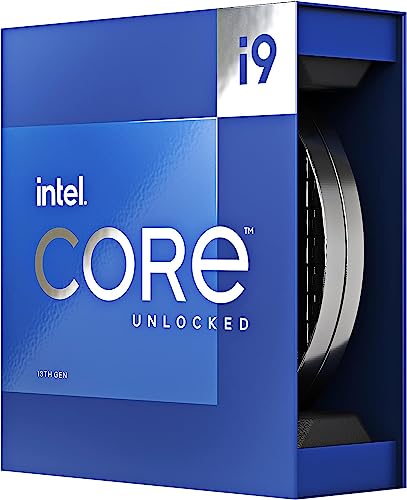
If you’re upgrading the whole core, a strong Intel chip like the Core i9-14900K at $469 with a 4.7 rating is a high-end option for gaming and heavy multitasking. Its close relative, the Core i9-13900K at $587.77 with a 4.8 rating, packs 24 cores, 8 P-cores plus 16 E-cores, 36M of cache, and boosts up to 5.8GHz, making it a serious productivity and gaming processor. Neither is a fix for a stuck fan on its own, but if a fan error surfaces during a planned platform rebuild, these are the kind of parts you’d drop in.

Pros
- Industry-leading 6.0GHz out-of-the-box boost clock for single-threaded applications.
- Massive 32-thread capacity excels in multi-threaded workloads like 4K video rendering and 3D modeling.
- Compatible with existing LGA 1700 motherboards via BIOS updates, extending the life of 600-series boards.
- Integrated Intel UHD Graphics 770 provides a fallback for troubleshooting and QuickSync hardware acceleration.
- Highly binned silicon offers significant tuning potential for users with high-end cooling solutions.
Cons
- High 253W maximum turbo power requires premium 360mm or 420mm AIO liquid cooling for sustained loads.
- Aggressive stock voltage curves can lead to thermal throttling on standard air coolers or entry-level AIOs.
- Final generation for the LGA 1700 socket, limiting future CPU upgrade paths without a motherboard change.
- Significant power draw necessitates a high-quality PSU with sufficient 12V EPS overhead.
The Intel Core i9-14900K represents the enthusiast-tier peak of the Raptor Lake Refresh lineup, targeting professional creators and gamers who require the highest possible clock speeds. With 24 cores and 32 threads, it is designed to handle simultaneous gaming, streaming, and recording without the performance degradation typically seen on lower-core-count processors.
Technical performance is defined by its 6.0GHz Thermal Velocity Boost, a milestone frequency that pushes the limits of the LGA 1700 platform. In real-world gaming, this translates to high frame ceilings in 1080p and 1440p scenarios, while the 16 Efficient-cores provide the necessary throughput for background tasks and heavy multi-threaded productivity suites like Adobe Premiere Pro and DaVinci Resolve.
Build quality and reliability are consistent with Intel's high-end silicon, though the chip is notoriously demanding regarding thermals. The integrated heat spreader (IHS) must dissipate significant heat during 250W+ bursts, making the choice of thermal interface material and mounting pressure critical for maintaining stability under full load.
The primary trade-off for this level of performance is power consumption and heat. Users should expect the processor to hit its thermal junction maximum (TjMax) quickly during synthetic stress tests if paired with inadequate cooling. It is a processor that requires manual tuning of power limits (PL1 and PL2) to balance efficiency and performance effectively.
Final verdict: Buy this processor if you are an enthusiast with a high-end Z790 motherboard and a 360mm+ liquid cooler who needs the absolute fastest gaming and multitasking performance currently available on the Intel platform. Skip this if you prefer a plug-and-play experience with low power draw or are building in a small form factor case with limited cooling clearance.
| Cores / Threads | 24 (8P + 16E) / 32 |
| Max Turbo Frequency | 6.0 GHz |
| Intel Smart Cache (L3) | 36 MB |
| Total L2 Cache | 32 MB |
| Processor Base Power | 125 W |
| Max Turbo Power | 253 W (Listed as 250W in specs) |
| Socket Support | LGA 1700 |
| Memory Support | DDR5 5600 / DDR4 3200 |
| PCIe Lanes | 20 Total (Up to Gen 5.0) |
| Integrated Graphics | Intel UHD Graphics 770 |
Motherboard and Chipset: The i9-14900K requires an LGA 1700 socket. While it is compatible with older Z600-series motherboards, a BIOS update is mandatory for the system to POST. For optimal power delivery and PCIe 5.0 support, a high-end Z790 motherboard with robust VRMs is strongly recommended to handle the 250W+ power excursions.
Cooling Requirements: Due to the 6.0GHz boost clock and high TDP, air cooling is generally not recommended for this tier unless using a flagship dual-tower cooler with a contact frame. A 360mm or 420mm All-In-One (AIO) liquid cooler is the standard recommendation to prevent thermal throttling during intensive rendering or compilation tasks.
Memory Selection: This CPU supports both DDR4 and DDR5, but the motherboard determines which one you must use. For maximum performance in modern titles and professional apps, pairing this with a DDR5-7200+ kit on a Z790 platform is the ideal configuration, though DDR4 remains a viable cost-saving path for those upgrading from 12th gen.
Power Supply Guidance: Given the potential for 300W+ spikes from the CPU alone, especially when overclocked, a high-quality 850W or 1000W 80 Plus Gold PSU is recommended. Ensure your PSU has at least two 8-pin EPS (CPU) connectors to provide stable voltage to the motherboard's power phases.
Operating System: To properly utilize the Intel Thread Director and the hybrid core architecture, Windows 11 is the recommended operating system. Windows 10 may not efficiently schedule tasks between the P-cores and E-cores, potentially leading to inconsistent performance in multitasking scenarios.
For a build leaning hard into all-core productivity, streaming, and rendering alongside gaming, the higher core count and cache of the 13900K make it a compelling choice. Pair either chip with a capable cooler sized for its thermal output, and reconfirm the CPU_FAN header on first boot so you don’t trigger the very error you just chased down. A fresh cooler mount with the fan in the right header is the clean way to close out a CPU swap.
Pros
- Massive multi-threaded performance for 4K video editing, 3D rendering, and complex data science workloads.
- High 5.8 GHz peak frequency provides excellent single-core performance for gaming and CAD applications.
- Integrated UHD Graphics 770 serves as a reliable backup for troubleshooting or non-gaming productivity setups.
- Broad platform compatibility across two motherboard generations and two different memory standards.
Cons
- High 125W base power and significant peak wattage require a high-end 360mm AIO or custom loop cooling.
- Requires a BIOS update on many Intel 600 series motherboards before the system will POST.
- Platform longevity is limited as LGA1700 is an established socket nearing the end of its release cycle.
The Intel Core i9-13900K represents the pinnacle of the 13th Gen Raptor Lake lineup, positioned as a flagship solution for users who refuse to compromise. With a total of 24 cores and 32 threads, it is specifically engineered for enthusiast gamers, streamers, and heavy content creators who frequently run demanding applications like Adobe Premiere Pro, DaVinci Resolve, or Blender.
The standout technical achievement here is the refined hybrid architecture. By pairing 8 high-frequency Performance-cores with 16 Efficiency-cores, the 13900K manages heavy compute loads without sacrificing the responsiveness of background applications. In real-world gaming, this typically translates to higher 1% low frame rates and smoother overall performance, especially when multitasking with OBS or Discord in the background.
Thermal management is a critical consideration for this chip. While the 125W base power seems manageable, the processor is designed to scale its power consumption significantly to maintain the 5.8 GHz boost clock. Users should expect high operating temperatures under sustained all-core loads, necessitating a robust cooling solution and a high-airflow case to prevent thermal throttling.
An honest trade-off for this level of performance is the power draw and the resulting heat output. This is not a 'set and forget' chip for budget cooling or small form factor builds without careful undervolting or power limiting. Additionally, while the support for DDR4 is a welcome cost-saving measure, the highest performance tiers are only unlocked when paired with high-frequency DDR5 memory.
Buy this if you are building a top-tier workstation or gaming rig and already have a 360mm liquid cooler and a high-wattage power supply. Skip this if you are primarily gaming at 4K where the GPU is the bottleneck, or if you prefer a more power-efficient system with lower cooling requirements.
| Feature | Specification |
|---|---|
| Core Count | 24 (8 P-cores + 16 E-cores) |
| Thread Count | 32 |
| Max Turbo Frequency | 5.8 GHz |
| P-core Base Frequency | 3.0 GHz |
| E-core Base Frequency | 2.2 GHz |
| Intel Smart Cache (L3) | 36 MB |
| Total L2 Cache | 32 MB |
| Processor Base Power | 125 W |
| Memory Support | DDR5 5600 / DDR4 3200 |
| PCIe Revision | 5.0 and 4.0 |
| Total CPU PCIe Lanes | 20 |
| Socket Support | LGA1700 |
| Integrated Graphics | Intel UHD Graphics 770 |
Socket and Chipset: This processor uses the LGA1700 socket. It is natively compatible with Intel 700 series motherboards (Z790, H770, B760). While it works with 600 series boards (Z690, H670, B660, H610), a BIOS update is almost certainly required for the system to boot if the board was manufactured before the 13th Gen launch.
Cooling Requirements: Given the 5.8 GHz boost clock and high core count, a premium 360mm or 420mm All-In-One (AIO) liquid cooler is strongly recommended. High-end dual-tower air coolers may suffice for gaming but will likely lead to thermal throttling during intensive multi-threaded rendering or stress testing.
Memory Selection: The i9-13900K supports both DDR4 and DDR5, but this is determined by your motherboard choice. For a flagship build, pairing this CPU with DDR5 5600MT/s or higher is recommended to avoid bandwidth bottlenecks in memory-sensitive applications and modern games.
Power Supply Guidance: Due to the high transient power spikes typical of i9 processors, ensure your PSU has sufficient headroom. For a build featuring this CPU and a high-end GPU like an RTX 4080 or 4090, a minimum of an 850W or 1000W 80 Plus Gold power supply is advised.
Operating System: To properly utilize the Intel Thread Director for efficient task scheduling between P-cores and E-cores, Windows 11 is highly recommended. While Windows 10 is supported, it may not always assign tasks to the optimal core type, potentially impacting performance.
Tools and parts needed
For diagnosing and fixing this, the kit is minimal: a Phillips screwdriver to open the case, a can of compressed air to clean the fan, and a flashlight to read the tiny header labels on the board. If the fan is dead, you’ll need a replacement cooler fan or a new CPU cooler sized for your processor. For a full platform upgrade, add the CPU itself and fresh thermal paste. Most fixes, though, need nothing more than your hands and a look inside the case.
A short word on when to bring in help. If you’ve moved the fan to the right header, cleaned it, confirmed it spins, and adjusted the BIOS threshold but the error still halts every boot, the fault may sit deeper, in a failing header on the board or a flaky fan controller. At that point, if you’re not comfortable swapping parts, a local shop can trace it quickly. For most people, though, the three checks above resolve the error, and the whole job costs nothing but a few minutes with the side panel off.
Common questions
Why am I getting a CPU fan error if my fan is spinning?
Usually because the fan is plugged into the wrong header or spinning too slowly for the board to register. The motherboard only monitors the CPU_FAN header, so a fan in CPU_OPT or a system header triggers the error even while spinning. Quiet, low-RPM fans can also read as stopped. Move the fan to CPU_FAN, and if it’s a slow quiet fan, lower the minimum RPM threshold in the BIOS to stop the false alarm.
Can I just press F1 and ignore the CPU fan error?
You can press F1 to boot, but don’t ignore it until you know why it’s happening. If the cause is a harmless BIOS threshold on a healthy quiet fan, it’s fine to adjust the setting and move on. But if the fan is actually dead or stalled, ignoring the warning lets your CPU overheat and throttle or shut down. Confirm the fan genuinely spins before you dismiss the message for good.
Does a CPU fan error mean my processor is damaged?
Almost never. The error is a boot-time safety check about the fan’s RPM signal, not the CPU’s health. The usual culprits are a fan in the wrong header, a dusty or failing fan, or a BIOS threshold set too high for a quiet fan. Fixing the fan or the setting resolves it. Only if you also see instability and other failures would you look past the cooler toward the CPU or motherboard, which is rare.































Write Your Review
No reviews yet. Be the first to share your experience!